10 October Art Projects for Kids That Are Easy, Fun, and Creative
October is a wonderful time for kids to explore art through autumn colors, playful Halloween themes, and creative seasonal activities. From making colorful paper pumpkins to designing spooky shadow pictures, children can enjoy hands-on projects that encourage imagination and build artistic skills.
These 10 October art projects for kids use different techniques and materials, so every activity offers a fresh creative experience. They are suitable for home, preschool, kindergarten, and elementary classrooms.
1. Torn Paper Pumpkin Art
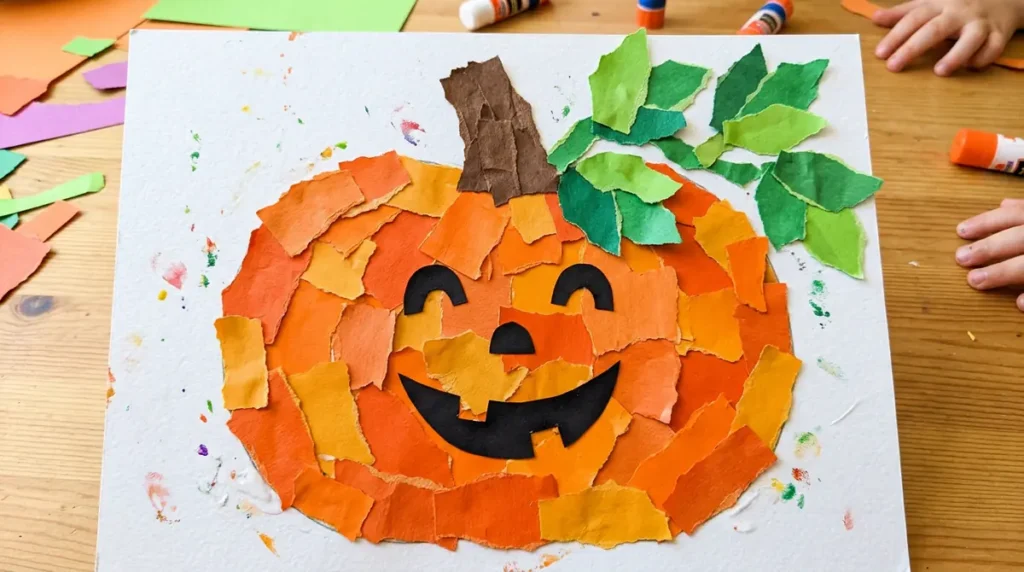
Torn paper pumpkin art is a simple collage activity that helps children develop fine motor skills while creating a colorful October decoration.
Materials
-
Orange construction paper
-
Green and brown paper
-
White cardstock
-
Glue stick
-
Pencil
How to make it
-
Draw a large pumpkin outline on white cardstock.
-
Tear orange paper into small pieces instead of cutting them.
-
Spread glue inside the pumpkin outline.
-
Cover the shape with the torn orange pieces, overlapping them slightly.
-
Add a brown stem and green paper leaves.
Creative tip: Use different shades of orange and yellow to give the pumpkin a layered, textured appearance.
Best for: Preschoolers and kindergarteners.
2. Halloween Silhouette Painting
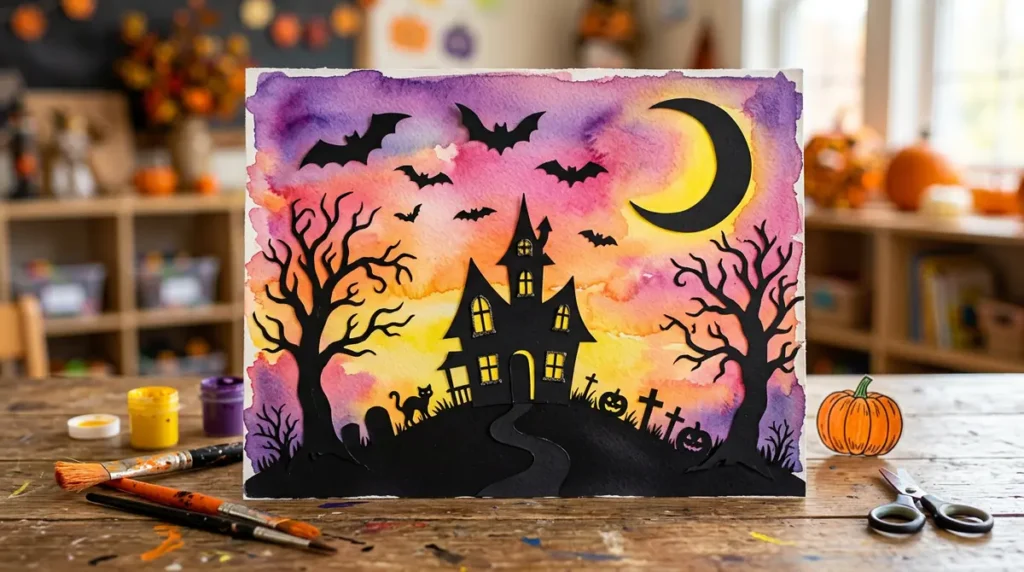
This project introduces children to silhouettes by combining a colorful background with dark Halloween shapes.
Materials
-
White cardstock
-
Watercolors or washable paints
-
Black construction paper
-
Glue
-
Child-safe scissors
How to make it
-
Paint the cardstock with a sunset background using yellow, orange, pink, and purple.
-
Let the background dry completely.
-
Cut simple silhouettes of bats, a haunted house, or bare tree branches from black paper.
-
Arrange the silhouettes against the painted sky.
-
Glue the shapes in place to complete the scene.
Creative tip: Encourage children to create their own spooky landscape with a large moon and flying bats.
Best for: Children ages 5 and up.
3. Autumn Leaf Suncatchers
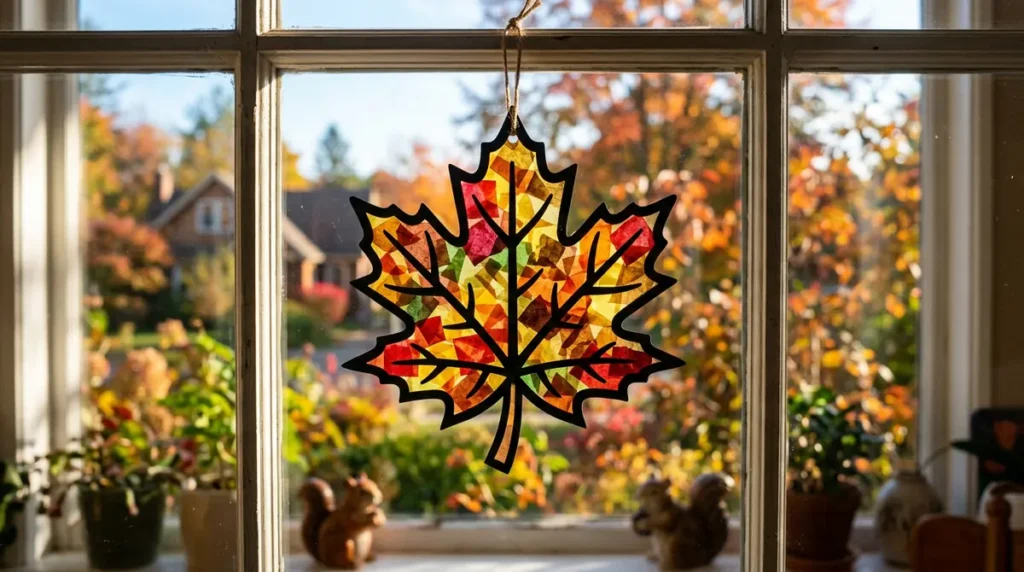
Leaf suncatchers transform transparent materials into colorful window decorations. This activity is ideal for exploring light, color, and natural shapes.
Materials
-
Clear contact paper
-
Tissue paper in autumn colors
-
Black construction paper
-
Child-safe scissors
-
Tape
How to make it
-
Cut two pieces of clear contact paper of equal size.
-
Cut or tear tissue paper into small red, yellow, orange, and brown pieces.
-
Arrange the tissue pieces on the sticky side of one sheet.
-
Cover the design with the second sheet, smoothing out air bubbles.
-
Cut the finished artwork into a leaf, circle, or pumpkin shape and display it on a sunny window.
Creative tip: Overlap different tissue colors to discover how transparent colors blend together.
Best for: Preschoolers and elementary-age children, with adult help for cutting.
4. Pumpkin Stamping With Apples
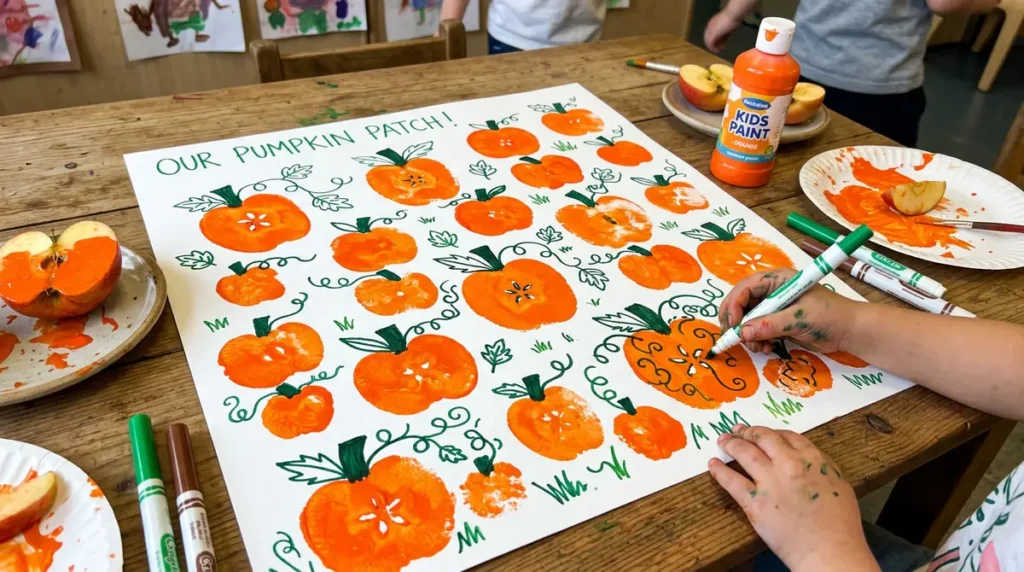
Instead of painting with brushes, children can use an apple half as a stamp to create repeated pumpkin shapes.
Materials
-
Apples cut in half by an adult
-
Orange washable paint
-
Green paint
-
White paper
-
Paint trays
-
Markers
How to make it
-
Pour a small amount of orange paint into a shallow tray.
-
Dip the flat side of an apple half into the paint.
-
Press the apple onto the paper to create a rounded print.
-
Repeat several times to make a pumpkin patch.
-
Add green stems and vines with paint or markers after the prints dry.
Creative tip: Use different apple sizes to create pumpkins of different shapes.
Best for: Preschoolers and kindergarteners.
Safety tip: An adult should prepare the apple stamps with a knife before the activity begins.
5. Paper Quilling Autumn Leaves
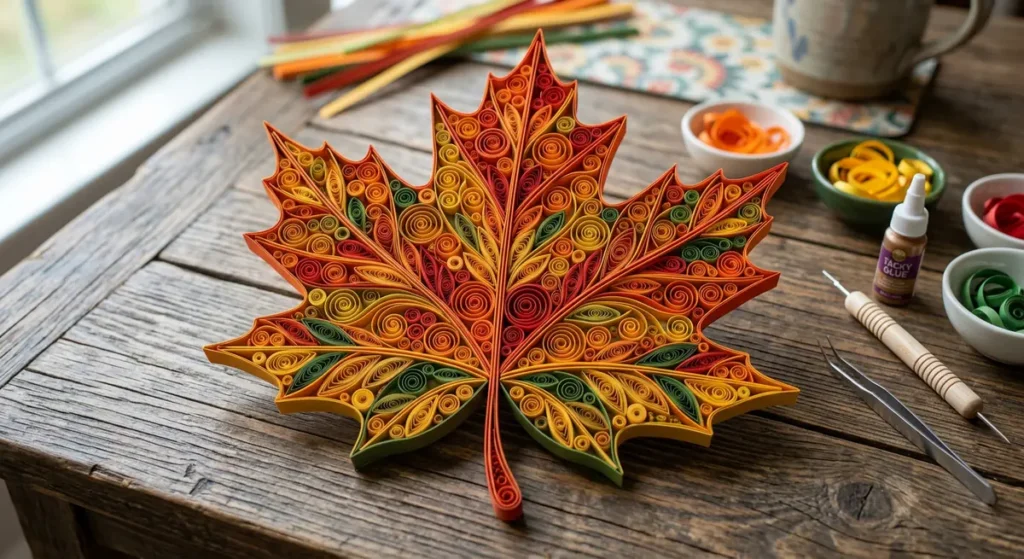
Paper quilling teaches children how to roll narrow strips of paper into decorative shapes. The finished pieces can be arranged into detailed autumn leaves.
Materials
-
Colored paper strips
-
Cardstock
-
Glue
-
Pencil
-
A quilling tool or a pencil for rolling
How to make it
-
Draw a large leaf outline on cardstock.
-
Roll paper strips around a pencil to create loose coils.
-
Gently release each coil and allow it to expand.
-
Pinch the coils into teardrop or leaf-like shapes.
-
Arrange and glue the pieces inside the outline using autumn colors.
Creative tip: Create a different pattern for each leaf using red, orange, yellow, and brown coils.
Best for: Children ages 7 and up.
6. Friendly Monster Paper Sculptures
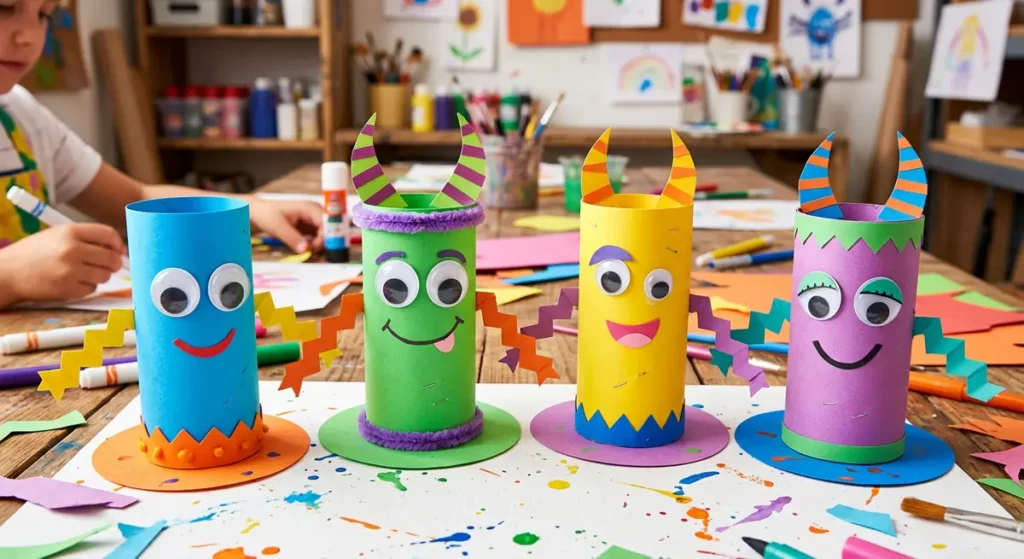
This three-dimensional art project allows children to turn ordinary paper into funny monsters with unusual shapes and expressions.
Materials
-
Colored construction paper
-
Glue stick
-
Markers
-
Googly eyes or paper circles
-
Child-safe scissors
How to make it
-
Cut a rectangle of colored paper and roll it into a cylinder.
-
Glue the edge to keep the cylinder in place.
-
Fold small paper strips into zigzags to create arms, legs, or horns.
-
Attach the folded pieces to the cylinder.
-
Add eyes, teeth, spots, and a mouth to give the monster its own personality.
Creative tip: Challenge children to invent a monster with three eyes, six legs, or a funny hairstyle.
Best for: Kindergarteners and elementary-age children.
7. Autumn Salt Painting
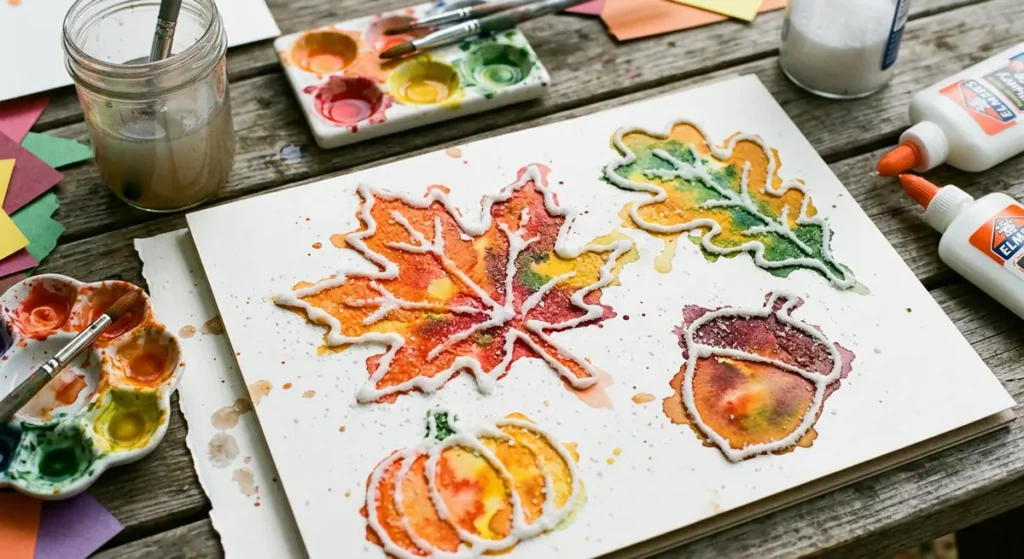
Salt painting creates raised, textured lines that make autumn-inspired artwork feel different from ordinary flat painting.
Materials
-
Thick cardstock
-
White school glue
-
Table salt
-
Watercolors
-
Small paintbrushes
How to make it
-
Draw a simple design, such as an autumn leaf, acorn, or tree, using white glue.
-
Sprinkle salt over the wet glue until the lines are covered.
-
Shake off the excess salt onto a tray.
-
Allow the design to dry.
-
Touch a watercolor-loaded brush gently to the salted lines and watch the color spread.
Creative tip: Use several colors along the same line to create a rainbow autumn leaf.
Best for: Children ages 5 and up, with adult supervision.
Safety tip: Keep salt and art materials away from children’s mouths and eyes.
8. Cardboard Tube Firefly Art
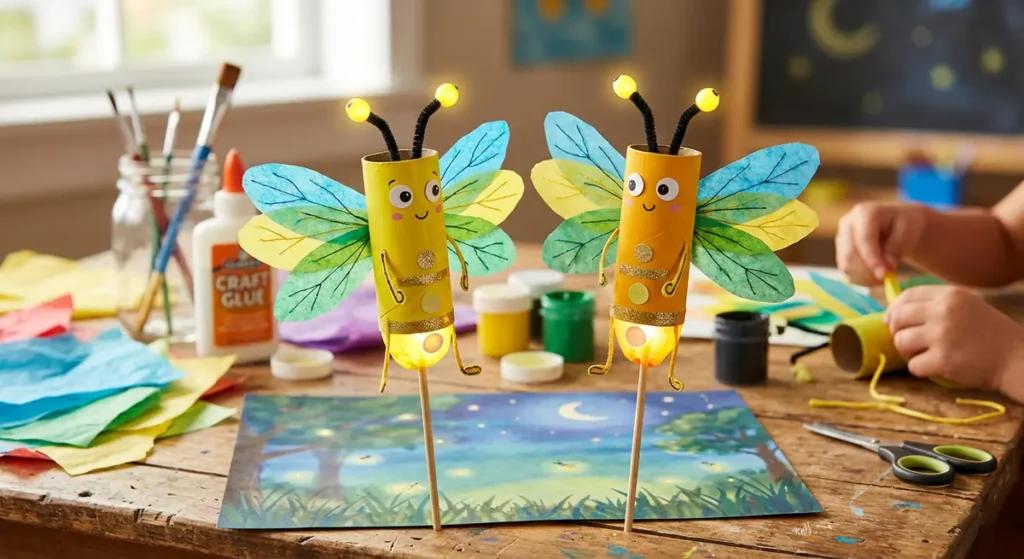
Fireflies may be associated with summer, but children can use them as a glowing nature theme for an imaginative October art project.
Materials
-
Empty cardboard tubes
-
Yellow and black construction paper
-
Tissue paper
-
Glue
-
Markers
-
Child-safe scissors
How to make it
-
Cover a cardboard tube with black or yellow paper.
-
Cut and attach two wings from translucent tissue paper.
-
Add eyes, antennae, and small legs.
-
Cut a yellow oval for the firefly’s glowing abdomen.
-
Draw tiny stars and dots on dark paper to create a nighttime background for displaying the fireflies.
Creative tip: Arrange several fireflies in a garden scene with paper grass and flowers.
Best for: Preschoolers and elementary-age children.
9. Watercolor Resist Spiderwebs
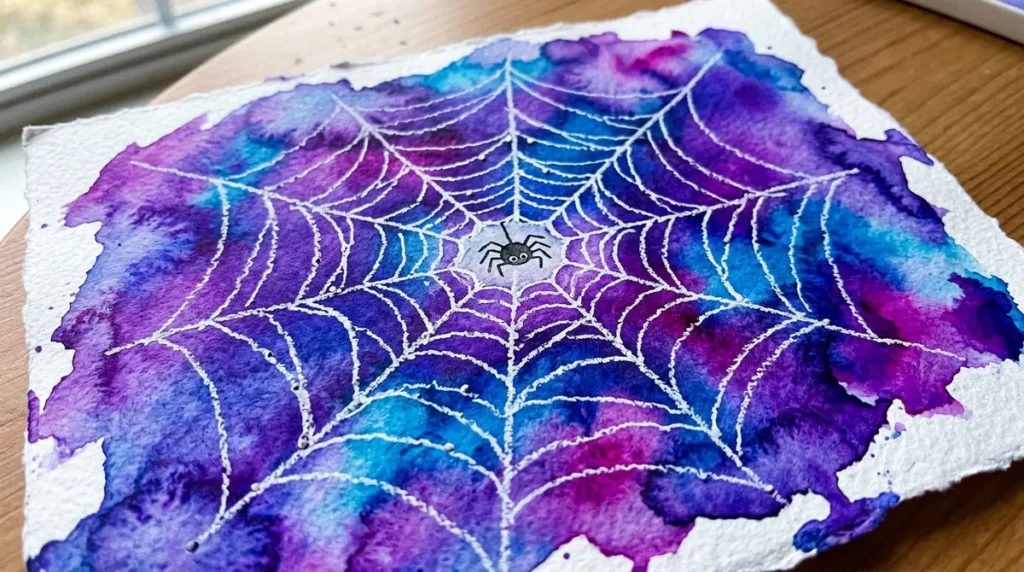
Watercolor resist art lets children create a spiderweb that appears as the paint moves across the paper around the wax lines.
Materials
-
White watercolor paper
-
White crayon
-
Watercolors
-
Paintbrush
-
Water cup
How to make it
-
Draw a large spiderweb using a white crayon on white paper.
-
Press firmly enough for the wax lines to show clearly when painted over.
-
Brush purple, blue, or black watercolor across the paper.
-
Watch the spiderweb appear as the paint is resisted by the wax.
-
Add a small spider using a dark crayon or marker after the paper dries.
Creative tip: Experiment with a gradient background, blending light purple into dark blue.
Best for: Children ages 5 and up.
10. October Art Journal
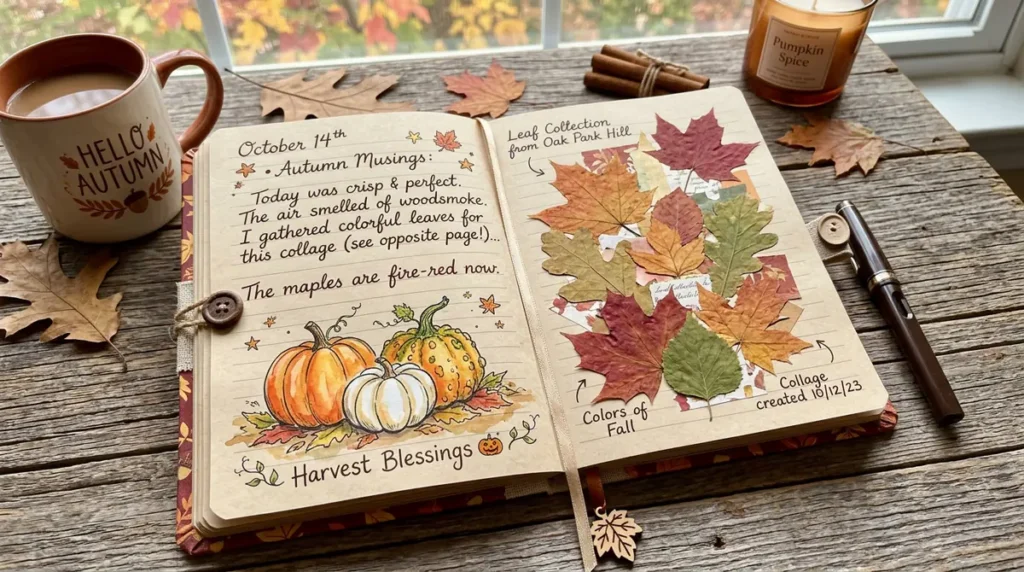
An October art journal gives children a place to collect their drawings, experiments, and seasonal observations throughout the month. Unlike a single craft, this project encourages ongoing creativity.
Materials
-
Blank notebook or folded sheets of paper
-
Colored pencils
-
Markers
-
Crayons
-
Glue
-
Leaves, photographs, or paper scraps
How to make it
-
Decorate the cover with the title “My October Art Journal.”
-
Dedicate a page to each day’s drawing or weekly theme.
-
Draw pumpkins, autumn weather, favorite animals, costumes, or neighborhood decorations.
-
Add short captions describing each picture.
-
At the end of October, review the pages and choose a favorite artwork.
Creative tip: Give each week a different theme, such as autumn nature, Halloween characters, changing weather, and imaginative creatures.
Best for: Children ages 4 and up, with writing support for younger children.
Tips for Planning October Art Activities for Kids
-
Choose age-appropriate projects: Simple stamping and torn-paper collages work well for younger children, while quilling and salt painting suit children who can follow more detailed steps.
-
Prepare a crafting space: Cover the table with newspaper or a washable mat before using paint, glue, or salt.
-
Use inexpensive supplies: Recycled cardboard, scrap paper, old notebooks, and tissue paper can replace many specialty craft materials.
-
Allow creative freedom: Let children choose their colors, shapes, and designs instead of expecting identical results.
-
Display finished projects: Hang artwork on a wall, arrange it on a shelf, or compile it into a seasonal art collection.
Frequently Asked Questions
What are some easy October art projects for kids?
Torn paper pumpkins, apple stamping, autumn leaf suncatchers, and watercolor resist spiderwebs are easy options. Most require only a few supplies and can be completed in one crafting session.
Which October art projects are best for preschoolers?
Pumpkin stamping, torn paper art, and simple cardboard tube fireflies are good choices for preschoolers. Adults can prepare the materials and assist with cutting when needed.
How can kids make October art without spending much money?
Use recycled cardboard tubes, scrap paper, old notebooks, homemade stamps, and basic paints or crayons. Natural autumn materials can also inspire creative designs without requiring expensive kits.
How can teachers use these projects in the classroom?
Teachers can organize a weekly art activity, prepare individual supply sets, and display finished pieces on an October art wall. Projects can also introduce concepts such as color mixing, symmetry, texture, and three-dimensional shapes.
Final Thoughts
These October art projects for kids offer a variety of creative experiences, from paper collage and silhouette painting to stamping, paper sculpture, and watercolor techniques. Each activity uses a different approach, giving children new ways to explore art throughout the month.