7 Fun and Creative Winter Crafts for Kids: Easy DIY Projects for Cozy Winter Days
Winter is a wonderful season for children to explore their creativity, experiment with different materials, and enjoy fun indoor activities. When the weather becomes cold and outdoor playtime is limited, winter crafts offer an excellent way to keep little hands busy and curious. From making adorable snowmen and sparkling snowflakes to creating colorful winter decorations and handmade gifts, there are countless ways to turn an ordinary winter afternoon into an exciting creative adventure.
Winter crafts for kids are not just about making beautiful decorations. They also encourage imagination, improve fine motor skills, develop problem-solving abilities, and help children learn through hands-on experiences. Whether you are a parent looking for screen-free activities, a teacher planning classroom projects, or someone organizing a fun winter craft day, these activities can provide hours of entertainment.
The best part is that most winter crafts can be made with inexpensive household supplies, recycled materials, paper, cotton balls, cardboard, yarn, and washable paints. You do not need expensive craft kits or professional artistic skills to help children create something special.
In this article, we will explore seven fun, creative, and easy winter crafts for kids of different ages. Each project includes helpful material suggestions, step-by-step instructions, creative variations, and practical tips to make crafting enjoyable, educational, and stress-free.
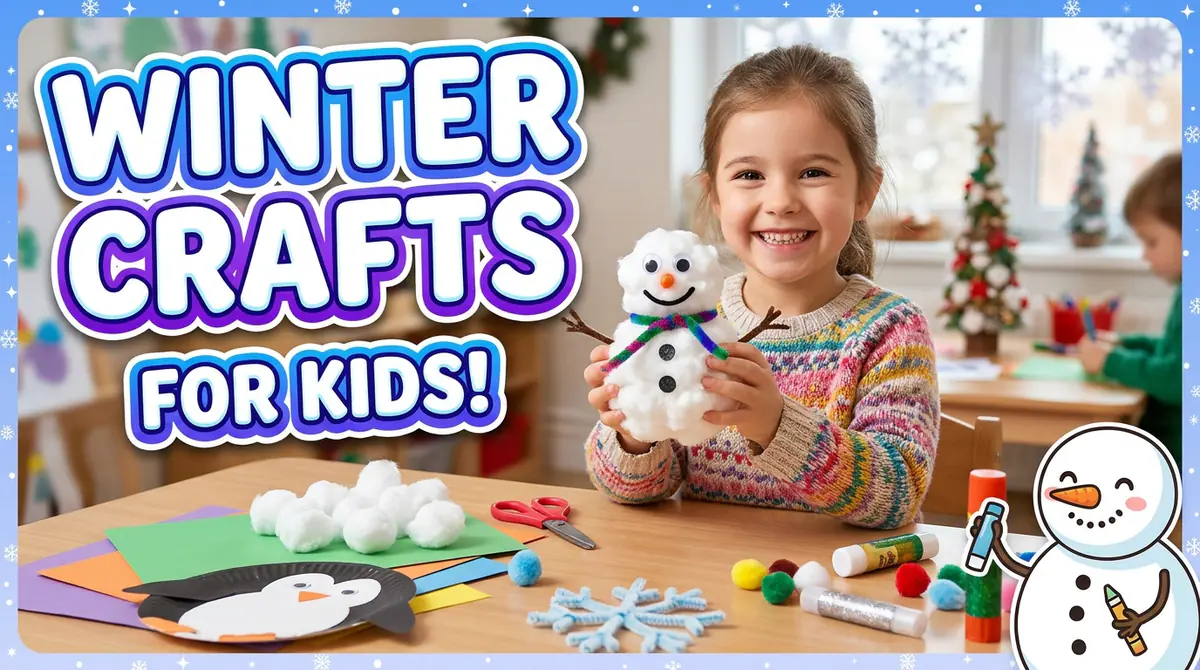
DIY Cotton Ball Snowman Craft
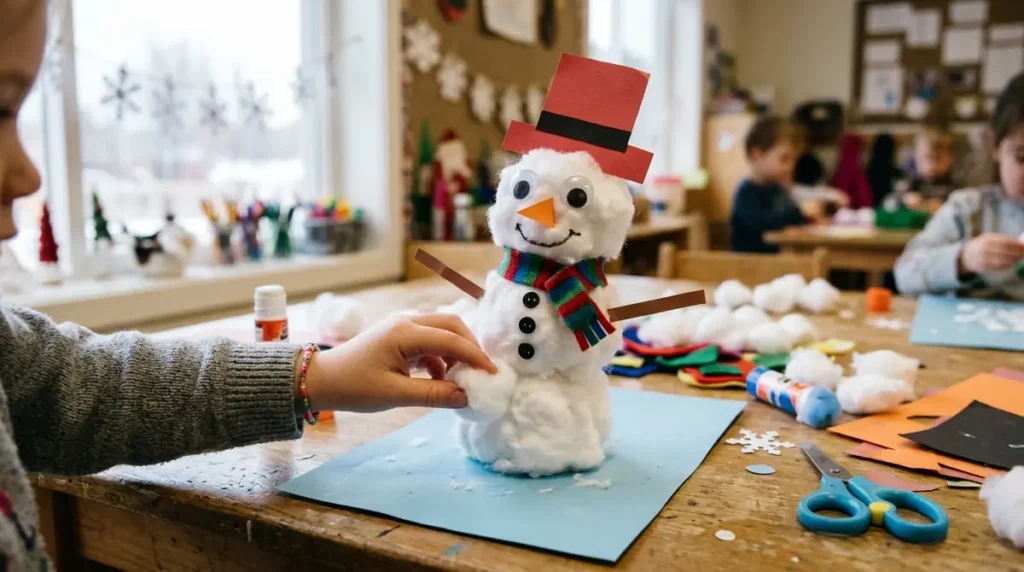
A cotton ball snowman is one of the easiest and most enjoyable winter crafts for young children. Even if children have never participated in a craft project before, they can create an adorable snowman using simple materials and a little imagination. This activity is especially suitable for preschoolers, kindergarten students, and early elementary school children because it involves simple movements such as picking up cotton balls, spreading glue, and placing decorations.
Unlike real snowmen, which require cold weather and actual snow, this indoor version allows children to enjoy the magic of winter without going outside. It is also a wonderful activity for classrooms, daycare centers, winter-themed parties, and family craft afternoons.
Materials You Will Need
- White cotton balls or cotton pads
- Blue or light-blue construction paper
- Child-safe liquid glue or glue sticks
- Orange construction paper
- Black construction paper or paper buttons
- Googly eyes
- Colorful felt or fabric scraps
- Child-safe scissors
- Markers or crayons
- Small decorative stickers
Step-by-Step Instructions
Start by giving each child a sheet of blue construction paper. This will serve as the background for the winter scene. Ask them to draw three circles of different sizes, arranging them vertically to create the snowman’s body. Younger children can use pre-drawn circles or round paper templates.
Next, help children spread glue inside the circles. They can pick up individual cotton balls and gently press them onto the glued areas until the snowman’s body looks fluffy and snowy. Encourage them to place the cotton balls close together so the entire snowman becomes covered in a soft white texture.
Once the body is complete, add two googly eyes near the top circle. Cut a small triangle from orange construction paper to create the carrot-shaped nose. Children can also use small black paper circles to make buttons and a smiling mouth.
Now comes the most exciting part: decorating the snowman. Give children colorful felt pieces or fabric scraps to create scarves, hats, earmuffs, and other accessories. They can draw arms using brown markers or attach thin paper strips to create stick arms.
Finally, encourage children to decorate the background with paper snowflakes, falling snow, winter trees, or a snowy ground.
Creative Ways to Make It More Interesting
Children can personalize their snowmen by giving them names, creating different facial expressions, or adding tiny paper accessories. They can also make an entire snowman family with different sizes and outfits. For a classroom activity, each child can create a snowman representing their personality.
Educational Benefits
This craft helps children develop fine motor skills through picking up and positioning small cotton balls. It also introduces basic concepts such as shapes, sizes, textures, and colors. Parents and teachers can encourage children to count the cotton balls, compare snowman sizes, and identify facial features.
Helpful Tips
Use glue sticks for younger children because they are generally easier to control and less messy. Prepare the paper shapes in advance if working with preschoolers. Always supervise children when using scissors and small decorative pieces.
The finished snowmen can be displayed on classroom walls, refrigerator doors, bedroom boards, or winter-themed bulletin boards. This simple project turns ordinary cotton balls into adorable winter decorations while giving children an enjoyable opportunity to express their creativity.
Paper Plate Winter Penguin Craft
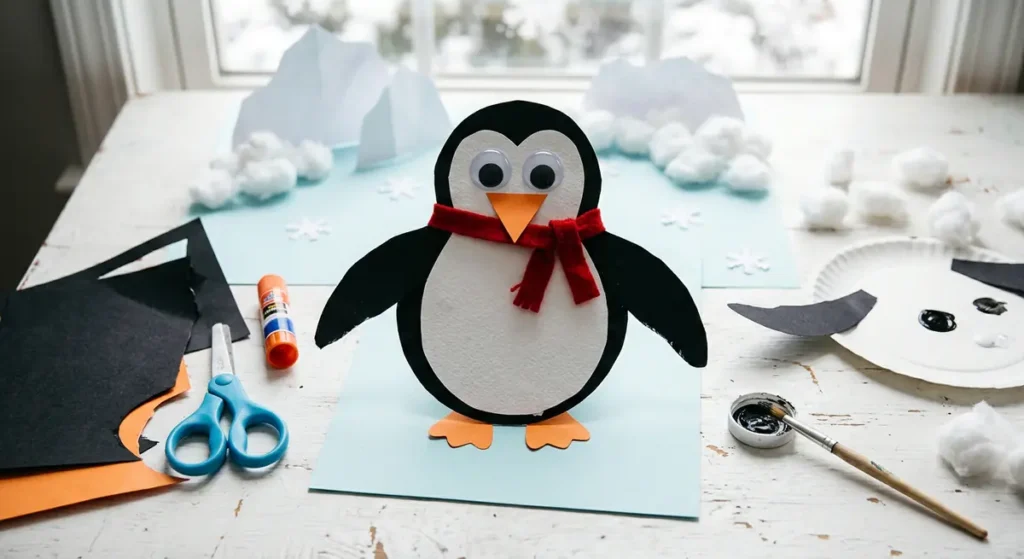
Penguins are among the most recognizable animals associated with winter, making them a perfect inspiration for children’s seasonal crafts. A paper plate penguin is an affordable, beginner-friendly project that transforms an ordinary paper plate into a cute winter animal. Children can enjoy creating their own penguin characters while learning interesting facts about these fascinating birds.
This activity works especially well for preschoolers, kindergarten children, and elementary school students. It is also ideal for winter classroom lessons about polar animals, habitats, and cold-weather environments.
Materials You Will Need
- One white paper plate per penguin
- Black construction paper
- White construction paper
- Orange construction paper
- Googly eyes
- Child-safe glue
- Safety scissors
- Black washable paint or crayons
- Paintbrush
- Cotton balls
- Blue paper for the background
- Optional decorative stickers
Step-by-Step Instructions
Begin by placing a white paper plate on a flat working surface. Explain that the plate will become the penguin’s body. If you want a traditional black-and-white penguin, cover the outer portion of the plate with black construction paper or washable black paint.
Leave a large oval-shaped white section in the center to create the penguin’s belly. You can either cut an oval from white paper and glue it onto the plate or help children paint the central area white.
Next, prepare the penguin’s wings. Cut two curved shapes from black construction paper and attach one to each side of the plate. Position them slightly outward so the penguin looks as if it is standing with its wings open.
Now create the penguin’s face. Attach two googly eyes near the upper part of the white belly area. Cut a small orange triangle for the beak and two orange webbed feet. Glue the beak below the eyes and place the feet at the bottom of the plate.
Allow children to add personal details such as rosy cheeks, eyebrows, tiny hats, or colorful scarves. These little decorations help each penguin look different and give children an opportunity to experiment with character design.
To make the project even more exciting, create a winter background. Give children blue construction paper and cotton balls to represent snow. They can add paper icebergs, snowflakes, and frozen water to create a miniature penguin habitat.
Creative Variations
Instead of making only one penguin, children can create a penguin family with different heights and facial expressions. Older children might enjoy making a standing penguin using folded paper or cardboard. Another fun idea is to attach a small paper heart or winter greeting to the penguin and turn it into a handmade seasonal card.
Educational Benefits
This project introduces children to animal recognition, body parts, and basic wildlife concepts. Parents can explain that penguins are birds, have feathers, and use their wings as flippers for swimming. Children can also learn about Antarctica and other penguin habitats.
The activity encourages cutting, arranging, painting, and gluing, helping strengthen hand coordination and visual planning.
Helpful Tips
Prepare the black and white paper pieces in advance for younger children. Allow older children to cut their own shapes with child-safe scissors. Use washable paint and place scrap paper underneath the plates to protect the table.
Once completed, the penguins can become adorable winter decorations for classroom displays, bedroom walls, or seasonal craft exhibitions. This project combines creativity, simple science learning, and winter fun in one enjoyable activity.
Colorful Paper Snowflake Decorations
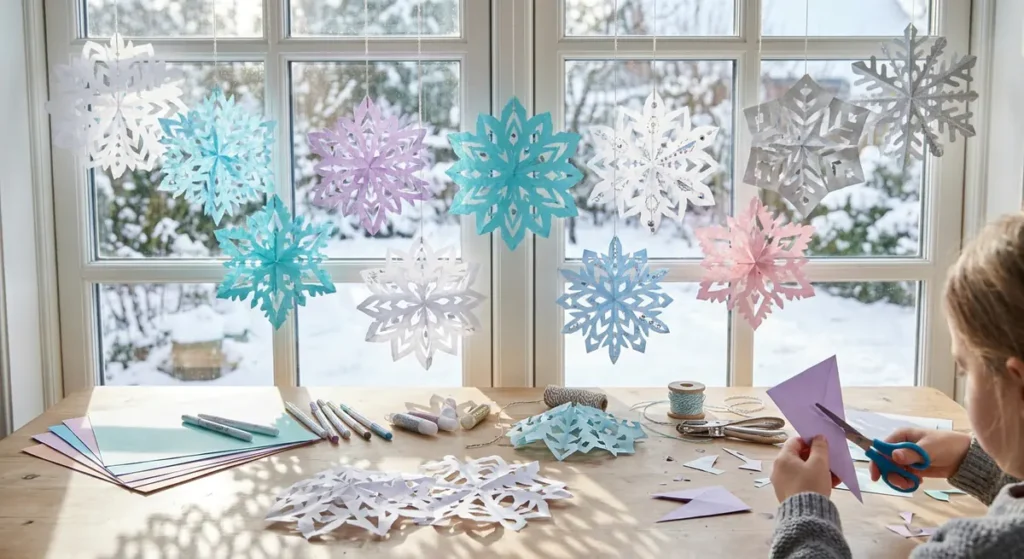
Paper snowflakes are classic winter decorations that never go out of style. They are inexpensive, easy to customize, and offer endless possibilities for creative designs. Children can transform ordinary sheets of paper into beautiful snowflake patterns using folding, cutting, and decorating techniques.
This craft is particularly useful when you want an activity that does not require many supplies. It can be completed at home, in classrooms, at winter parties, or during holiday craft sessions. Children of different ages can participate because the project can be simplified or made more challenging depending on their abilities.
Materials You Will Need
- White printer paper
- Blue construction paper
- Light-blue paper
- Child-safe scissors
- Colored markers
- Glitter glue
- Washable paint
- Stickers
- Ribbons or string
- Hole punch
- Optional metallic paper
Step-by-Step Instructions
Start with a square sheet of paper. If you only have rectangular printer paper, fold one corner diagonally until the edges line up and cut away the extra strip to create a square.
Fold the square in half diagonally to make a triangle. Fold it again into a smaller triangle. Older children can continue folding it into smaller sections to create more intricate patterns. For younger children, two folds are usually enough to make cutting easier.
Next, use child-safe scissors to cut small shapes along the folded edges. Children can experiment with triangles, curves, half-circles, and tiny rectangles. Explain that they should avoid cutting away the entire folded edge because doing so may cause the snowflake to fall apart.
Once the cutting is finished, slowly unfold the paper. The symmetrical pattern will appear, creating a unique snowflake. Every design will look different depending on where the child made the cuts.
After unfolding, place the snowflake on a flat surface and gently smooth out any creases. Children can decorate it using markers, glitter glue, metallic stickers, or small paper shapes. White and silver decorations create a traditional snowy appearance, while pink, purple, turquoise, and gold can make the snowflakes more colorful.
For a hanging decoration, use a hole punch to make a small hole near the top and attach a ribbon or string. Multiple snowflakes can be connected to create a beautiful winter garland.
Creative Ways to Customize Snowflakes
Encourage children to create different sizes of snowflakes and combine them into a winter display. They can make large white snowflakes for windows, small blue snowflakes for greeting cards, or metallic snowflakes for party decorations.
Older children can experiment with more complicated folding and cutting patterns. They can also create snowflake mobiles by attaching several designs to a lightweight cardboard ring.
Educational Benefits
This project introduces children to symmetry, geometry, shapes, and patterns. As they fold and cut the paper, they begin to understand how one side of a design can resemble another. It also strengthens hand coordination, concentration, and patience.
Helpful Tips
Use lightweight paper because thick cardstock can be difficult for younger children to fold and cut. Always supervise scissor use. Avoid loose glitter for very young children, as glitter glue is generally easier to manage.
Finished snowflakes look beautiful when displayed on windows, classroom ceilings, bedroom walls, and winter-themed bulletin boards. This simple craft allows children to create a magical snowy atmosphere even when there is no snow outside.
DIY Pinecone Winter Bird Feeders
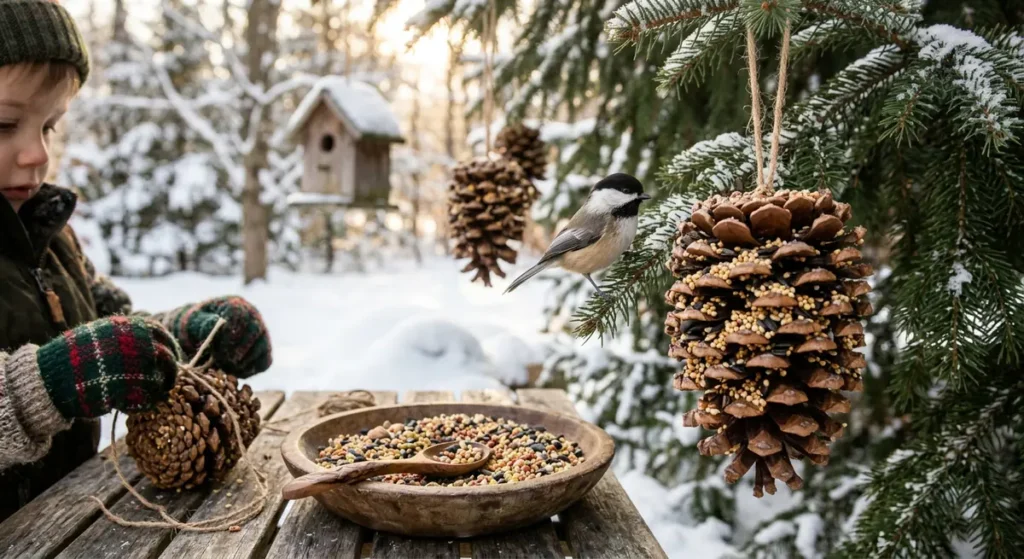
Winter can be a challenging season for wild birds because natural food sources may become less available in some environments. Making a simple pinecone bird feeder is a wonderful way to introduce children to nature-inspired crafts while encouraging them to care about local wildlife.
This project combines creativity, outdoor observation, and environmental learning. Children can collect pinecones, decorate them, and transform them into feeders that attract suitable local birds. It is particularly enjoyable for families who want to combine an indoor craft activity with an outdoor nature experience.
Materials You Will Need
- Large, clean pinecones
- Natural cotton or jute string
- Birdseed suitable for local wild birds
- A small amount of plain, unsalted, xylitol-free seed butter, if appropriate for local wildlife
- Small bowl
- Child-safe spoon
- Tray or newspaper
- Optional natural twine decorations
Step-by-Step Instructions
Begin by collecting dry pinecones from a clean outdoor area. Choose pinecones with open scales because they provide more spaces for holding the bird food. Inspect each pinecone carefully and remove loose dirt or debris.
Before starting, tie a piece of natural string around the upper section of the pinecone. Make a secure knot so the feeder can hang safely from a branch later. It is easier to attach the string before adding the food.
Next, prepare the birdseed mixture. Place an appropriate bird-safe binder in a small bowl and give children a spoon to spread a thin layer between the pinecone scales. Avoid ingredients containing salt, added sugar, artificial sweeteners, or other unsuitable additives. Check local wildlife guidance before using any spread, as some ingredients may not be appropriate for every species or region.
Once the pinecone is lightly coated, place it inside a shallow bowl filled with suitable birdseed. Gently roll it around so the seeds stick to the coated areas. Children can use their fingers or spoons to press additional seeds into the spaces between the scales.
When the pinecone is covered, place it on a tray and allow it to become firm according to the binder manufacturer’s instructions. Once ready, hang the feeder from a suitable tree branch in a quiet location where cats and other predators cannot easily reach it.
Creative Variations
Children can create several feeders using different pinecone sizes. They can also make a bird-watching station by placing a notebook near a window and recording which birds visit. Encourage them to draw the birds they observe and write down their colors, sizes, and behaviors.
Educational Benefits
This activity helps children learn about local birds, seasonal food availability, and wildlife conservation. It also develops observation skills and encourages responsibility toward nature.
Important Safety and Wildlife Tips
An adult should handle the preparation and placement of the feeder. Wash hands after handling birdseed and outdoor materials. Use bird-safe food recommended for local species, avoid unsafe decorative materials, and clean feeding areas regularly to reduce disease transmission. If you cannot maintain a clean feeder, a simple shallow dish of suitable bird food may be a better option.
A pinecone bird feeder is more than a winter decoration. It gives children an opportunity to connect with nature, observe wildlife, and understand how small actions can support the environment.
Handmade Winter Mitten and Scarf Paper Craft
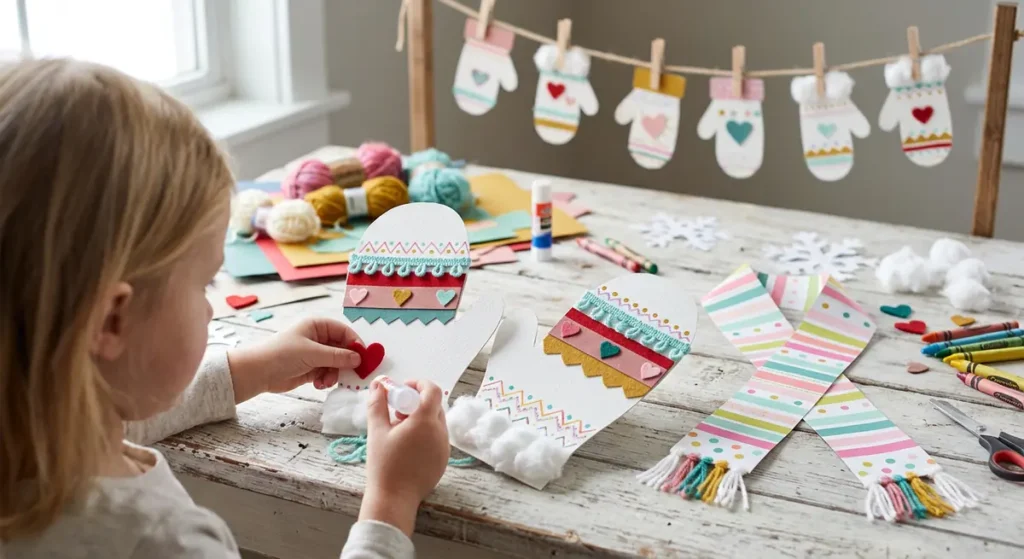
Winter clothing provides wonderful inspiration for children’s craft projects. Mittens, scarves, hats, and warm socks are simple shapes that children can decorate in countless ways. A handmade winter mitten and scarf craft is an excellent activity for preschool and elementary-age children because it combines cutting, coloring, pattern-making, and creative decoration.
This project is especially useful during winter classroom lessons because teachers can connect the craft with discussions about cold weather, seasonal clothing, and staying warm. Parents can also use it as an enjoyable indoor activity during chilly afternoons.
Materials You Will Need
- Colored construction paper
- White cardstock
- Child-safe scissors
- Glue sticks
- Washable markers
- Crayons
- Yarn pieces
- Cotton balls
- Colorful buttons
- Felt scraps
- Decorative stickers
- Ribbon or wool
Step-by-Step Instructions
Start by drawing a large mitten shape on white cardstock. If children are young, prepare a mitten template in advance so they can trace around it. Older children can draw their own mitten shapes and cut them out using child-safe scissors.
Once the mitten shape is ready, let children choose their favorite colors. They can use colored construction paper as a background or decorate the mitten directly with crayons and washable markers.
Now introduce the decorating stage. Give children short pieces of yarn, cotton balls, felt scraps, and paper shapes. They can attach these materials to create cuffs, decorative stripes, hearts, stars, zigzags, and other colorful patterns.
Encourage children to experiment with repeating patterns. For example, they might create a red-blue-red-blue design or alternate small and large circles across the mitten. This makes the activity more educational while allowing children to make their designs unique.
For the scarf, cut a long rectangular strip from construction paper. Children can decorate it with colorful stripes, polka dots, zigzag patterns, or little snowflakes. Attach small yarn pieces to both ends to create soft-looking tassels.
After finishing the mitten and scarf, children can glue both pieces onto a larger sheet of blue or light-purple paper. Add paper snowflakes, cotton-ball snow, winter trees, and a cheerful winter message to complete the scene.
Creative Variations
Children can create a matching pair of mittens using identical patterns. They can also design a winter clothing collection featuring scarves, hats, gloves, and boots. For a classroom display, each child can write their name on a mitten and place it on a large paper winter clothesline.
Another fun option is to create a paper mitten greeting card. Fold a piece of cardstock, attach a decorated mitten to the front, and write a warm winter message inside.
Educational Benefits
This project supports fine motor development, color recognition, pattern identification, and creative decision-making. Children also learn about winter clothing and why people wear insulating layers to stay warm.
Helpful Tips
Use large mitten templates for preschoolers and allow older children to design more detailed shapes. Avoid small buttons and other choking hazards when working with very young children. Substitute paper circles or larger felt shapes when needed.
These handmade mittens and scarves make beautiful seasonal decorations and can be displayed on classroom walls, doors, or bedroom boards. The activity is simple, affordable, and flexible enough for different ages and skill levels.
DIY Winter Mason Jar Lanterns
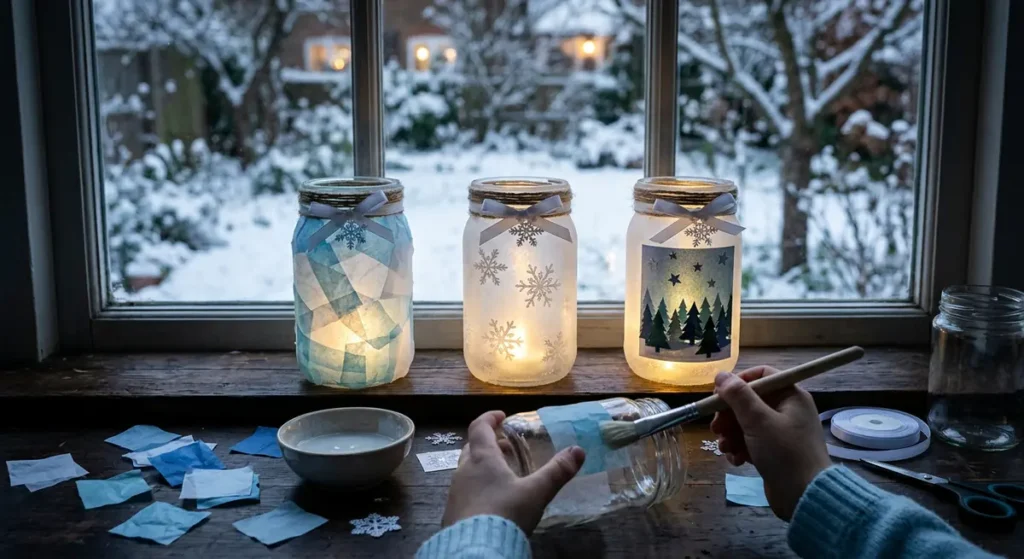
Creating winter lanterns is a wonderful way to bring a cozy seasonal atmosphere into the home. Children can transform clean glass jars into beautiful decorative lanterns using translucent materials, winter-themed decorations, and battery-operated lights.
This craft is particularly suitable for older children who enjoy decorating objects and experimenting with colors, textures, and lighting effects. It can also be adapted for younger children by having adults prepare the jars and allowing children to complete the decorating process.
Winter mason jar lanterns make attractive decorations for bedroom shelves, dining tables, classroom displays, and seasonal craft exhibitions. They can also become thoughtful handmade gifts for family members.
Materials You Will Need
- Clean, empty glass jars
- White tissue paper
- Blue tissue paper
- Child-safe craft glue
- Soft paintbrushes
- Snowflake stickers
- White ribbon
- Decorative string
- Battery-operated LED tea lights
- Optional silver paper shapes
- Small artificial winter decorations
Step-by-Step Instructions
Begin by washing and completely drying the glass jars. Remove any old labels or sticky residue so the surface is clean. Adults should inspect the jars for cracks or sharp edges and handle any glass preparation.
Next, cut white and blue tissue paper into small squares or irregular shapes. Children can choose different shades to create their own winter color combinations.
Apply a thin layer of child-safe craft glue to a small section of the jar. Carefully place a tissue-paper piece onto the glued area and smooth it gently with a soft paintbrush. Continue adding overlapping pieces until the outside of the jar is covered.
Encourage children to leave small gaps or use alternating white and blue sections to create an interesting frosted appearance. Once the entire surface is decorated, apply a light finishing layer of glue if the product instructions recommend it.
Allow the jar to dry completely. This may take several hours depending on the glue and the amount of tissue paper used.
After drying, add snowflake stickers or paper decorations to the outside. Tie a ribbon around the top of the jar and attach a small paper snowflake or winter greeting.
Finally, place a battery-operated LED tea light inside the jar. Switch it on and observe how the soft light shines through the tissue paper, creating a gentle winter glow.
Creative Ways to Customize Your Lanterns
Children can create different themes such as snowy forests, icy blue landscapes, winter stars, or colorful holiday scenes. They can also use white paper silhouettes of trees, houses, and snowmen to create a miniature winter village effect.
For a group project, every child can decorate one jar and combine all the lanterns into a larger winter display.
Educational Benefits
This project introduces children to color blending, layering, light, and transparency. It encourages patience because each decorative layer needs time to dry. It also strengthens hand coordination and develops an understanding of how materials interact with light.
Important Safety Tips
Use battery-operated LED lights only. Never place real candles, matches, or open flames inside decorative jars used by children. Keep glass jars away from table edges, and allow adults to handle any broken glass.
These glowing lanterns are a beautiful way to combine art and seasonal decoration. They also help children understand that simple recycled containers can become attractive decorative pieces with a little creativity.
DIY Winter Wonderland Shoebox Diorama
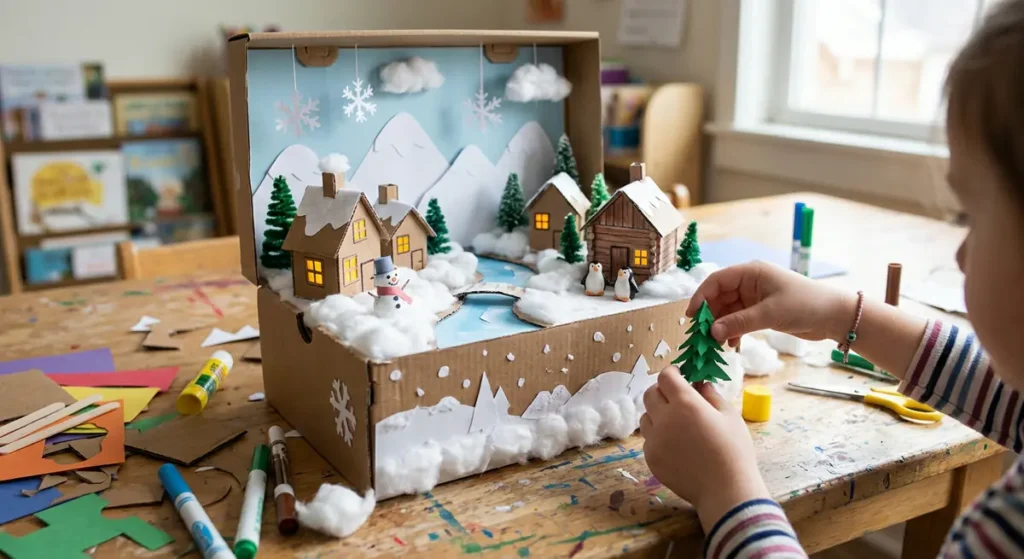
A winter wonderland shoebox diorama is an exciting craft project that allows children to build their own miniature snowy world. Unlike simpler paper crafts, this activity combines several creative elements, including landscape design, miniature decorations, paper construction, and storytelling.
Children can create a snowy village, a frozen forest, a mountain landscape, or an imaginary winter kingdom inside an ordinary shoebox. It is an excellent project for elementary-age children, although younger children can participate with help from adults.
This activity is especially useful for school assignments, winter classroom exhibitions, seasonal displays, and family craft days. It also encourages children to think creatively and plan how different objects fit together within a small space.
Materials You Will Need
- One empty shoebox
- White construction paper
- Blue construction paper
- Green construction paper
- Cotton balls
- Child-safe glue
- Child-safe scissors
- Markers and crayons
- Small cardboard pieces
- Popsicle sticks
- Craft foam
- Paper snowflakes
- Small animal or winter character figures
- Optional battery-operated mini LED lights
Step-by-Step Instructions
Begin by turning the shoebox onto its side so the open section faces forward. This creates a display area for the miniature winter scene. If the box has a colorful or distracting interior, cover the inside with blue or white construction paper.
Next, create the snowy ground. Spread glue across the bottom of the box and attach cotton balls or small pieces of white paper to create a soft snow-covered landscape. Children can arrange the cotton balls into hills, snowy paths, or little mounds.
Now make the background. Cut white and blue paper into mountain shapes and attach them to the back wall of the box. Use markers to draw distant trees, falling snow, clouds, or a winter sunset.
For the trees, cut simple evergreen shapes from green construction paper. Fold a small strip at the bottom of each tree to create a base, then attach it to the floor of the diorama. Older children can make three-dimensional trees using folded paper or layered cardboard.
Next, build tiny winter houses using cardboard pieces. Cut rectangles for the walls and triangles for the roofs. Decorate the houses with windows, doors, chimneys, and snowy rooftops. Use markers or small paper pieces to add details.
Place the houses, trees, and other decorations inside the shoebox. Children can add a paper snowman, miniature penguins, winter animals, or a frozen pond made from blue paper.
Finally, decorate the front edges of the box with snowflakes, winter patterns, or a handmade title card. If desired, an adult can add a battery-operated mini LED light to illuminate the scene.
Creative Themes to Explore
Children can choose different winter settings for their dioramas. A snowy village might include small houses, a winding path, and miniature trees. A polar landscape could feature penguins, seals, icebergs, and snowy mountains. An imaginary winter forest might contain paper animals, colorful trees, and a tiny cabin.
Encourage children to tell a story about their miniature world. They can explain who lives there, what the weather is like, and what happens during a snowy day.
Educational Benefits
This project helps children develop spatial awareness, planning skills, storytelling abilities, and problem-solving techniques. It also introduces basic concepts related to landscapes, habitats, seasons, and miniature model construction.
Helpful Tips
Use a larger shoebox if children want to include many decorations. Prepare difficult cardboard shapes in advance for younger participants. Recycled packaging is useful for building houses, mountains, and other structures. Make sure the project has enough drying time before moving it.
A completed winter wonderland diorama can become a beautiful centerpiece for a classroom exhibition or a memorable decoration at home. Most importantly, it allows children to turn their imagination into a miniature world they can proudly display and explain.
Conclusion
Winter is the perfect season to slow down, spend quality time together, and enjoy creative activities that make ordinary days more exciting. These seven winter crafts for kids provide wonderful opportunities to explore imagination while developing important skills through hands-on experiences. From fluffy cotton ball snowmen and adorable paper penguins to colorful snowflakes, nature-inspired bird feeders, decorative mittens, glowing lanterns, and miniature winter wonderlands, every project offers something different for children to enjoy.
The best thing about these activities is that they do not require expensive supplies or complicated crafting techniques. Most projects can be created using everyday household materials, recycled containers, construction paper, cotton balls, yarn, and simple decorations. Parents and teachers can easily adjust each activity according to children’s ages, interests, and abilities.
Remember that the goal of winter crafting is not to create perfect decorations. It is to give children the freedom to experiment, make their own choices, learn new skills, and enjoy the creative process. Let them choose their favorite colors, invent unusual designs, and add personal touches to every project. Even when a snowman looks a little uneven or a paper snowflake has an unexpected shape, those little imperfections make each creation special.
Whether you are planning a cozy afternoon at home, organizing a winter classroom activity, or looking for screen-free entertainment, these easy winter crafts can bring creativity, learning, and happiness into the season. Gather a few simple supplies, prepare a comfortable crafting space, and let the winter creativity begin!