7 Beautiful Thanksgiving Crafts for Adults to Make Your Home Warm, Cozy, and Festive
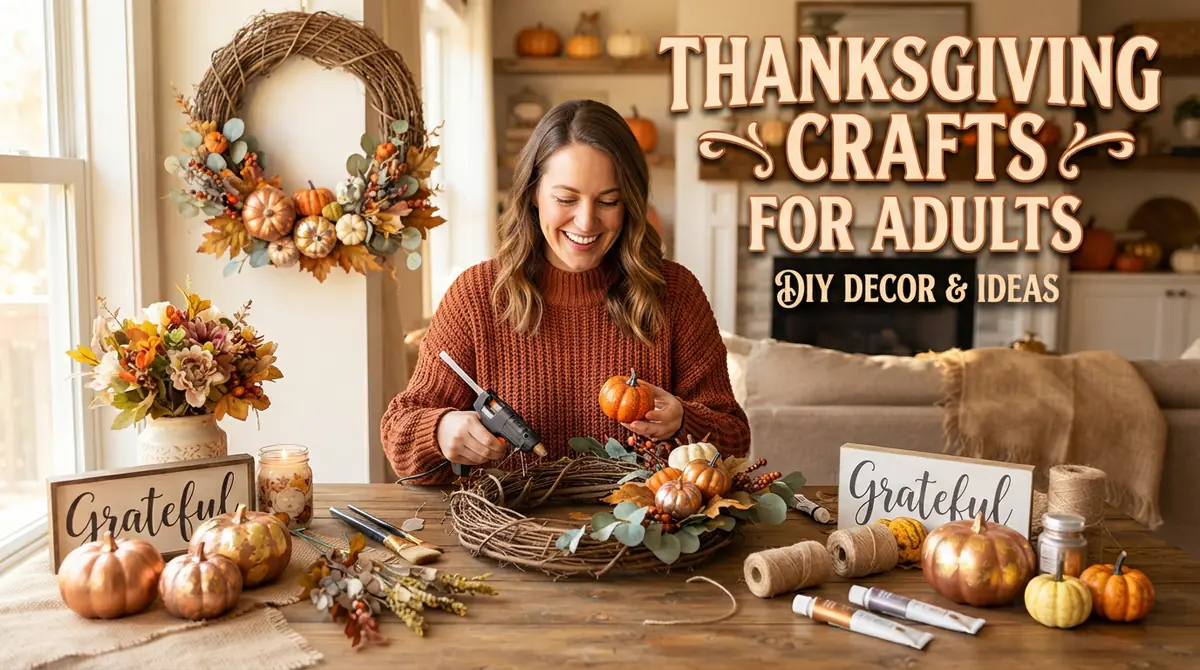
Thanksgiving is a wonderful time to slow down, appreciate the little things, and bring family and friends together. While delicious food and meaningful conversations are often the highlights of the holiday, decorating your home with handmade seasonal decorations can make the celebration even more special. Creating your own Thanksgiving crafts is also a relaxing way to enjoy the autumn season while adding warmth, personality, and creativity to your living space.
Whether you enjoy rustic farmhouse decorations, elegant table centerpieces, natural autumn arrangements, or simple DIY projects, there are plenty of Thanksgiving crafts for adults that are both beautiful and practical. You don’t need expensive supplies or professional crafting skills to create something impressive. Many projects can be made using affordable materials such as dried leaves, pinecones, mason jars, fabric scraps, pumpkins, wooden pieces, and seasonal flowers.
Handmade decorations also give you the freedom to customize colors, textures, and designs to match your home’s existing style. You can create pieces for your dining table, fireplace mantel, front porch, entryway, or even thoughtful handmade gifts for guests.
In this guide, you’ll discover seven creative and useful Thanksgiving crafts for adults that combine seasonal beauty with practical decorating ideas. Each project includes materials, instructions, styling suggestions, and helpful tips to make crafting easier and more enjoyable.
Rustic Thanksgiving Table Centerpiece with Pumpkins and Natural Elements
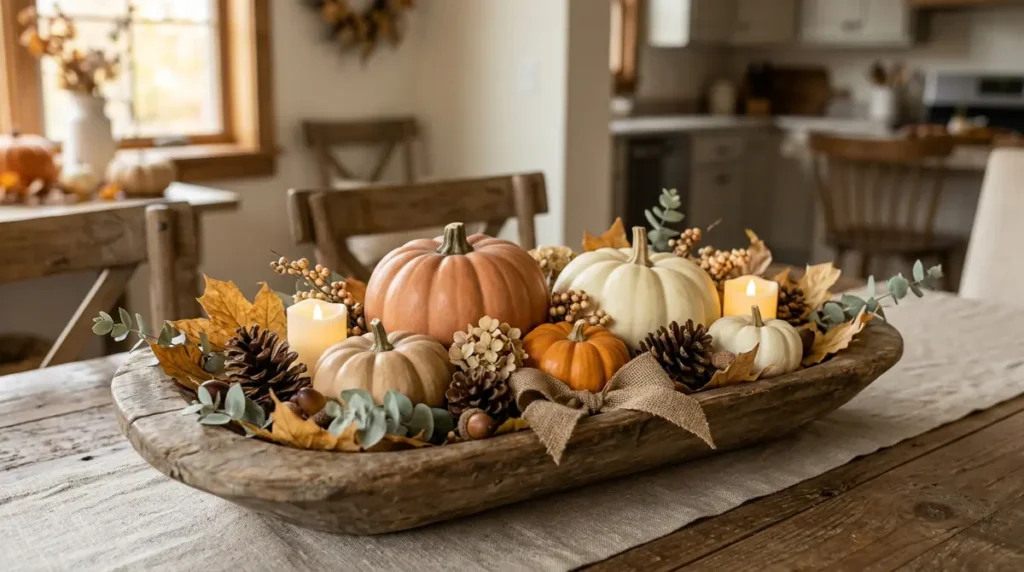
A rustic Thanksgiving centerpiece is one of the most beautiful ways to bring autumn charm to your dining room. Since the dining table is often the main gathering place during Thanksgiving, decorating it with natural seasonal elements creates a welcoming atmosphere for family and friends. Instead of purchasing an expensive arrangement, you can make your own centerpiece using miniature pumpkins, pinecones, dried leaves, eucalyptus, and other affordable materials.
The best thing about this craft is its flexibility. You can create a simple farmhouse arrangement with neutral-colored pumpkins or choose traditional orange, burgundy, and golden shades for a more colorful autumn appearance. A handmade centerpiece also allows you to adjust its size according to your dining table and the number of guests you expect.
Materials Needed:
- 3–5 miniature pumpkins in different sizes
- A wooden tray, shallow basket, or decorative dough bowl
- Dried autumn leaves
- Pinecones and acorns
- Faux or fresh eucalyptus branches
- Small seasonal flowers
- Battery-operated candles
- Floral wire or floral foam, if needed
- Natural burlap ribbon
Step-by-Step Instructions:
Start by selecting a suitable base for your centerpiece. A wooden tray, vintage serving board, or rustic basket works particularly well because it provides a natural foundation for the arrangement. Make sure the base is wide enough to hold your decorative materials without making the table feel crowded.
Next, position your pumpkins around the center of the tray. Place the largest pumpkin slightly off-center and arrange smaller pumpkins around it to create visual balance. Using pumpkins with different shapes, colors, and textures makes the arrangement look more natural and interesting.
Add dried leaves and eucalyptus branches around the pumpkins. Allow some leaves to extend slightly beyond the tray to create a relaxed, organic appearance. Fill empty spaces with pinecones, acorns, and small flowers. These natural details add texture and make the centerpiece feel complete.
Finally, incorporate battery-operated candles to create a warm evening glow. Avoid placing open flames near dried foliage or other flammable decorations. A small burlap bow or neutral ribbon can provide the finishing touch.
Helpful Decorating Tips:
Choose a color palette before arranging your materials. Cream, beige, muted orange, brown, and sage green work beautifully together. If you prefer a more elegant look, use white pumpkins, gold accents, and soft greenery.
Keep the arrangement low enough that guests can comfortably see each other across the table. Avoid using strong fragrances that could compete with the aromas of Thanksgiving dinner.
Why Adults Will Love This Craft:
This project is perfect for anyone who enjoys natural home decorating. It requires no complicated techniques, can be customized to suit different interior styles, and creates an attractive focal point for your Thanksgiving celebration. You can also reuse the tray, faux greenery, and decorative pumpkins in future autumn arrangements.
DIY Decorative Pumpkin Vases for Elegant Autumn Flowers
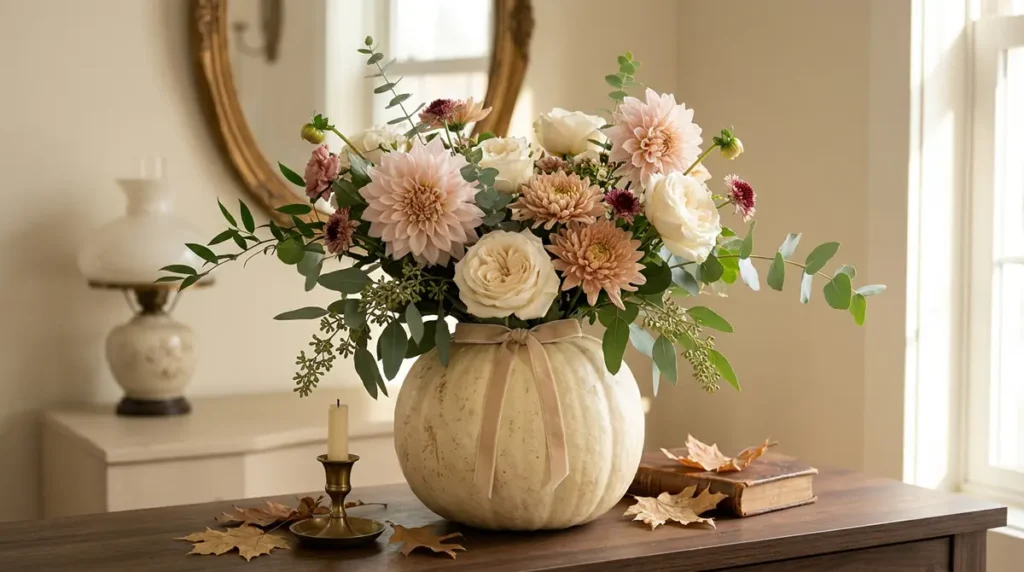
Pumpkins are among the most recognizable symbols of autumn, but they can be used for much more than traditional seasonal displays. Turning a pumpkin into a decorative flower vase is a creative Thanksgiving craft that combines natural textures with beautiful floral arrangements. It is an excellent option for adults who enjoy elegant decorations and want something different from ordinary store-bought centerpieces.
A pumpkin vase can look beautiful on a dining table, kitchen island, fireplace mantel, entryway console, or side table. You can use a real pumpkin for a temporary seasonal arrangement or a reusable artificial pumpkin for decorations that last longer. The finished design can be rustic, modern, farmhouse-inspired, or sophisticated depending on your choice of colors and flowers.
Materials Needed:
- One medium-sized real or artificial pumpkin
- A sharp craft knife, if using a real pumpkin
- A spoon for removing the pumpkin interior
- A waterproof container or floral vessel
- Floral foam suitable for fresh flowers, if needed
- Fresh seasonal flowers
- Eucalyptus or other greenery
- Floral scissors
- Decorative ribbon
- Acrylic paint, optional
Step-by-Step Instructions:
Begin by choosing a pumpkin with a stable, flat bottom. White, cream, muted orange, and soft green pumpkins are particularly attractive for decorative flower arrangements. If you prefer a customized appearance, you can paint an artificial pumpkin in a color that complements your home.
For a real pumpkin, carefully cut an opening around the stem and remove the top. Scoop out the seeds and soft interior until there is enough room for a small waterproof container. The container is important because direct contact with water can cause a real pumpkin to deteriorate more quickly.
Place your waterproof container inside the hollow pumpkin. Add fresh water and arrange your flowers. If you are using floral foam, choose the appropriate type for fresh flowers and soak it according to its instructions before placing it inside the container.
Start with greenery such as eucalyptus to create a natural foundation. Add larger flowers next, positioning them at different heights for a balanced arrangement. Chrysanthemums, dahlias, roses, and seasonal blooms are excellent choices. Fill smaller spaces with additional flowers and foliage.
For an elegant finish, wrap a narrow velvet ribbon around the pumpkin or add a small decorative tag. Keep the arrangement away from direct sunlight and heat, and refresh the water regularly.
Creative Styling Ideas:
For traditional Thanksgiving decorating, combine orange chrysanthemums, yellow flowers, and burgundy foliage. For a modern farmhouse look, choose cream pumpkins with white flowers and eucalyptus. If you prefer glamorous decorations, use gold-painted artificial pumpkins with deep red or ivory flowers.
You can also create several smaller pumpkin vases and arrange them along a dining table or fireplace mantel. Using different pumpkin sizes creates a beautiful layered effect.
Why This Craft Is Worth Trying:
Pumpkin vases are inexpensive, customizable, and visually impressive. They bring together two classic autumn decorations in one project. They are also wonderful handmade gifts for Thanksgiving hosts, especially when filled with flowers in the recipient’s favorite seasonal colors.
Handmade Thanksgiving Gratitude Tree with Personalized Messages
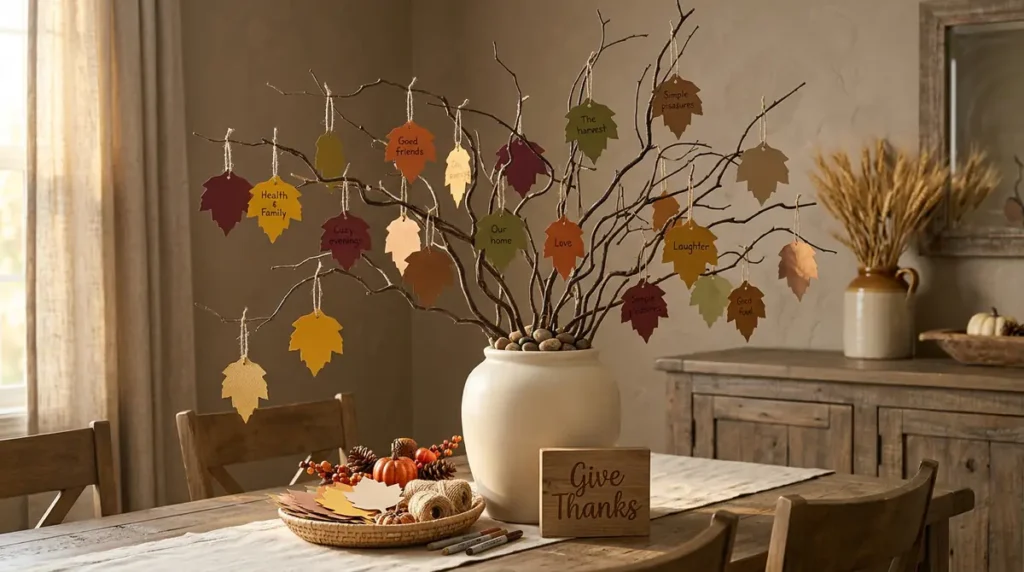
Thanksgiving is not only about decorating your home and preparing delicious meals. It is also an opportunity to reflect on the people, experiences, and little blessings that make life meaningful. A handmade gratitude tree is a thoughtful craft that combines seasonal decoration with a meaningful family activity.
Unlike ordinary decorative projects, this craft gives every family member an opportunity to contribute something personal. Guests can write down what they are thankful for and hang their messages on the branches. By the end of Thanksgiving dinner, your tree becomes a beautiful collection of memories, appreciation, and positive thoughts.
This project works particularly well for adults who want to create meaningful holiday decorations rather than simply adding more decorative objects to their homes.
Materials Needed:
- A collection of sturdy natural branches
- A large decorative vase or ceramic container
- Small stones or floral foam to secure the branches
- Kraft paper or colored cardstock
- Scissors
- A leaf-shaped paper template
- Hole punch
- Natural twine or thin ribbon
- Pens or fine-tip markers
- Small decorative beads, optional
Step-by-Step Instructions:
Begin by collecting several dry, sturdy branches from your garden or purchasing decorative branches from a craft store. Choose branches with multiple smaller stems because they provide enough space to hang gratitude messages.
Arrange the branches inside a large vase. Add stones or another suitable support material to keep them upright and stable. Make sure the arrangement has a balanced shape and enough open space for decorative tags.
Next, create paper leaves using cardstock in autumn-inspired colors such as mustard yellow, burnt orange, burgundy, olive green, and brown. You can draw your own leaf shapes or use a printable template. Cut out enough leaves for your expected guests and punch a small hole near the top of each one.
Thread a piece of twine through every leaf to create hanging tags. Keep several blank leaves in a small basket beside the tree so guests can easily participate.
Before Thanksgiving dinner, invite everyone to write a short message about something they appreciate. It could be a family member, a meaningful experience, a personal achievement, good health, friendship, or even a simple everyday pleasure.
Once the messages are written, guests can hang their leaves on the branches. Gradually, the tree will become fuller and more colorful throughout the celebration.
Personalization Ideas:
You can make the tree more meaningful by adding a small wooden sign that says “Give Thanks” or “Grateful Hearts Gather Here.” Another idea is to use different tag colors for different categories, such as family, friendship, personal growth, and favorite memories.
If you have children or younger relatives visiting, prepare larger paper leaves and colorful markers so everyone can participate comfortably.
How to Preserve the Messages:
After Thanksgiving, collect the written leaves and place them in a decorative memory box or scrapbook. You can revisit them the following year and create a new gratitude tree with fresh messages.
Why Adults Will Love This Craft:
A gratitude tree is affordable, easy to customize, and deeply meaningful. It creates an opportunity for conversation and connection while serving as a beautiful seasonal decoration. It is especially suitable for families who want to make Thanksgiving traditions more personal and memorable.
DIY Fall Mason Jar Lanterns for Warm Thanksgiving Lighting
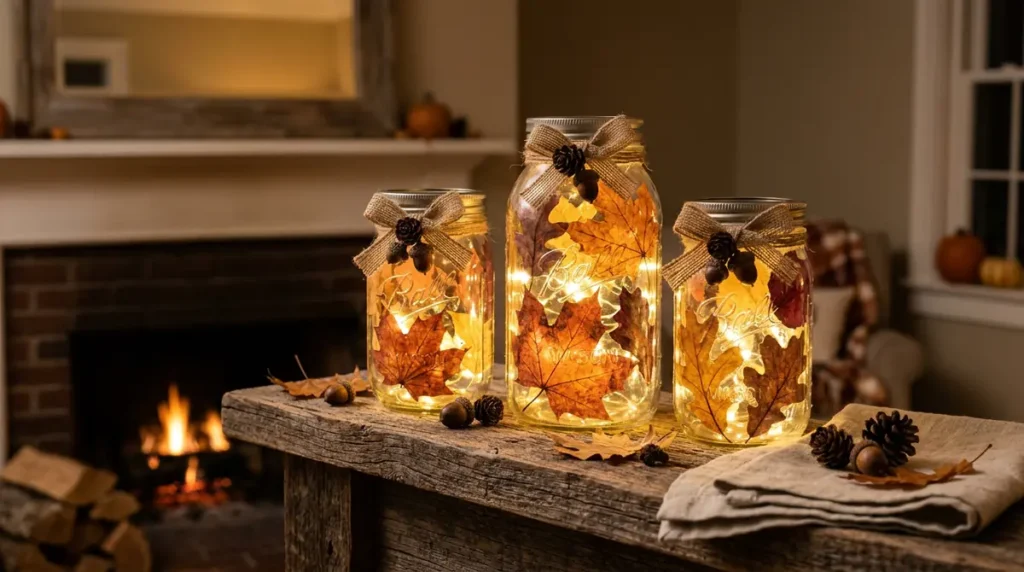
Lighting plays an important role in creating a comfortable and welcoming Thanksgiving atmosphere. As the evening approaches, soft decorative lights can make your living room, dining table, or front porch feel warmer and more inviting. DIY fall mason jar lanterns are an easy and affordable way to introduce seasonal lighting while reusing ordinary glass jars.
This craft is particularly useful for adults who enjoy upcycling household materials. Instead of throwing away empty mason jars, pickle jars, or other suitable glass containers, you can transform them into beautiful autumn decorations.
The finished lanterns can be styled in several ways. You can decorate them with pressed leaves, twine, burlap, miniature pinecones, or seasonal ribbons. Their transparent surfaces allow the warm light inside to create a soft decorative glow.
Materials Needed:
- 3–5 clean glass mason jars
- Pressed artificial or dried leaves
- Battery-operated tea lights or LED fairy lights
- Clear craft adhesive suitable for glass
- Burlap ribbon or natural twine
- Small decorative pinecones
- Scissors
- Foam brush
- Decorative tags, optional
Step-by-Step Instructions:
First, wash and dry your jars thoroughly. Remove any labels and sticky residue so the glass surface looks clean. Choose jars with different shapes or sizes if you want a more interesting arrangement.
Next, select your decorative leaves. Maple, oak, and other autumn-inspired leaf shapes work particularly well. Artificial leaves are a practical option because they retain their color and shape for longer than natural dried leaves.
Apply a thin layer of suitable craft adhesive to the outside of the jar. Carefully position the leaves around the glass, leaving small gaps between them so the light can shine through. Smooth out wrinkles and allow the adhesive to dry according to the manufacturer’s instructions.
Once the decorative layer is dry, wrap twine or burlap ribbon around the neck of the jar. You can attach a small pinecone or paper tag for extra seasonal detail. Avoid covering too much of the glass because the transparent areas help create the lantern effect.
Place a battery-operated tea light inside each jar. Alternatively, use a short strand of battery-powered fairy lights to create a more decorative appearance. Arrange the finished lanterns together on a wooden tray, dining table, or fireplace mantel.
Different Decorating Styles:
For farmhouse-inspired lanterns, combine brown twine, neutral burlap, and traditional orange leaves. For an elegant arrangement, choose gold, copper, or burgundy accents. If you prefer minimalist decorations, use clear jars with only a few delicate leaves and warm-white LED lights.
You can also create a coordinated display using three jars of different heights. Place the tallest jar in the center and smaller ones on either side.
Important Safety Tips:
Use battery-operated lights rather than placing open flames inside jars decorated with paper, dried leaves, fabric, or adhesives. Check that all materials are suitable for contact with glass and that the light source does not overheat.
Why This Craft Is Worth Making:
Mason jar lanterns are inexpensive, reusable, and beginner-friendly. They can be completed without complicated equipment and look beautiful in both traditional and modern homes. After Thanksgiving, you can remove or replace the decorations and reuse the jars for Christmas, winter, or everyday home styling.
Personalized Thanksgiving Wooden Signs for Farmhouse Home Decor
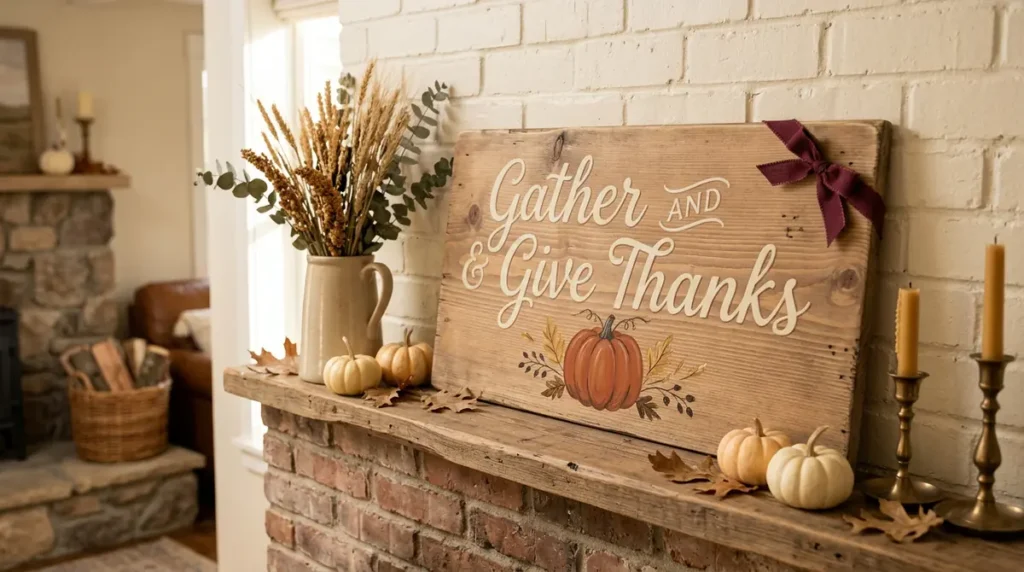
Personalized wooden signs are a wonderful way to give your home a warm Thanksgiving personality. They are especially popular in farmhouse-inspired interiors because natural wood, simple lettering, and seasonal colors create a comfortable, welcoming appearance.
A handmade Thanksgiving sign can be displayed near your front door, placed above the fireplace, positioned on an entryway console, or used as part of a larger seasonal decoration arrangement. You can choose a traditional message such as “Give Thanks,” “Gather Together,” or “Thankful and Blessed,” or create a completely personalized design featuring your family name.
This project is ideal for adults who enjoy painting, lettering, and working with natural materials. It also provides an opportunity to reuse old wooden boards, leftover timber, or wooden signs from previous decorating projects.
Materials Needed:
- One wooden board or unfinished wooden sign
- Sandpaper
- Acrylic paint or wood stain
- Paintbrushes
- Pencil
- Lettering stencil or printed design
- Permanent paint markers
- Measuring tape
- Clear protective finish suitable for the intended location
- Decorative ribbon or artificial autumn leaves
Step-by-Step Instructions:
Start by choosing a wooden board that fits your intended display location. A long rectangular board works well for a front porch or entryway, while a smaller square sign is suitable for shelves and tabletops.
Sand the surface gently to remove rough edges, splinters, and uneven areas. Wipe away the dust before applying paint or stain. If you prefer a rustic farmhouse appearance, use a light brown or weathered wood stain that allows some natural grain to remain visible.
Once the base coat is dry, decide on your message. Short phrases are easier to read and generally look more attractive on decorative signs. “Give Thanks,” “Gather and Be Grateful,” and “Thankful Hearts” are excellent choices.
Use a ruler and pencil to lightly mark the center of your board. Position your lettering stencil or printed template and trace the design carefully. If you have experience with hand lettering, you can write directly onto the board using a pencil before filling in the letters with paint.
Choose colors that complement your seasonal decorating scheme. Cream, dark brown, muted orange, deep burgundy, and forest green are popular Thanksgiving shades.
After completing the lettering, allow the paint to dry completely. Apply an appropriate protective finish if the sign will be exposed to dust, handling, or outdoor conditions. Follow the product instructions for drying and ventilation.
Finally, add a decorative detail such as a small painted pumpkin, a leaf illustration, or a simple ribbon. Keep the design balanced so the message remains the main focus.
Creative Design Ideas:
For a rustic appearance, leave the wood grain visible and use simple cream lettering. For a more modern look, paint the entire board in a warm neutral shade and use clean black typography. You can also create a family-specific sign with your surname and the year.
If you are decorating an outdoor porch, use weather-resistant materials and finishes suitable for exterior conditions.
Why Adults Will Love This Craft:
Wooden Thanksgiving signs are durable, customizable, and easy to incorporate into existing home decorations. Unlike many disposable seasonal crafts, a well-made wooden sign can be stored carefully and reused every year. It also makes a thoughtful handmade gift for friends, family members, or Thanksgiving hosts.
Autumn Wreath with Dried Flowers, Pinecones, and Seasonal Foliage
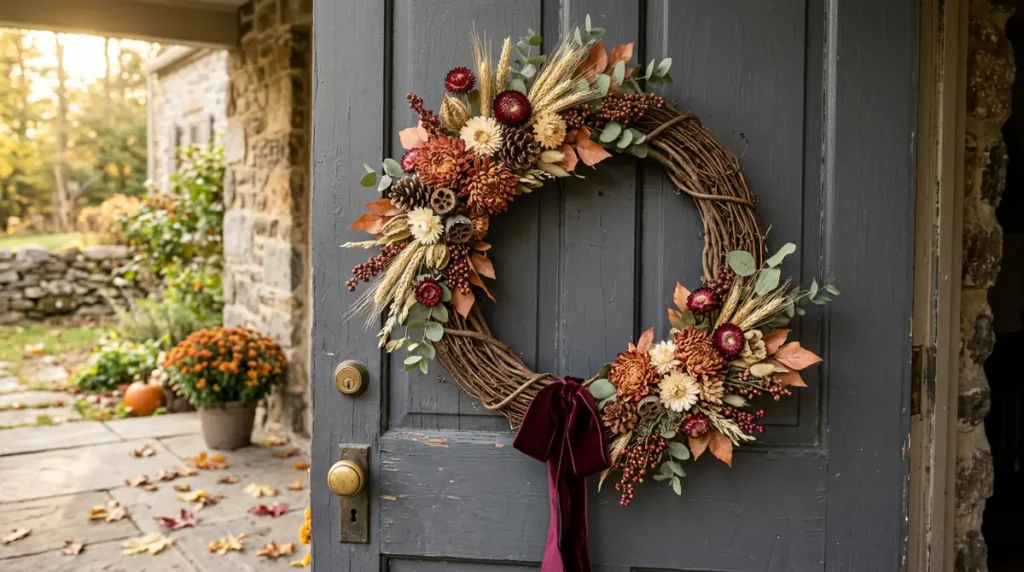
An autumn wreath is a classic seasonal decoration that instantly makes a home feel more welcoming. Hanging one on your front door is a simple way to introduce Thanksgiving colors before guests even step inside. However, instead of purchasing a ready-made wreath, you can create a personalized version using dried flowers, pinecones, seasonal foliage, and natural decorative materials.
This craft is especially enjoyable for adults who appreciate floral arrangements and nature-inspired decorating. The design possibilities are almost endless, allowing you to create something rustic, elegant, minimalist, or traditional depending on your preferences.
A handmade wreath can also be displayed indoors above a fireplace, on an interior door, or as part of a larger wall decoration arrangement.
Materials Needed:
- A grapevine or natural straw wreath base
- Dried autumn leaves
- Dried wheat stalks
- Small pinecones
- Dried flowers or artificial seasonal blooms
- Eucalyptus or other decorative greenery
- Floral wire
- Wire cutters
- Hot glue gun and glue sticks, if appropriate
- Decorative ribbon
- Hanging hook
Step-by-Step Instructions:
Begin by choosing a wreath base in the size you want. A grapevine wreath is particularly suitable because its natural texture complements dried flowers and seasonal foliage. It also provides spaces where decorative branches and stems can be inserted.
Before attaching anything, lay out all your materials on a flat surface. Divide the wreath into sections and decide where you want the largest decorative elements to appear. Planning the arrangement beforehand helps prevent overcrowding and makes the final design look more balanced.
Start by attaching greenery around the base. Use floral wire to secure eucalyptus branches or artificial foliage. Work in one direction around the wreath so the stems create a consistent visual flow.
Next, add larger decorative elements such as dried flowers and wheat stalks. Position these materials in small groups rather than spreading every piece evenly. This creates depth and makes the wreath look more natural.
Attach pinecones and smaller decorative details to fill empty spaces. If using dried materials, handle them gently because they can become brittle. Use floral wire or an appropriate adhesive to secure the decorations without damaging delicate stems.
Finally, add a ribbon to the top or bottom of the wreath. Burlap, velvet, and natural cotton ribbons all work well. Choose a color that complements the flowers and leaves rather than competing with them.
Design Ideas for Different Home Styles:
For traditional Thanksgiving decorating, combine orange leaves, red berries, golden wheat, and brown pinecones. For a farmhouse look, use eucalyptus, cream flowers, and neutral burlap ribbon. For a sophisticated arrangement, choose burgundy dried flowers, champagne-colored accents, and darker foliage.
You can also create an asymmetrical wreath by concentrating most of the decorations on one side while leaving part of the grapevine base exposed. This creates a modern, artistic appearance.
Care and Storage Tips:
Keep natural dried wreaths away from excessive moisture, direct sunlight, and strong winds. When the season ends, place the wreath in a dry storage container and avoid crushing its decorative elements.
Why This Craft Is Worth Trying:
An autumn wreath is a beautiful way to welcome guests and introduce seasonal character to your home. Although it requires some arranging and patience, the process is straightforward and allows plenty of creative freedom. A carefully stored wreath can become a treasured Thanksgiving decoration that you enjoy bringing out year after year.
DIY Thanksgiving Fabric Napkins and Personalized Table Decorations
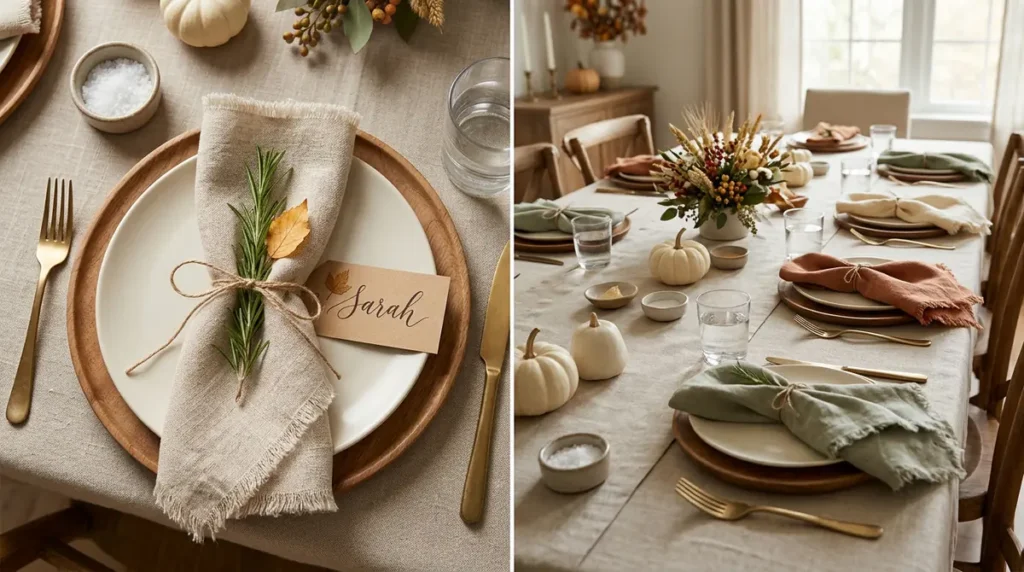
A beautifully decorated Thanksgiving table does not need expensive dinnerware or professionally arranged decorations. Sometimes, the smallest details make the biggest difference. Handmade fabric napkins and personalized place settings are an excellent way to add a thoughtful finishing touch to your holiday table.
This project is particularly useful for adults who enjoy sewing, fabric crafts, or simple home decorating. You can transform leftover cotton or linen fabric into reusable napkins that look elegant while also reducing the need for disposable paper alternatives.
Personalized table decorations also help guests feel welcome. Adding handwritten place cards or small seasonal details creates a more organized and memorable dining experience.
Materials Needed:
- Cotton or linen fabric
- Fabric scissors or rotary cutter
- Measuring tape or quilting ruler
- Sewing machine and thread, optional
- Iron and ironing board
- Natural twine or decorative ribbon
- Small dried leaves or rosemary sprigs
- Kraft cardstock for place cards
- Permanent markers or calligraphy pens
- Optional fabric paint or seasonal stencils
Step-by-Step Instructions:
Start by selecting fabric in colors that complement your Thanksgiving table. Natural linen, ivory cotton, muted mustard, terracotta, sage green, and warm brown are excellent choices.
For a standard dinner napkin, cut your fabric into approximately 18-by-18-inch squares. You can make larger or smaller napkins depending on your preferred table setting. If you want neat, professional-looking edges, fold each edge inward twice and press it with an iron.
Sew around the edges using a straight stitch to secure the folds. If you do not have a sewing machine, use fabric adhesive designed for hemming or choose a no-sew fabric method that is suitable for washable items.
Once your napkins are finished, iron them to remove wrinkles. Fold each one into a rectangle, triangle, or simple pocket shape. You can also roll the napkins and secure them with natural twine.
Next, create personalized place cards. Cut kraft cardstock into small rectangular or leaf-shaped pieces. Write each guest’s name using a dark marker or calligraphy pen. For an extra seasonal touch, attach a small dried leaf, rosemary sprig, or miniature paper pumpkin.
Place the napkin beside or on top of each dinner plate. Position the name card where guests can easily see it. If you are using decorative napkin rings, choose wooden beads, natural twine, or simple metal rings that match your table’s color scheme.
Creative Personalization Ideas:
You can make the table setting even more special by adding a short gratitude message to each place card. Another idea is to use different fabric patterns while keeping the same color palette for a coordinated but relaxed appearance.
For a rustic farmhouse table, combine natural linen napkins with wooden chargers and simple ceramic plates. For a more elegant dinner, choose ivory fabric, gold-colored details, and delicate greenery.
You can also sew a matching table runner using leftover fabric to create a coordinated Thanksgiving table arrangement.
Why Adults Will Love This Craft:
Fabric napkins and personalized place settings combine beauty with everyday usefulness. Unlike disposable decorations, reusable napkins can be washed, stored, and brought out for future holidays and family dinners. This craft is also a wonderful way to use leftover fabric and create a table setting that feels thoughtful, personal, and inviting.
Conclusion
Thanksgiving is a time to celebrate gratitude, family, friendship, and the simple joys of gathering together. Adding handmade decorations to your home is a wonderful way to make the holiday feel more personal while enjoying a relaxing and creative activity before the celebration begins.
These seven Thanksgiving crafts for adults offer something for different interests and decorating styles. From rustic pumpkin centerpieces and elegant pumpkin vases to meaningful gratitude trees, glowing mason jar lanterns, personalized wooden signs, autumn wreaths, and handmade fabric napkins, each project provides an opportunity to bring seasonal beauty into your home.
You do not need to complete every project to create a beautiful Thanksgiving atmosphere. Start with one or two crafts that match your available time, budget, and crafting skills. If you enjoy natural decorations, try a pumpkin centerpiece or autumn wreath. If you prefer meaningful family activities, a gratitude tree can become a special holiday tradition. For practical decorations, handmade napkins and wooden signs are excellent choices that you can reuse in future celebrations.
Remember that the most beautiful handmade decorations are not necessarily perfect. Small imperfections, natural textures, and personal touches often make DIY projects more charming and memorable.
Gather your supplies, choose your favorite ideas, and enjoy creating a warm, welcoming space for everyone who joins your Thanksgiving celebration. After all, the true beauty of Thanksgiving is not just in how your home looks, but in the love, appreciation, and memories shared inside it.