7 Creative Gingerbread-Themed Crafts to Cozy Up Your Home This Season
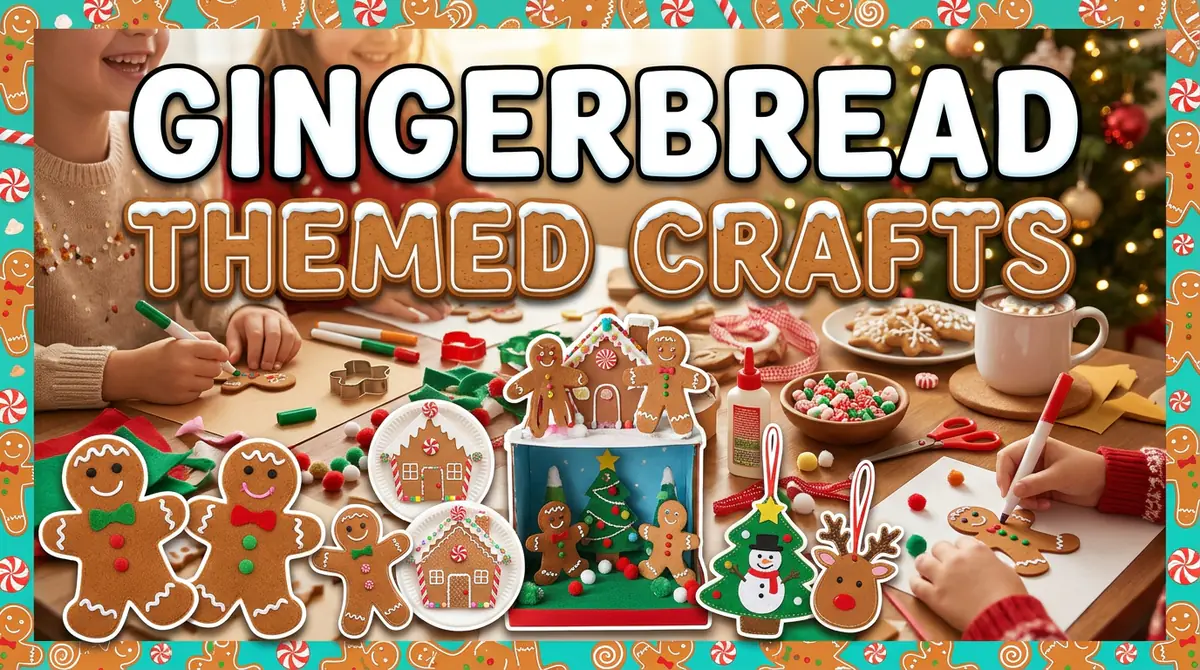
Few seasonal motifs evoke warm holiday nostalgia quite like the humble gingerbread man. With its rich, warm brown tones, crisp white icing detail, and playful folk-art charm, gingerbread decor adds a cozy, timeless feel to any room.
Whether you want to skip the sticky mess of real baking or craft reusable holiday keepsakes that last year after year, these seven easy-to-understand, step-by-step DIY projects will transform simple craft supplies into charming holiday accents.
Hand-Sewn Upcycled Sweater Gingerbread Ornaments
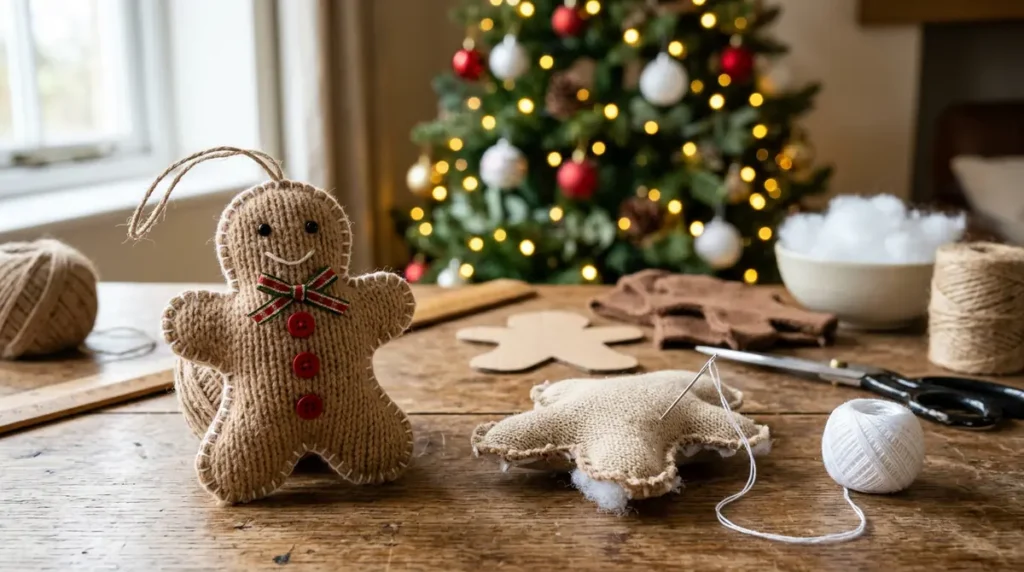
Transform worn-out tan, beige, or brown knit sweaters into soft, textured gingerbread ornaments for your tree or gift toppers.
- Materials Needed: Old knit sweater, fabric scissors, white embroidery floss, embroidery needle, pillow stuffing, craft glue, small black beads or buttons.
- Why It Works: Knit fabrics add rich tactile warmth and rustic charm to holiday trees without the rigidity of plastic or wood.
Step-by-Step Instructions
- Trace & Cut: Draw a 4-inch gingerbread silhouette onto cardboard to create a template. Trace the shape onto double-layered sweater fabric and cut out two identical pieces per ornament.
- Embellish the Face & Body: Work on the front piece before sewing the two halves together. Use white embroidery floss to stitch a simple backstitch smile and French knots or small black beads for eyes. Add tiny red buttons down the chest.
- Add “Icing” Edges: Using a blanket stitch or simple whipstitch with white embroidery floss, sew the front and back pieces together along the outer edges, leaving a 1-inch gap at the top or side.
- Stuff & Seal: Lightly pack the ornament with pillow stuffing to give it a soft, plump dimensional look.
- Attach Hanger: Insert a loop of jute twine into the top opening and stitch the gap completely closed.
Long-Lasting Salt Dough Gingerbread Village Keepsakes
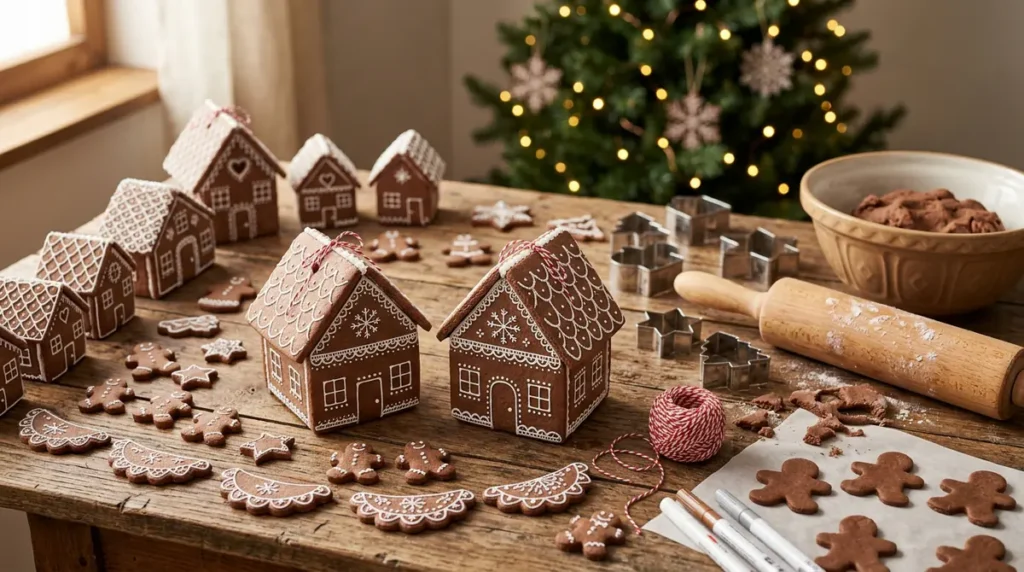
Salt dough is an affordable, non-toxic medium that bakes into sturdy, long-lasting gingerbread house cutouts, place cards, or hanging garlands.
- Materials Needed: 2 cups all-purpose flour, 1 cup table salt, 1 cup warm water, 2 tbsp cocoa powder (for natural brown coloring), white puffy paint or acrylic paint pens, cookie cutters.
- Why It Works: Cocoa powder gives the dough an authentic baked color and a faint chocolatey scent, eliminating the need for brown paint.
Step-by-Step Instructions
- Mix the Dough: Stir flour, salt, and cocoa powder together in a mixing bowl. Gradually add warm water while kneading until a smooth, pliable dough forms.
- Roll & Cut: Roll the dough out on parchment paper to approximately 1/4-inch thickness. Use gingerbread house, star, or gingerbread man cookie cutters to cut shapes.
- Prep for Hanging: If making ornaments or garlands, use a straw to punch a neat hole at the top of each piece before baking.
- Bake: Bake on a parchment-lined sheet at 250°F (120°C) for 2 to 2.5 hours, turning halfway through, until completely dry and hard. Allow to cool fully.
- Decorate with “Icing”: Draw intricate lace lines, window grids, dots, and scallops using fine-tip white puffy paint or opaque white paint pens. Let dry overnight before threading with ribbon.
Farmhouse Cinnamon Gingerbread Garland for the Mantle
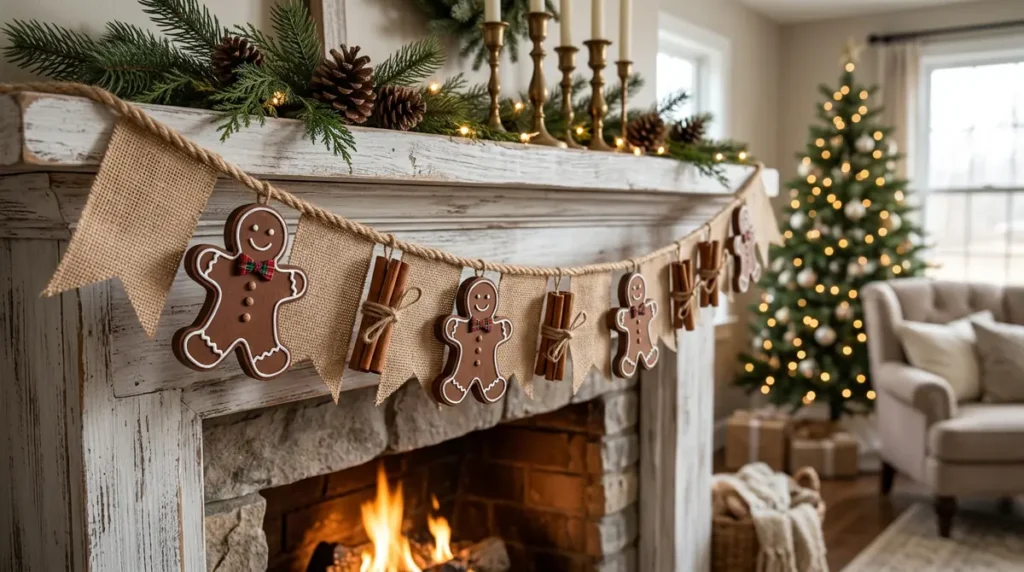
Combine rustic burlap, cinnamon sticks, and painted wooden gingerbread cutouts to create an aromatic garland for your fireplace mantle, stair railing, or holiday shelf.
- Materials Needed: Pre-cut wooden gingerbread shapes, dark brown and white acrylic paint, cinnamon sticks, burlap ribbon (2 inches wide), jute twine, hot glue gun.
- Why It Works: Mixing natural textures like burlap and twine with wood cutouts creates an elevated farmhouse aesthetic that bridges rustic and festive styles.
Step-by-Step Instructions
- Paint Base Layer: Coat wooden gingerbread shapes in dark cinnamon-brown acrylic paint. Allow to dry completely.
- Apply Icing Details: Use a fine-liner brush or white paint marker to add wavy “icing” lines along the arms, legs, and head. Add eyes, a smile, and tiny bowties.
- Assemble Cinnamon Bundles: Wrap 3–4 cinnamon sticks together with thin jute twine, tying a tight bow in the center.
- Construct Burlap Flags: Cut burlap ribbon into 6-inch strips, snip a V-notch into the bottom of each strip, and fold the top edge over a long strand of main jute twine, securing with hot glue.
- Attach Elements: Alternate gluing wooden gingerbread figures and cinnamon bundles onto the burlap flags along the length of your garland.
Plush Felt Gingerbread Garland with Ric-Rac Accents

Soft felt crafts are durable, pet-friendly, and perfect for beginner crafters who enjoy simple hand-stitching or hot-glue assembly.
- Materials Needed: Warm brown felt sheets, white wavy ric-rac trim, colorful mini pom-poms, white embroidery thread or fabric glue, fiberfill, twine.
- Why It Works: White ric-rac trim perfectly mimics classic squiggly royal icing without requiring any painting precision.
Step-by-Step Instructions
- Cut Felt Shapes: Cut pairs of gingerbread men from brown felt using a sturdy cardstock template.
- Glue Ric-Rac Icing: Cut short lengths of white ric-rac trim and glue or stitch them across the wrists and ankles of each front felt piece.
- Add Face Details: Glue two black mini pom-poms for eyes, a red pom-pom for a mouth, and two brightly colored pom-poms down the center torso for gumdrop buttons.
- Stitch & Fill: Place matching front and back felt pieces together. Use white thread to stitch around the perimeter, inserting a small pinch of fiberfill stuffing inside before sealing.
- String Together: Pass a needle threaded with heavy twine through the back of each gingerbread figure’s head to space them evenly along your hanging line.
Recycled Cardboard & Puffy Paint Gingerbread Houses
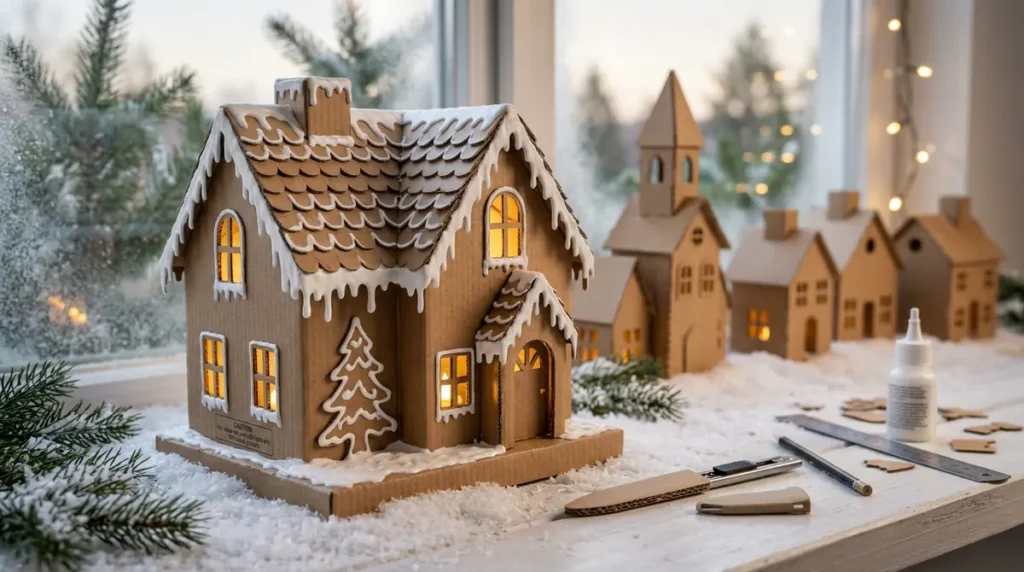
Upcycle ordinary shipping boxes into architectural, Scandinavian-inspired gingerbread houses for tabletop displays, window sills, or mantelscapes.
- Materials Needed: Corrugated cardboard boxes, utility knife/scissors, ruler, white dimensional puffy paint, hot glue, LED tea lights.
- Why It Works: Natural cardboard carries the exact warm tone of real baked gingerbread, making it an ideal eco-friendly crafting base.
Step-by-Step Instructions
- Measure & Cut House Panels: Use a pencil and ruler to outline simple house silhouettes (front, back, sides, and pitched roof pieces) on clean cardboard. Cut out carefully with a utility knife.
- Cut Out Windows & Doors: Cut square windows and arched doorways. Ensure windows are large enough to let light shine through.
- Apply Dimensional Decor: Before assembling, lay panels flat and draw decorative roof shingles, window frames, snow drips, and wall trim using white puffy paint. Let dry flat for 4–6 hours.
- Assemble the Structure: Hot glue the wall pieces together at right-angled corners, then secure the roof pieces on top.
- Add Interior Glow: Place the finished cardboard house over a battery-operated LED tea light for a warm, cozy evening window display.
Scented Mason Jar Gingerbread Candle Holders
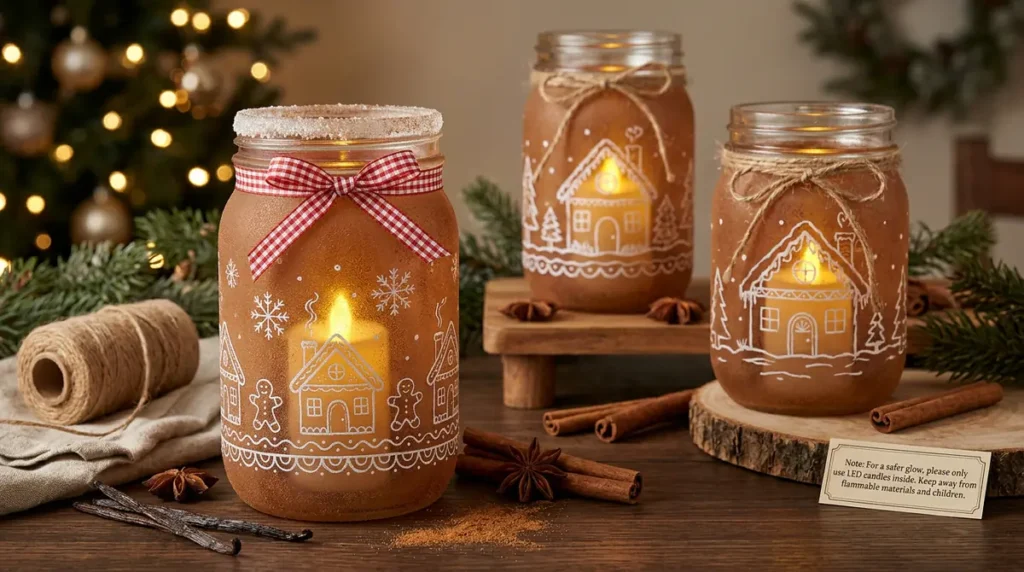
Bring sensory warmth to your space by creating glowing mason jar candle holders that diffuse subtle cinnamon and vanilla aromas when illuminated.
- Materials Needed: Clear glass mason jars, brown acrylic paint or frosted glass spray, white chalk paint pen, mod podge, ground cinnamon, tea light candles.
- Why It Works: Combining visual gingerbread aesthetics with real spice aromas creates an immersive cozy atmosphere.
Step-by-Step Instructions
- Coat the Jar: Mix brown acrylic paint with a small drop of Mod Podge and coat the outside of the glass jar evenly, or use a warm brown frosted glass spray paint. Allow to dry.
- Draw Gingerbread Accents: Use a white chalk paint pen to draw gingerbread house outlines, snowflake patterns, or gingerbread men directly onto the painted glass exterior.
- Add “Sugar” & Spice Rim: Brush a thin layer of Mod Podge around the outer rim of the jar. Roll the wet rim in a mixture of coarse white glitter and ground cinnamon.
- Finish with Ribbon: Tie a strip of red-and-white gingham ribbon or jute twine around the jar neck.
- Light It Up: Insert an LED or real wax tea light inside to cast a soft, warm glow through your hand-drawn designs.
No-Sew Fleece Gingerbread Man Pillows

Create cozy, touchable accent pillows for couches or bedrooms using soft fleece fabric and basic fabric adhesives—no sewing machine required.
- Materials Needed: 1 yard of gingerbread-brown polar fleece, white fabric puff paint or white iron-on vinyl, fabric glue or heavy-duty fusible bonding tape, polyester fiberfill stuffing, iron.
- Why It Works: No-sew techniques make large-scale plush decor accessible to crafters of all skill levels.
Step-by-Step Instructions
- Fold & Cut Outline: Fold fleece fabric in half with right sides together. Draw a large 16-inch gingerbread figure outline with tailor’s chalk and cut through both layers simultaneously.
- Apply Face & Accents: Unfold the top layer. Cut eyes and a smile from black/red felt pieces and attach them to the face using permanent fabric glue. Apply white ric-rac or white fabric paint for wrist and ankle squiggles.
- Bond the Edges: Apply heavy-duty fabric glue or heat-activated fusible bonding tape along the inner perimeter of the bottom fleece shape, leaving a 4-inch opening along one leg.
- Press & Seal: Lay the top fleece shape over the bottom, aligning edges precisely. Press firmly (or apply an iron if using bonding tape) to create a strong seam.
- Stuff & Close: Stuff the pillow generously with fiberfill until firm and plush. Apply fabric glue or tape to the 4-inch opening and hold firmly until fully sealed.
Conclusion
Gingerbread-themed crafts bring classic warmth, festive color, and nostalgic charm into holiday decorating without requiring expert artistic skills or high budget outlays. By combining simple materials like felt, cardboard, salt dough, and upcycled textiles with crisp white accents, you can create a cohesive collection of handmade decor items that last for seasons to come. Choose one or two projects to start with, set up your workspace, and enjoy the cozy process of building your own handmade holiday home.