
The Ultimate Guide to DIY Christmas Garden Crafts: 7 Stunning Projects for Winter Curb Appeal
When winter sets in and summer flower beds go dormant, outdoor spaces can easily begin to look bare and monochrome. Decorating your garden for the holidays does not require spending hundreds of dollars on fragile, mass-produced store displays. By combining natural foraged greenery, upcycled garden tools, low-voltage outdoor lighting, and weather-resistant craft supplies, you can transform your yard, front porch, and garden pathways into a warm, inviting winter sanctuary.
This ultimate step-by-step guide walks you through 7 detailed, budget-friendly DIY Christmas garden crafts. Each project includes a complete materials checklist, precise construction steps, placement strategies, and expert weatherproofing tips to ensure your outdoor decor stays vibrant all season long.
Rustic Birch Log Candle Trio
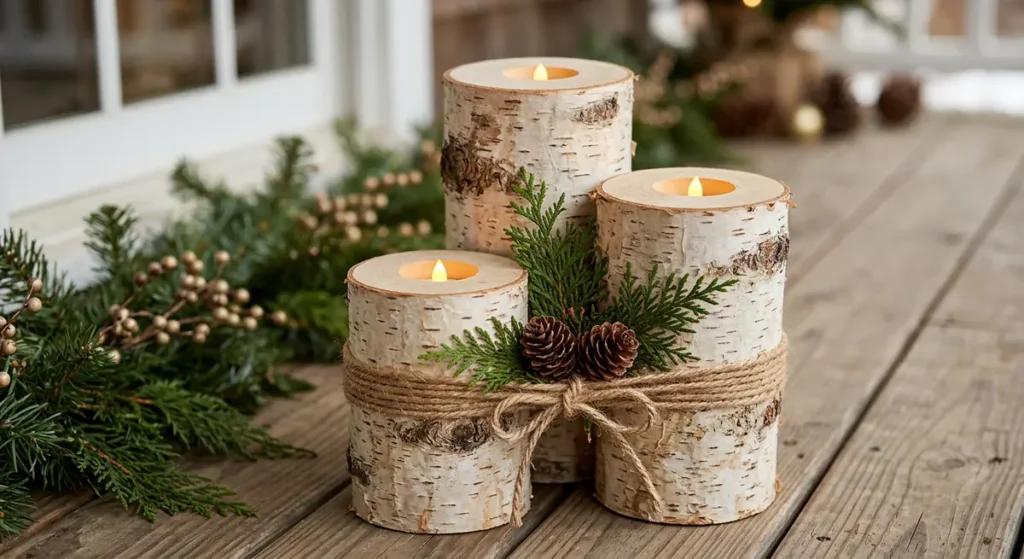
Natural white birch wood provides a stark, striking visual contrast against dark soil, evergreen foliage, or brick masonry. Grouping wood cuts at staggered heights creates immediate architectural interest on cold porch steps, patio tables, or garden borders.
Project Breakdown
- Skill Level: Easy to Intermediate
- Estimated Time: 30–45 minutes
- Estimated Cost: $5–$15 (Free if using fallen trees/foraged wood)
- Durability: High (Reusable for multiple seasons)
Complete Materials & Tools List
- 1 white birch log (or thick hardwood branch) at least 4 to 5 inches in diameter
- Hand saw, miter saw, or chainsaw
- Power drill fitted with a 1.5-inch spade bit or Forstner bit
- 3 battery-operated outdoor LED tea lights (with built-in timers)
- Heavy-duty jute twine or burlap ribbon
- Fresh cedar sprigs and small pinecones
- Clear exterior polyurethane wood sealant (optional)
Step-by-Step Instructions
- Cut the Wood to Staggered Heights: Using your saw, measure and cut your log into three distinct lengths: 6 inches, 9 inches, and 12 inches. It is critical that both the top and bottom cuts are completely level so the logs stand upright without tipping.
- Bore the Candle Recesses: Mark the center point on the top flat face of each log. Attach a 1.5-inch spade bit to your drill. Holding the log firmly, drill straight down into the center to create a recessed pocket roughly ¾ inch to 1 inch deep. This pocket should cleanly fit a standard electronic tea light so it sits flush with the top surface.
- Seal Against Moisture (Optional): If you live in a rainy or snowy climate, paint a thin coat of clear polyurethane sealant over the exposed top cut wood. This seals the open grain and prevents water from pooling inside the candle recess, which can cause splitting.
- Assemble the Cluster: Stand the three logs side-by-side in a tight triangular formation, with the tallest log at the back. Wrap heavy jute twine tightly around the center of the bundle three to four times. Tie a firm double knot at the front.
- Add Finishing Details & Lighting: Tuck a couple of short cedar sprigs and two small pinecones behind the twine knot. Drop a waterproof, battery-operated LED tea light into each drilled recess.
Placement & Styling Tips
- Porch Stairs: Place the trio on the corner of your lowest front porch step to greet arriving guests.
- Garden Borders: Nestled into bare soil beds next to winter boxwoods or hollies.
- Patio Focal Point: Set the arrangement on top of an outdoor wooden bench or table as a weatherproof centerpiece.
Frosted Mason Jar Pathway Luminaries
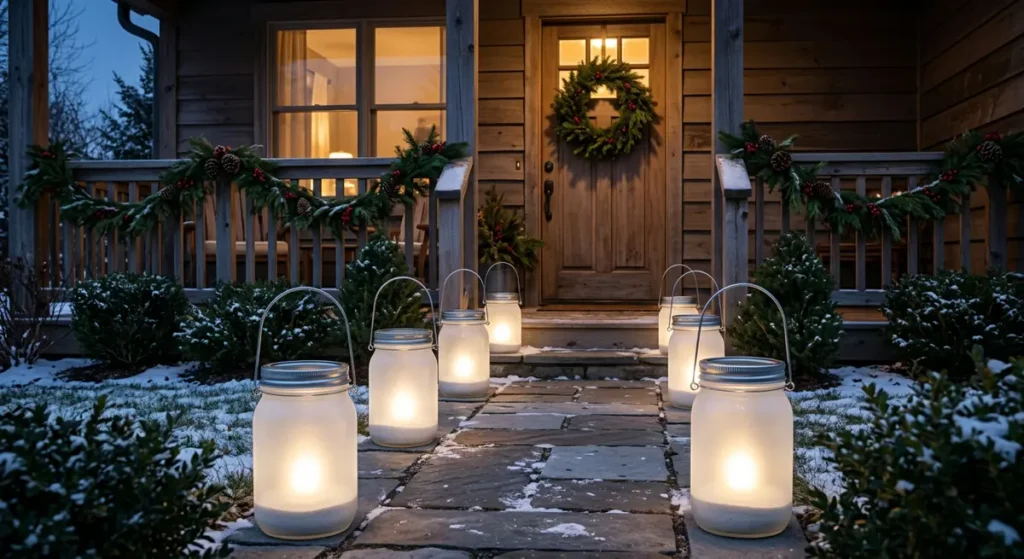
Glass mason jars easily convert into durable, weatherproof ground lanterns. Coating the glass creates a diffuse, ice-like glow along garden walkways, front entryways, and garden bed boundaries without exposing live flames to winter wind.
Project Breakdown
- Skill Level: Easy
- Estimated Time: 45 minutes (plus drying time)
- Estimated Cost: $10–$20 for a set of 6
- Durability: Medium to High (Handle glass with care during storage)
Complete Materials & Tools List
- 6 quart-sized (32 oz) wide-mouth glass mason jars with ring bands
- Frosted glass exterior spray paint
- Rubbing alcohol and paper towels
- 16-gauge copper or galvanized steel wire
- Wire cutters and needle-nose pliers
- Coarse white sand, pea gravel, or small decorative stones (for ballast)
- 6 waterproof, battery-operated LED string lights or tea lights with timers
Step-by-Step Instructions
- Clean and Frost the Glass: Thoroughly clean the outside of each jar with rubbing alcohol to remove oils and dirt. Set the jars upside down on a drop cloth in a well-ventilated space. Apply two light, uniform coats of frosted glass spray paint, allowing 20 minutes of dry time between coats.
- Form the Wire Hanging Harness: Cut a 24-inch piece of 16-gauge wire for each jar. Wrap the midpoint of the wire tightly around the threaded neck of the mason jar, right beneath the rim. Twist the ends together tightly using needle-nose pliers to lock it into place. Bend the excess wire up and over the top opening to create an arched handle, wrapping the opposite end into the neck wire on the far side.
- Add Weight Ballast: Pour roughly 2 inches of coarse white sand or pea gravel into the bottom of each dry jar. This serves a dual purpose: it weighs the jar down against high winter winds and provides a solid base for your lighting.
- Install the LED Lights: Take your waterproof battery-operated LED light string, uncoil it, and lower it into the jar, letting it rest on the sand. Secure the compact battery pack to the underside of the flat lid disk using outdoor double-sided tape, or rest it gently on top of the sand.
- Seal the Lid: Screw the metal outer band ring tightly over the jar to seal out rain, sleet, and snow.
Placement & Styling Tips
- Pathway Lining: Space the jars evenly 3 to 4 feet apart down both sides of your front sidewalk.
- Shepherd’s Hooks: Hang the wire handles from small metal garden shepherd’s hooks positioned inside flower beds to elevate the light off the ground.
- Deck Posts: Line them along outer deck railings or balcony ledges for secondary ambient lighting.
Oversized Glowing Globe Lawn Ornaments
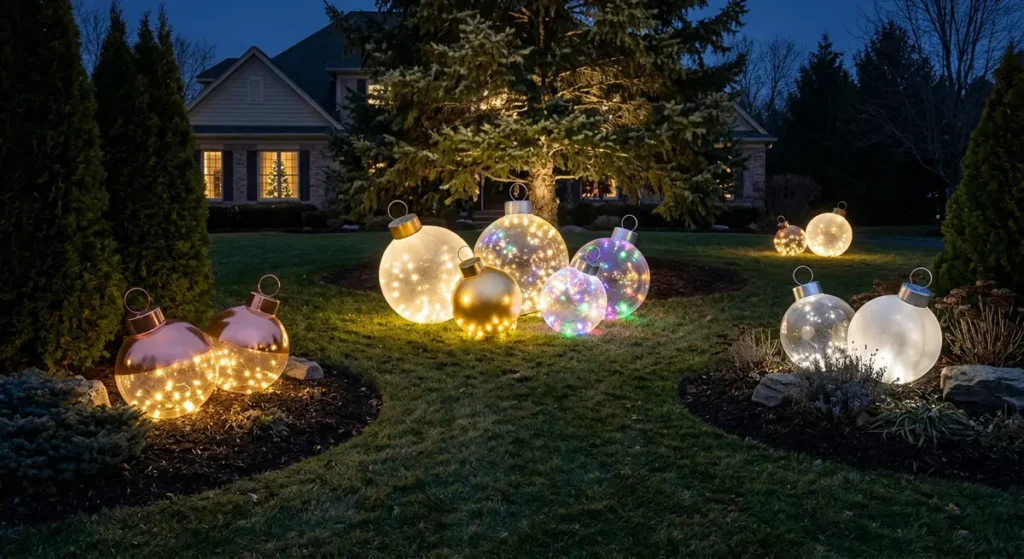
Large-scale lawn decor creates striking visual impact across broad garden spaces. Repurposing acrylic light globes into oversized ornament balls mimics high-end commercial holiday displays at a fraction of the retail cost.
Project Breakdown
- Skill Level: Intermediate
- Estimated Time: 1 hour
- Estimated Cost: $15–$25 per ornament
- Durability: High (Weather-resistant plastic construction)
Complete Materials & Tools List
- 10-inch or 12-inch clear or frosted acrylic post light globes (available at home improvement stores)
- Plastic deli container lids or small aluminum tart pans (for ornament caps)
- Metallic silver, gold, or copper exterior spray paint
- Power drill with a ¼-inch drill bit
- Outdoor-rated 50-count LED string lights (warm white or multi-colored)
- Clear exterior-grade silicone adhesive
- Heavy U-shaped wire garden staples (for lawn anchoring)
Step-by-Step Instructions
- Craft the Ornament Cap: Take a rigid plastic deli lid or mini aluminum pan. Apply two coats of metallic silver or gold exterior spray paint to match traditional Christmas ornament tops. Once dry, drill a ¼-inch hole directly through the center top of the cap. Thread a 6-inch piece of folded wire through the hole to make a top loop, securing the wire ends flat on the underside with hot glue.
- Install the Lighting Strand: Feed an entire 50-count strand of outdoor LED string lights inside the hollow plastic globe. Leave the main plug tail extending 6 to 12 inches out of the bottom neck opening so it can easily connect to an outdoor extension cord.
- Attach the Metallic Cap: Apply a continuous bead of clear silicone adhesive around the top top of the globe opposite the bottom neck opening. Press your painted metallic cap firmly over the silicone seal. Allow it to cure fully for 24 hours.
- Weatherproof the Base Opening: Ensure the bottom neck opening (where the electrical plug exits) remains slightly clear to allow any internal condensation to drain naturally without damaging the LEDs.
Placement & Styling Tips
- Lawn Clusters: Group 3 or 5 globes of varying sizes together under a large shade tree or in the middle of a front lawn.
- Garden Bed Nesting: Tightly nestle the globes into empty mulch beds surrounded by low evergreen ground cover.
- Anchoring Secret: Push heavy U-shaped garden landscape staples over the base lip of the globes into the soil to prevent them from blowing away during winter storms.
Pinecone & Evergreen Twig Stars
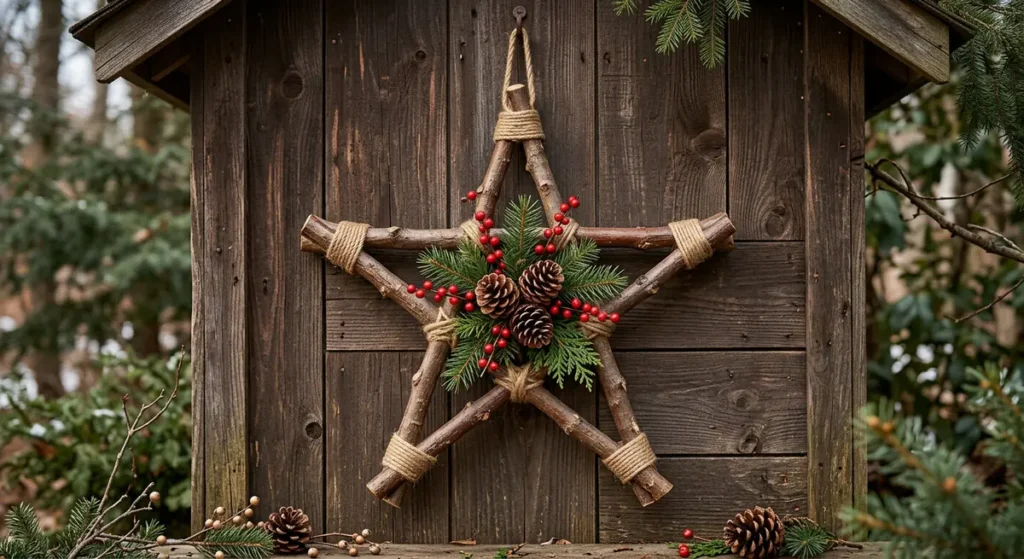
Combining natural branches, pinecones, and fresh winter foliage creates a rustic star layout. These lightweight structures serve as focal points for garden structures that usually lack color during the cold months, such as wooden gates, privacy fences, and garden sheds.
Project Breakdown
- Skill Level: Easy
- Estimated Time: 30–45 minutes
- Estimated Cost: Under $10 (Mostly foraged materials)
- Durability: Medium to High
Complete Materials & Tools List
- 5 straight tree branches or fallen twigs (roughly 15 to 18 inches long, ½ inch thick)
- Pruning shears
- Heavy jute twine or 22-gauge green floral wire
- Weatherproof hot glue gun or exterior craft glue
- Large pinecones (foraging recommendation: Sugar Pine or Ponderosa)
- Fresh cut sprigs of noble fir, white pine, or cedar
- Faux weatherproof red winterberry stems
Step-by-Step Instructions
- Sort and Trim Branches: Gather 5 straight branches of uniform thickness. Use pruning shears to trim all 5 branches to the exact same length (18 inches works best for visible fence decor).
- Form the Basic Five-Point Star: Lay the branches out on a flat working surface in a classic overlapping five-point star pattern:
- Form an inverted ‘V’ with the first two branches.
- Lay the third branch diagonally across the ‘V’.
- Run the fourth branch horizontally across the frame.
- Connect the fifth branch from the bottom corner back up to the top peak.
- Lash the Joints Firmly: At each of the 5 outer points where the branch tips meet, wrap floral wire or jute twine around the intersection 6 to 8 times. Pull tightly and knot securely. Repeat this lashing process at the 5 inner points where the branches cross over one another inside the star frame to make it completely rigid.
- Decorate the Center Junction: Bundle 3 short sprigs of fresh evergreen greenery, a cluster of red berries, and 2 medium pinecones together at their stems using floral wire. Wire this focal bundle directly onto the middle intersecting branches of the star frame.
- Attach the Hanger: Tie an 8-inch loop of thick jute twine around the top point of the star for easy mounting.
Placement & Styling Tips
- Garden Gates: Mount a star directly onto the center of an entry gate.
- Outbuildings: Hang multiple stars in a row along the wall of a garden shed or detached garage.
- Fence Posts: Place a star on prominent corner fence posts surrounding your yard perimeter.
Upcycled Tomato Cage Christmas Trees
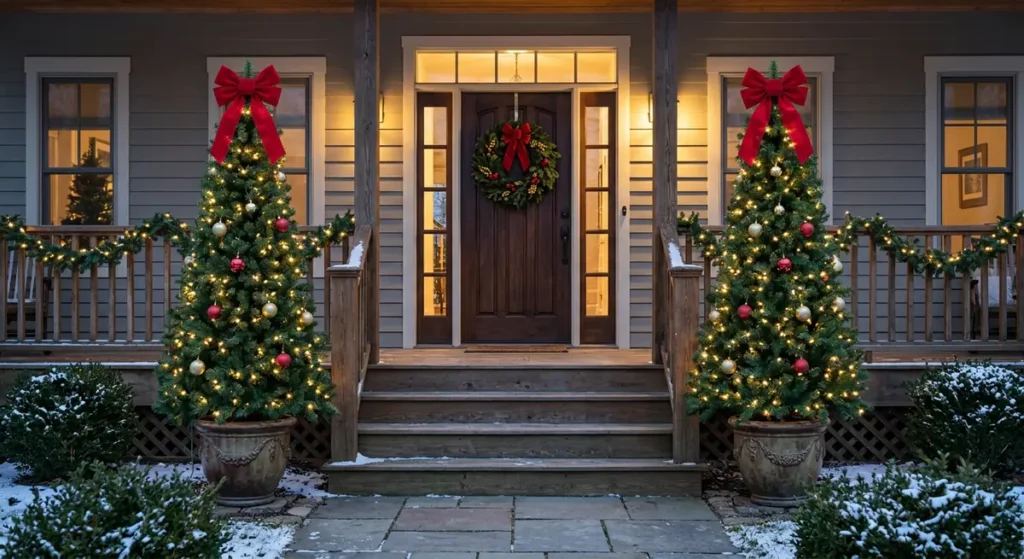
Summer tomato cages often sit unused in garages once harvesting season ends. By turning them upside down and wrapping them in evergreen garland and lights, you create durable, weather-resistant mini Christmas trees suitable for framing entryways and driveway borders.
Project Breakdown
- Skill Level: Easy
- Estimated Time: 45 minutes per tree
- Estimated Cost: $15–$30 per tree
- Durability: High (Sturdy metal frame withstands winter snow load)
Complete Materials & Tools List
- 3-ring or 4-ring wire tomato cages (4 to 5 feet tall)
- Heavy-duty 8-inch green zip ties
- 25 to 35 feet of artificial outdoor faux pine garland (or fresh spruce garland)
- 1 strand of 100 outdoor LED mini lights (warm white or green wire)
- Outdoor shatterproof ornament balls or weather-resistant bows (optional)
- Brick or concrete paver (for weight anchoring)
Step-by-Step Instructions
- Construct the Conical Frame: Turn the wire tomato cage upside down so the widest circular wire ring rests on the ground and the open pointed vertical legs extend upward. Gather all 3 or 4 pointed wire ends together at the top to form a sharp cone peak. Bind these wire legs together tightly using two heavy-duty zip ties.
- Attach the Evergreen Garland: Starting at the very top point of the frame, fasten the end of your evergreen garland to the metal frame with a zip tie. Wrap the garland tightly down around the cage in a continuous spiral, working toward the broad base. Ensure the garland fully covers the horizontal wire rings so no raw metal frame remains visible. Secure the garland with green zip ties every 8 to 10 inches.
- Weave the Lighting Strand: Starting from the base plug end, wrap your strand of outdoor LED mini lights around the tree, working from bottom to top. Push the lighting wire slightly inward toward the center frame so the bulbs nestle naturally between the pine needles.
- Add Optional Accent Ornaments: Use floral wire to firmly attach shatterproof outdoor ornaments or a weather-resistant bow to the top peak of the tree.
Placement & Styling Tips
- Flanking Entryways: Place a matching pair on opposite sides of your front door porch steps.
- Planter Inserts: Insert the base wire ring directly into large empty ceramic lawn pots to elevate the trees off the ground.
- Lawn Line: Set up a series of 3 to 5 trees in a line along your front yard flower bed to define your property border.
- Anchoring Tip: Place a heavy brick or garden paver over the bottom wire ring inside the tree base to keep it weighted down against heavy winter winds.
Peanut Butter & Birdseed Pinecone Feeder Ornaments
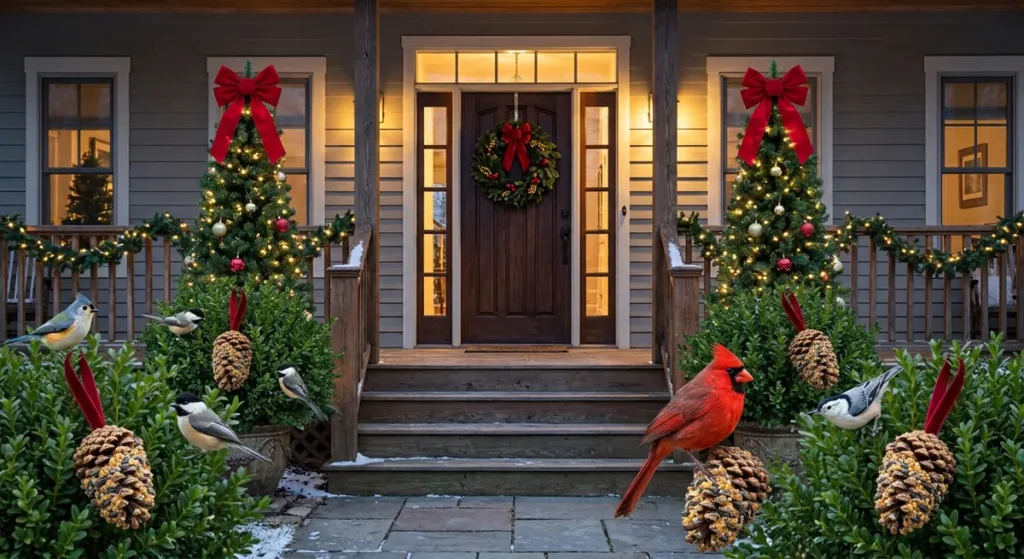
Incorporating wildlife feeding into holiday decor brings movement and color to the winter garden. These edible pinecone ornaments attract seed-eating bird species—such as Northern Cardinals, Chickadees, Nuthatches, and Titmice—during months when natural food sources are scarce.
Project Breakdown
- Skill Level: Beginner / Great for Kids
- Estimated Time: 20–30 minutes
- Estimated Cost: Under $10
- Durability: Temporary (Designed to be consumed over 1–2 weeks)
Complete Materials & Tools List
- Large, fully open pinecones (Sugar Pine, Jeffrey Pine, or slash pinecones work best)
- Creamy natural peanut butter, almond butter, or vegetable tallow (lard)
- High-grade wild birdseed mix (rich in black oil sunflower seeds, white proso millet, and cracked corn)
- Butter knife or silicone spatula
- 1/2-inch wide velvet red ribbon or jute twine
- Deep pie pan or rimmed baking sheet
Step-by-Step Instructions
- Attach the Hanging Ribbon First: Before applying any food coatings, cut a 14-inch length of red velvet ribbon or heavy twine. Wrap the midpoint of the ribbon around the upper scales near the narrow top of the pinecone. Tie a secure double knot underneath the scales, leaving a 6-inch loop at the top for hanging. (Tying the hanger after applying peanut butter makes a mess).
- Spread the Binding Base: Using a butter knife or spatula, apply a generous layer of peanut butter or lard over the entire pinecone surface. Work the coating deep into the open crevices between the woody scales to maximize the amount of seed the pinecone can hold.
- Roll and Press the Birdseed: Pour your wild birdseed mix into a wide rimmed baking sheet, spreading it into a uniform layer. Lay the coated pinecone into the seed and press down firmly. Roll the pinecone back and forth until every square inch of peanut butter is completely covered with seeds.
- Chill to Set: Place the finished pinecone ornaments on a wax-paper-lined tray and put them in the freezer for 1 hour. Chilling hardens the fats in the peanut butter, preventing the seeds from sloughing off during outdoor installation.
Placement & Styling Tips
- Bare Deciduous Trees: Hang them on lower branches of leafless trees (like maple, birch, or oak) at eye level for high indoor visibility.
- Arbors & Trellises: Suspend them from garden structures near your home’s main windows so you can easily observe feeding birds.
- Weather Protection: Hang feeders under natural evergreen canopies or porch overhangs to shield the seed from direct rain and heavy snow accumulation.
Tiered Porch & Garden Urn Evergreen Towers
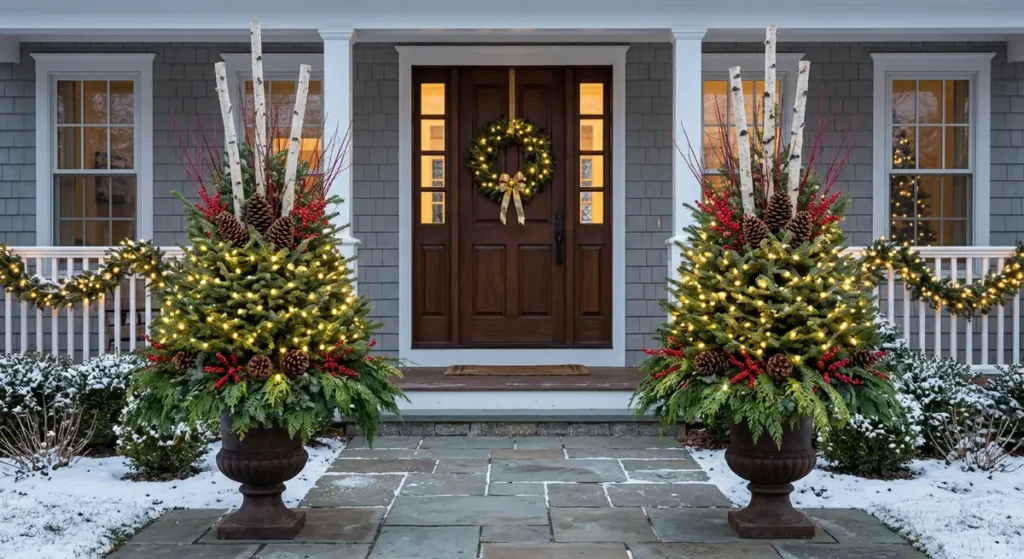
Empty summer planters and garden urns often sit vacant during the winter months. Transforming them into lush, multi-textured evergreen arrangements adds architectural height, green foliage, and natural texture to entryways when flowers are no longer blooming.
Project Breakdown
- Skill Level: Intermediate
- Estimated Time: 45–60 minutes per planter
- Estimated Cost: $20–$40 per urn
- Durability: High (Fresh cut greenery stays fresh in cold winter climates for up to 2–3 months)
Complete Materials & Tools List
- Large outdoor planter urn or heavy container
- Dense potting soil, coarse sand, or rigid wet floral foam blocks
- 3 white birch poles (4 to 5 feet high, 2 inches in diameter)
- Fresh cut evergreen boughs:
- Noble Fir or Fraser Fir (for stiff central structure)
- Western Red Cedar or Incense Cedar (for broad middle filler)
- White Pine or Princess Pine (for soft, draping edges)
- Red twig dogwood branches or curly willow stems
- Large pinecones mounted on wooden floral picks
- Artificial red winterberry or holly stem sprays
- Hand pruning shears
Step-by-Step Instructions
- Prepare the Structural Anchor: Fill your planter or urn nearly to the brim with tightly packed potting soil or sand. If using soil from summer flowers, simply leave it in place. Dampen the soil thoroughly—this provides the weight required to keep top-heavy branches upright during high winds.
- Anchor the Central Height (Birch Branches): Push 3 tall white birch poles into the center of the soil, sinking them at least 8 to 10 inches deep so they stand rigid. Stagger their placement slightly so one main pole stands higher than the other two.
- Install the “Thriller” Category (Upright Greenery): Cut stiff Noble Fir or Fraser Fir boughs into 24-to-30-inch lengths. Stripping the bottom 4 inches of needles from each stem, drive them deeply into the soil immediately surrounding the birch poles. These provide the central vertical shape of the arrangement.
- Add the “Filler” Category (Broad Greenery): Cut broad fan-shaped Western Red Cedar branches into 18-to-24-inch lengths. Insert these stems at a slight outward angle around the fir boughs, filling in the mid-section width of the planter to hide the container rim.
- Incorporate the “Spiller” Category (Cascading Greenery): Cut soft White Pine boughs into 12-to-18-inch lengths. Insert them horizontally around the very outer edge of the urn so they drape down over the container rim.
- Add Color & Texture Accents: Insert 3 to 5 bright red twig dogwood branches near the center birch poles for a pop of color. Tuck wired pinecones and weather-resistant red berry sprays into the middle cedar layer to complete the design.
Placement & Styling Tips
- Front Door Flanking: Place two matching urn arrangements on opposite sides of your front door to frame your entryway.
- Patio Corners: Position them in bare corners of rear outdoor living spaces or decks.
- Freeze-Lock Secret: Once your arrangement is complete, water the soil base heavily one final time. When temperatures drop below freezing, the wet soil freezes solid, locking the stems into place like concrete for the remainder of the winter season.
Quick-Reference Project Comparison
| Project Name | Primary Materials | Key Visual Placement | Estimated Crafting Time |
| 1. Birch Log Candle Trio | Birch logs, LED tea lights, jute twine | Porch steps, garden borders, outdoor tables | 30–45 mins |
| 2. Frosted Mason Jar Luminaries | Mason jars, frosted spray, wire, sand | Pathway borders, shepherd’s hooks, deck rails | 45 mins |
| 3. Oversized Glowing Globes | Light globes, LED lights, metallic spray paint | Open lawn areas, underneath large trees | 60 mins |
| 4. Twig & Pinecone Stars | Fallen branches, pinecones, fir sprigs, twine | Garden gates, wooden sheds, outer fences | 30–45 mins |
| 5. Upcycled Tomato Cage Trees | Wire tomato cages, garland, zip ties, mini lights | Entryway steps, garden pots, driveway borders | 45 mins |
| 6. Birdseed Pinecone Feeders | Large pinecones, peanut butter, birdseed, ribbon | Deciduous tree branches, arbors, trellises | 20–30 mins |
| 7. Evergreen Urn Towers | Birch poles, mixed fir/cedar boughs, outdoor urn | Front porch entryways, patio corner displays | 45–60 mins |
3 Essential Rules for Weatherproofing Outdoor Holiday Crafts
To ensure your handmade Christmas garden crafts survive wind, rain, freezing ice, and heavy snow, apply these basic outdoor maintenance rules:
- Always Use Battery-Operated LED Lighting with Timers: Standard indoor lights will short-circuit when exposed to rain or melting snow. Ensure all string lights, battery packs, and tea lights carry an explicit IP44 or higher waterproof rating. Using lights with built-in 6-hour timers eliminates the need to manually switch on your garden crafts in freezing weather.
- Anchor Against Winter Winds: Winter winds easily displace lightweight plastic or wire crafts. Always use U-shaped metal garden staples to pin down lawn globes, add 2 inches of sand ballast to mason jar lanterns, and place heavy pavers inside the bases of wire tomato cage trees.
- Protect Organic Materials from Moisture Damage: Raw pinecones close up tight when exposed to moisture. Spray pinecones with a light coat of clear acrylic spray before assembling your crafts to preserve their wide-open shape. For living evergreen boughs in urn planters, water the soil deeply right before a freeze to preserve needle freshness and lock the branches into place.