7 Beautiful DIY Wall Hanging Crafts to Decorate Your Home
DIY wall hanging crafts are a wonderful way to transform plain walls into beautiful, creative, and personalized spaces without spending a lot of money on expensive home decorations. Whether you want to decorate your living room, bedroom, hallway, children’s room, or home office, handmade wall hangings can add warmth, personality, color, and texture to almost any interior. The best part is that you do not need to be a professional artist or an experienced crafter to create attractive wall decorations. With a few affordable materials, some creativity, and simple crafting techniques, you can make unique wall hangings that match your personal style.
One of the biggest advantages of DIY wall hanging crafts is the freedom to customize every detail. You can choose your favorite colors, experiment with different textures, reuse leftover materials, and create decorations that perfectly complement your furniture and room design. From rustic wooden decorations and elegant macrame pieces to colorful yarn designs and handmade paper art, there are countless possibilities to explore.
These crafts are also suitable for different skill levels. Beginners can start with simple fabric, paper, and yarn projects, while experienced crafters can experiment with weaving, embroidery, layered designs, and mixed-media artwork. Many of these projects are inexpensive, making them excellent options for seasonal decorating, handmade gifts, and creative weekend activities.
In this guide, you will discover seven beautiful DIY wall hanging crafts, including the materials required, step-by-step instructions, helpful decorating ideas, and important tips for achieving attractive results. Each project offers a different way to bring creativity and charm into your home.
DIY Macrame Wall Hanging
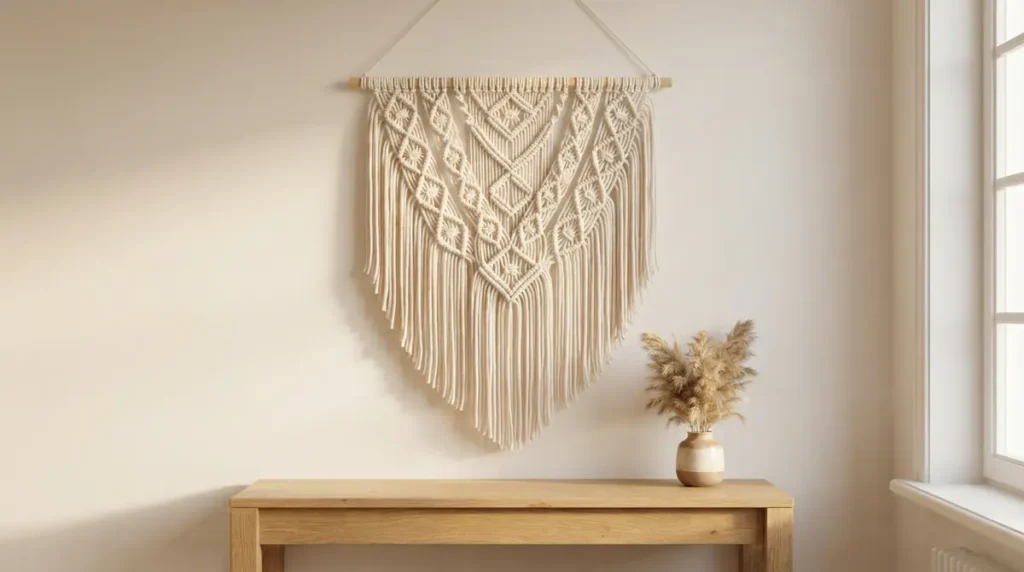
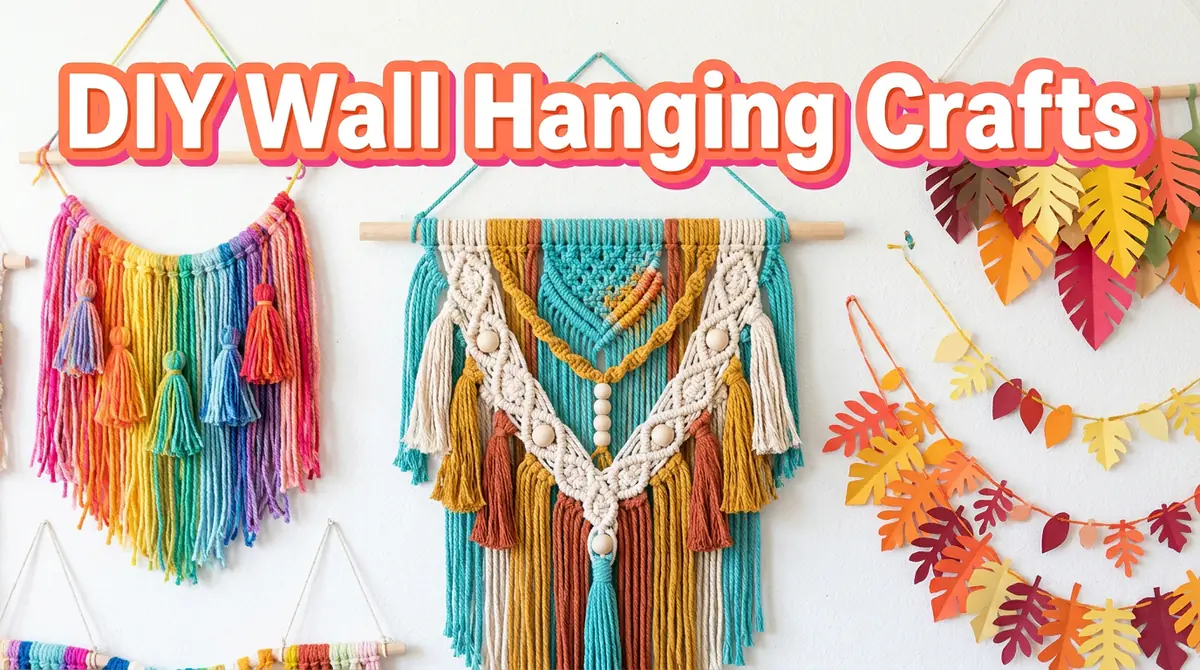
Macrame wall hangings are beautiful handmade decorations that bring a natural, cozy, and bohemian appearance to any room. They are created by tying different types of knots using cotton cords, ropes, or macrame string. The finished designs can include beautiful patterns, decorative fringes, geometric shapes, and layered textures. Because macrame uses simple knotting techniques rather than complicated tools, it is an excellent project for beginners who want to learn a new craft while creating something useful for their home.
One of the best things about macrame wall art is that it can be customized in many ways. You can make a small and simple hanging for a bedroom corner or create a large statement piece for your living room. Natural cream, beige, ivory, and brown cords create a traditional bohemian appearance, while colored cords can introduce a modern and playful touch.
Materials Needed
- 3–5 mm cotton macrame cord.
- One wooden dowel or natural wooden branch.
- Measuring tape or ruler.
- Sharp scissors.
- Comb or macrame brush for creating fringes.
- Small hooks or wall-hanging hardware.
- Optional wooden beads and decorative rings.
Step-by-Step Instructions
1. Prepare the wooden dowel: Choose a wooden dowel that matches the width of your desired wall hanging. Clean it properly and lightly sand rough edges if necessary.
2. Cut the cords: Measure and cut several equal lengths of macrame cord. The length depends on your design, but beginners can start with approximately 1.5–2 meters per cord.
3. Attach the cords: Fold each cord in half and attach it to the wooden dowel using a lark’s head knot. Continue adding cords until the dowel has enough strands for your design.
4. Create the first row: Begin with basic square knots or alternating square knots. These techniques create attractive patterns and help you become comfortable working with macrame cord.
5. Add decorative patterns: Experiment with diagonal knots, spiral knots, and diamond shapes. You can combine different knotting techniques to make your wall hanging look more detailed.
6. Create the fringe: Leave the bottom strands loose and trim them into a straight, V-shaped, or curved pattern. Use a comb to gently brush the ends for a soft appearance.
7. Add finishing details: Attach wooden beads or decorative rings if desired. Finally, hang your finished creation using suitable wall hardware.
Important Tips
- Use soft cotton cord because it is easier to knot and comb.
- Keep the knots evenly spaced for a balanced appearance.
- Practice difficult knots on a small sample before starting the main design.
- Avoid pulling the cords too tightly because uneven tension can distort the pattern.
- Choose a dowel strong enough to support the finished decoration.
Decorating Ideas
A cream macrame hanging looks especially attractive above a bed, sofa, reading chair, or wooden console table. You can also create a matching set of three smaller macrame hangings in different lengths. For a more natural appearance, combine cotton cord with wooden beads, dried flowers, or small decorative branches.
This craft is especially suitable for people who love minimalist, farmhouse, rustic, and bohemian interior styles. It also makes a thoughtful handmade housewarming gift.
DIY Yarn Wall Hanging
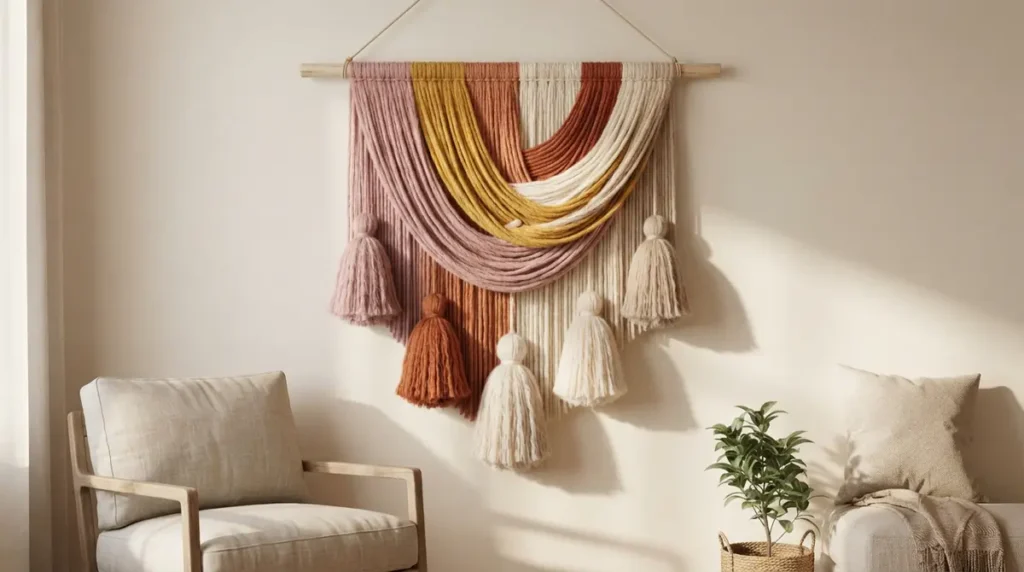
A yarn wall hanging is a colorful and creative decoration that can make an ordinary wall look more attractive. This project is particularly suitable for beginners because it does not require advanced crafting skills or expensive supplies. You can create beautiful designs using leftover yarn, embroidery thread, wooden sticks, or simple dowels. By combining different colors, textures, and yarn thicknesses, you can produce a decorative piece that reflects your personality and matches your home’s color scheme.
Yarn wall hangings are also excellent for using leftover craft materials. Instead of throwing away small amounts of yarn from knitting or crochet projects, you can turn them into attractive wall decorations. You can create rainbow patterns, abstract shapes, colorful stripes, tassels, or layered fringes.
Materials Needed
- Different colors of yarn or wool.
- One wooden dowel or smooth branch.
- Scissors.
- Measuring tape.
- Cardboard for making tassels.
- Needle for adding optional decorative details.
- Small hanging string.
- Optional wooden beads and felt decorations.
Step-by-Step Instructions
1. Choose a color combination: Select three to six yarn colors that complement one another. For a calm bedroom decoration, try cream, beige, dusty pink, and brown. For a children’s room, choose brighter colors.
2. Prepare the wooden support: Select a wooden dowel or branch that is wide enough for your desired design. Make sure it is clean and free from sharp edges.
3. Cut the yarn: Cut several pieces of yarn to your preferred length. You can use different lengths to create a layered appearance.
4. Attach the yarn: Fold each strand in half and loop it around the wooden dowel. Pull the loose ends through the loop and tighten gently. Repeat this process until the desired width is covered.
5. Create different sections: Arrange yarn colors in stripes, gradients, or alternating patterns. You can also group several strands together to create thicker sections.
6. Add decorative tassels: Wrap yarn around a piece of cardboard several times, tie one end, cut the opposite end, and secure the top to create a tassel. Attach these tassels to selected areas.
7. Trim the bottom: Use scissors to create a straight, diagonal, rounded, or pointed lower edge. Check the overall shape before making the final cuts.
8. Add finishing details: Attach a hanging string to both ends of the dowel and add beads or small decorative elements if desired.
Important Tips
- Combine thick and thin yarn to create interesting textures.
- Avoid using too many unrelated colors because the design may look overcrowded.
- Cut yarn slightly longer than necessary so you have enough material for trimming.
- Use a comb to separate wool strands and create a fluffy appearance.
- Keep the top section evenly attached to prevent the hanging from becoming unbalanced.
Creative Design Ideas
You can make a rainbow yarn hanging with curved layers of colorful strands, a neutral-toned design with soft cream and brown yarn, or an ombre decoration that gradually changes from light to dark shades.
Another attractive idea is to create a yarn wall hanging with oversized tassels at the bottom. This works particularly well in bedrooms, nurseries, playrooms, and creative workspaces.
Yarn wall hangings are affordable, customizable, and enjoyable to make. They are also a wonderful way to introduce handmade decorations into your home without needing complicated tools or techniques.
DIY Wooden Wall Hanging Crafts
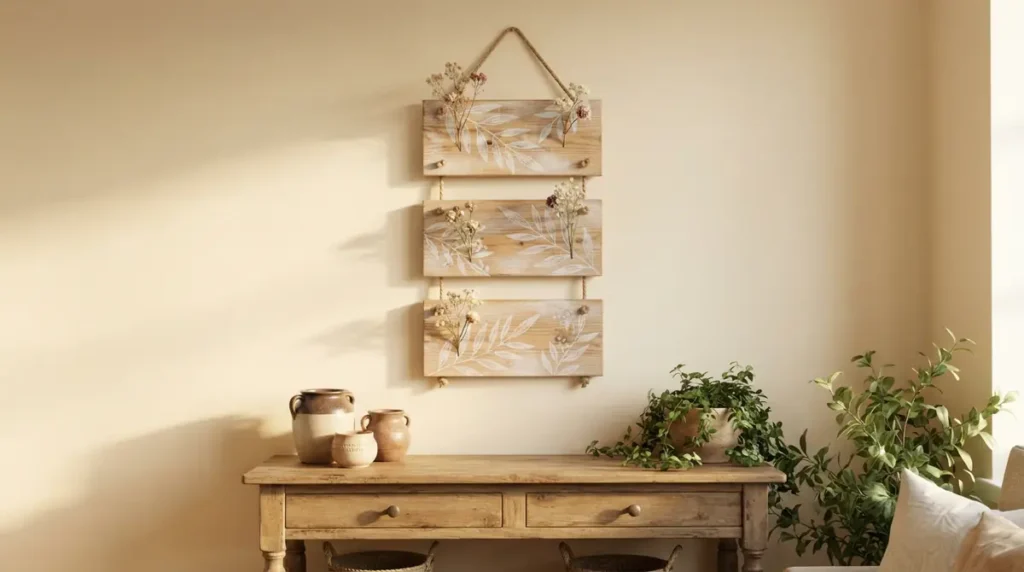
Wooden wall hangings are an excellent choice for anyone who loves rustic, farmhouse, Scandinavian, or natural home decorations. Wood has a warm and timeless appearance that works beautifully with different interior styles. You can use wooden slices, small boards, leftover craft sticks, thin plywood, or natural branches to create attractive decorative pieces.
One reason wooden wall art is so popular is its versatility. You can paint simple patterns, write meaningful quotes, attach artificial flowers, create geometric designs, or combine several wooden pieces into one larger decoration. Depending on your preferred style, the finished project can look modern, rustic, minimalist, or traditional.
This craft is also a good opportunity to reuse leftover wood from other DIY projects. Small wooden pieces that might otherwise be discarded can become attractive decorations with only a little sanding, painting, and creativity.
Materials Needed
- Wooden slices, thin wooden boards, or craft sticks.
- Sandpaper.
- Acrylic paint or wood stain.
- Paintbrushes.
- Pencil and ruler.
- Wood glue or suitable craft adhesive.
- Jute rope or hanging cord.
- Optional stencils, artificial flowers, and decorative beads.
Step-by-Step Instructions
1. Choose your wooden base: Select a wooden board, circular wood slice, or several smaller pieces. Decide whether you want one large hanging or a collection of smaller decorations.
2. Prepare the surface: Use sandpaper to smooth rough edges and remove loose splinters. Wipe away the dust with a dry cloth before painting.
3. Plan your design: Sketch your desired pattern using a pencil. You can choose flowers, leaves, geometric shapes, abstract lines, or simple inspirational words.
4. Apply the background color: Paint the wooden surface with your chosen acrylic color. Neutral shades such as white, beige, gray, and light brown create a natural appearance. Allow the paint to dry completely.
5. Add decorative details: Use a smaller brush to paint your design. You can also attach artificial flowers, small wooden shapes, or decorative lettering.
6. Create a layered arrangement: If using multiple wooden pieces, arrange them on a flat surface before attaching them. Experiment with different sizes and spacing until the composition looks balanced.
7. Attach the hanging cord: Secure jute rope or suitable hanging hardware to the back. Make sure the attachment can support the total weight.
8. Finish and inspect: Check the edges, remove excess adhesive, and allow everything to dry before hanging the decoration.
Important Tips
- Always sand unfinished wood before painting or handling it.
- Use appropriate adhesive for the type and weight of the materials.
- Apply paint in thin layers to prevent uneven surfaces.
- Keep the design simple if you prefer a modern appearance.
- Seal painted wood with a suitable clear finish when additional surface protection is needed.
Creative Decorating Ideas
A wooden welcome sign can look beautiful near an entrance, while a collection of small painted wooden circles can create an attractive gallery wall. You can also make a rustic hanging using three wooden boards connected vertically with jute rope.
For a more personalized decoration, paint family initials, meaningful dates, botanical illustrations, or short inspirational messages. You can even create seasonal wooden wall hangings featuring autumn leaves, Christmas trees, or spring flowers.
Wooden wall hangings are especially suitable for living rooms, kitchens, entryways, and dining areas. They combine natural materials with personal creativity, making them a beautiful and long-lasting addition to your home.
DIY Fabric Wall Hanging Crafts
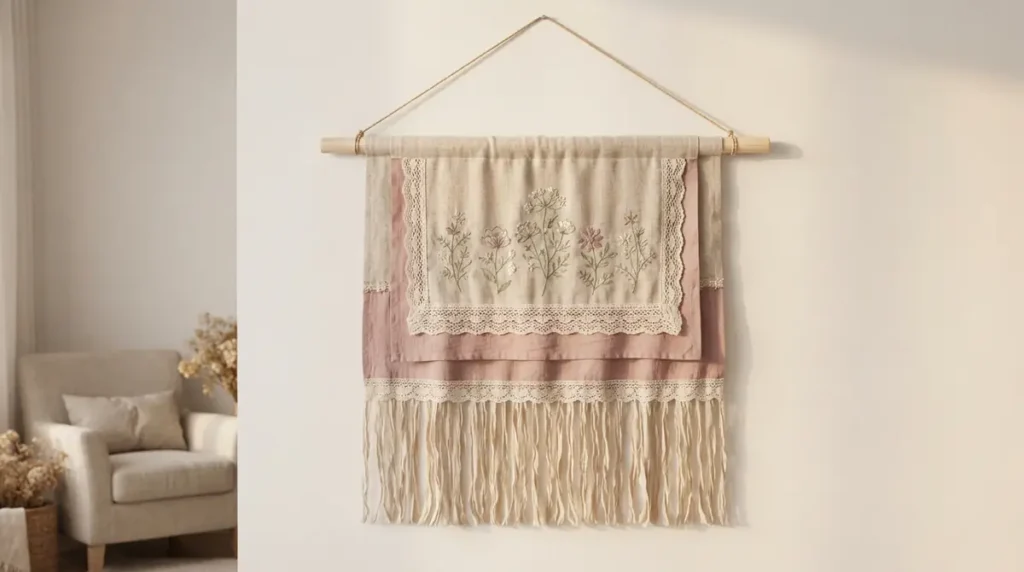
Fabric wall hangings are beautiful decorations that introduce softness, color, and texture into your home. They are also an excellent way to reuse old clothing, leftover fabric, embroidered cloth, or attractive textile scraps. Unlike some complicated wall art projects, fabric hangings can be made using basic cutting, folding, sewing, and gluing techniques.
The biggest advantage of fabric wall art is the wide variety of materials available. You can use cotton, linen, burlap, canvas, felt, denim, or patterned upholstery fabric. Each material creates a different appearance. For example, linen gives a simple and elegant look, burlap adds rustic texture, and colorful cotton prints create a cheerful decorative effect.
You can also customize fabric wall hangings according to the room where you plan to display them. Soft floral patterns are suitable for bedrooms, while geometric prints and neutral colors work beautifully in modern living rooms.
Materials Needed
- Cotton, linen, canvas, or burlap fabric.
- Wooden dowel or embroidery hoop.
- Fabric scissors.
- Measuring tape.
- Needle and thread or fabric glue.
- Fabric paint or embroidery thread.
- Ribbon or hanging cord.
- Optional lace, buttons, felt shapes, and decorative trims.
Step-by-Step Instructions
1. Choose the fabric: Select a material that matches your room’s color scheme. Make sure the fabric is clean and free from major wrinkles.
2. Determine the size: Decide whether you want a small decorative hanging or a large statement piece. Measure and cut the fabric according to your preferred dimensions, leaving extra material for finishing the edges.
3. Prepare the edges: Fold the edges inward and sew them to prevent fraying. If you do not want to sew, use suitable fabric glue or iron-on hemming tape according to its instructions.
4. Create your design: Sketch a simple pattern or arrange decorative fabric pieces on the surface. You can create flowers, abstract shapes, letters, hearts, or geometric patterns.
5. Attach decorative elements: Sew or glue lace, ribbons, felt shapes, buttons, or smaller fabric pieces onto the main fabric.
6. Add embroidery or painting: If desired, use embroidery thread or fabric paint to add additional details. Allow painted areas to dry completely.
7. Attach the wooden support: Fold the upper edge of the fabric over a wooden dowel and sew or glue it securely. Alternatively, stretch the fabric inside an embroidery hoop.
8. Add hanging hardware: Attach a ribbon or cord to the wooden dowel or hoop. Check that the fabric hangs evenly before placing it on the wall.
Important Tips
- Wash and dry reusable fabric before starting the project.
- Choose fabrics that are thick enough to hold their shape.
- Avoid excessive glue because it may create hard, visible patches.
- Use contrasting colors to make decorative patterns stand out.
- Test fabric paint on a small scrap before applying it to your main design.
Creative Decorating Ideas
You can create a beautiful botanical fabric hanging using green felt leaves and small embroidered flowers. Another idea is a personalized fabric banner featuring a family name, meaningful word, or inspirational quote.
For a children’s bedroom, consider colorful fabric shapes, stars, clouds, animals, or playful rainbow patterns. For a farmhouse interior, use natural linen, burlap, lace, and simple botanical designs.
Fabric wall hangings are particularly useful for decorating spaces where you want a softer appearance than traditional framed artwork. They also make thoughtful handmade gifts for birthdays, housewarmings, and special occasions.
DIY Paper Wall Hanging Crafts
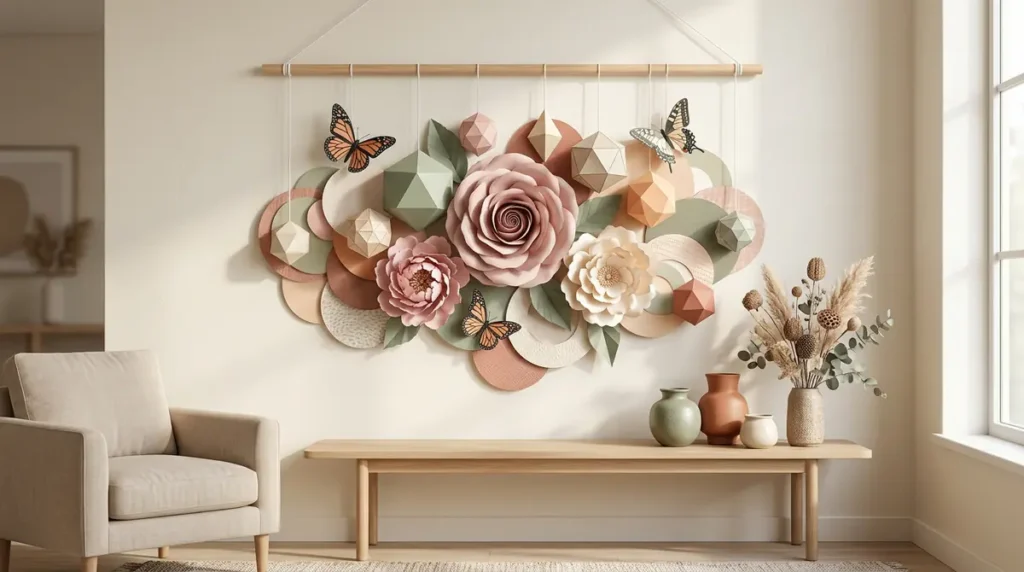
Paper wall hangings are among the most affordable and accessible DIY decorations. They are perfect for beginners, students, children, and anyone who wants to create attractive wall art without purchasing expensive supplies. With colored paper, cardstock, old magazines, scrapbook sheets, or leftover wrapping paper, you can make beautiful decorations for almost any room.
Paper is especially useful because it can be folded, cut, layered, rolled, and shaped into countless designs. You can create paper flowers, butterflies, geometric patterns, layered circles, decorative fans, or three-dimensional wall sculptures. By combining different shades and shapes, even simple paper crafts can look surprisingly elegant.
Another advantage is that paper wall hangings are easy to customize for different seasons and celebrations. You can make pastel floral decorations for spring, colorful butterflies for summer, autumn leaf designs, or festive Christmas decorations.
Materials Needed
- Colored construction paper or cardstock.
- Scrapbook paper or patterned sheets.
- Pencil and ruler.
- Scissors or craft knife.
- Glue stick or suitable craft adhesive.
- Wooden dowel or lightweight hanging support.
- Ribbon or string.
- Optional paper punches, templates, and decorative markers.
Step-by-Step Instructions
1. Choose your paper colors: Select a combination of colors that suits your room. You can use neutral shades for minimalist artwork or bright colors for playful decorations.
2. Select a design: Decide whether you want paper flowers, butterflies, geometric shapes, fans, or a layered abstract arrangement. Beginners should start with simple shapes.
3. Prepare templates: Draw your chosen shapes on paper or use ready-made craft templates. Make several different sizes to create a more interesting composition.
4. Cut the shapes: Carefully cut out your designs using sharp scissors. Keep the edges smooth and remove any unwanted paper scraps.
5. Create dimension: Fold selected pieces slightly or layer smaller shapes over larger ones. For example, overlapping several paper flower petals creates a more realistic three-dimensional effect.
6. Arrange the composition: Place the paper decorations on a flat surface and experiment with their positions before gluing them together.
7. Attach the decorations: Use a small amount of glue to secure the paper shapes to a larger cardstock background or lightweight hanging support.
8. Add the hanging system: Attach the finished arrangement to a wooden dowel or use lightweight hanging strips suitable for the wall surface.
Important Tips
- Use thicker cardstock for designs that need to maintain their shape.
- Avoid applying too much glue because it can wrinkle thin paper.
- Use a ruler when creating geometric patterns.
- Keep paper decorations away from moisture and direct heat.
- Consider using a protective frame or clear covering for delicate designs.
Creative Decorating Ideas
A paper butterfly wall hanging can create a beautiful feature in a children’s bedroom. Layered paper flowers look attractive above a dressing table or reading corner, while geometric paper circles can create a modern gallery-style arrangement.
You can also make a decorative paper fan wall hanging by folding rectangular sheets accordion-style, securing the center, and opening the folded paper into a circular fan shape. Combine several fans of different sizes to create a colorful arrangement.
Paper wall art is a wonderful way to explore creativity with limited materials. It is inexpensive, beginner-friendly, and suitable for family craft activities.
DIY Beaded Wall Hanging Crafts
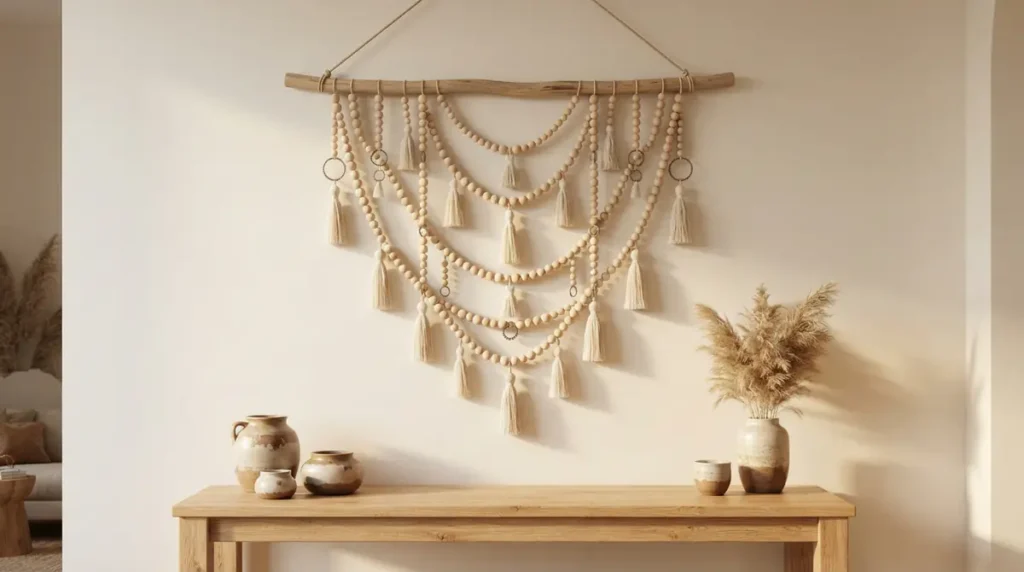
Beaded wall hangings are elegant decorations that add texture, detail, and a handmade appearance to your interior. They can be created using wooden beads, glass beads, clay beads, colorful acrylic beads, or natural stone-style decorative beads. By combining different bead sizes, shapes, and colors, you can create beautiful patterns that work with both modern and traditional home decorations.
One of the best features of this craft is its flexibility. You can make a simple hanging with a few large wooden beads or create a more detailed design with several strings of colorful beads arranged in layers. Beaded wall art can also be combined with macrame cord, wooden dowels, tassels, and natural branches for a more decorative appearance.
Natural wooden beads are especially popular for farmhouse and bohemian interiors, while colorful glass or acrylic beads are suitable for playful and contemporary spaces.
Materials Needed
- Wooden, glass, clay, or acrylic beads.
- Strong cotton cord, nylon thread, or jewelry string.
- Wooden dowel or natural branch.
- Scissors.
- Measuring tape.
- Small decorative tassels.
- Optional metal rings and macrame cord.
- Suitable hanging hardware.
Step-by-Step Instructions
1. Choose your beads: Select beads according to the appearance you want. Wooden beads create a warm, natural style, while colored beads add a playful touch.
2. Plan the pattern: Arrange the beads on a table before stringing them. Try alternating large and small beads or repeating a specific color sequence.
3. Cut the string: Prepare several pieces of strong cord. Each strand should be long enough to accommodate the beads and any decorative spacing.
4. Secure the first bead: Tie a strong knot at the bottom of each string or use a suitable bead stopper to prevent the beads from slipping off.
5. Thread the beads: Add beads according to your selected pattern. Check the spacing regularly to maintain a consistent appearance.
6. Create multiple strands: Repeat the process with different bead combinations. You can make each strand a different length to produce a cascading effect.
7. Attach the strands: Tie the completed strings securely to a wooden dowel or decorative branch. Space them evenly to create a balanced design.
8. Add finishing touches: Attach small tassels, decorative rings, or macrame details. Trim excess string and check every knot before hanging.
Important Tips
- Use strong cord that can support the total weight of the beads.
- Make secure knots at both ends of each strand.
- Choose a limited color palette for a sophisticated appearance.
- Test the weight of the finished decoration before mounting it.
- Keep small beads away from young children and pets because they can present choking hazards.
Creative Decorating Ideas
A cascading wooden bead hanging looks beautiful above a bedside table or entryway console. You can also create a colorful rainbow design for a children’s room or a neutral-toned arrangement for a minimalist living space.
Another attractive idea is to combine wooden beads with natural cotton tassels and a small branch. This creates a rustic decoration that looks especially appealing in bohemian and farmhouse interiors.
Beaded wall hangings are also excellent handmade gifts because you can customize their colors, shapes, and patterns to match someone’s home decor.
DIY Nature-Inspired Wall Hanging Crafts
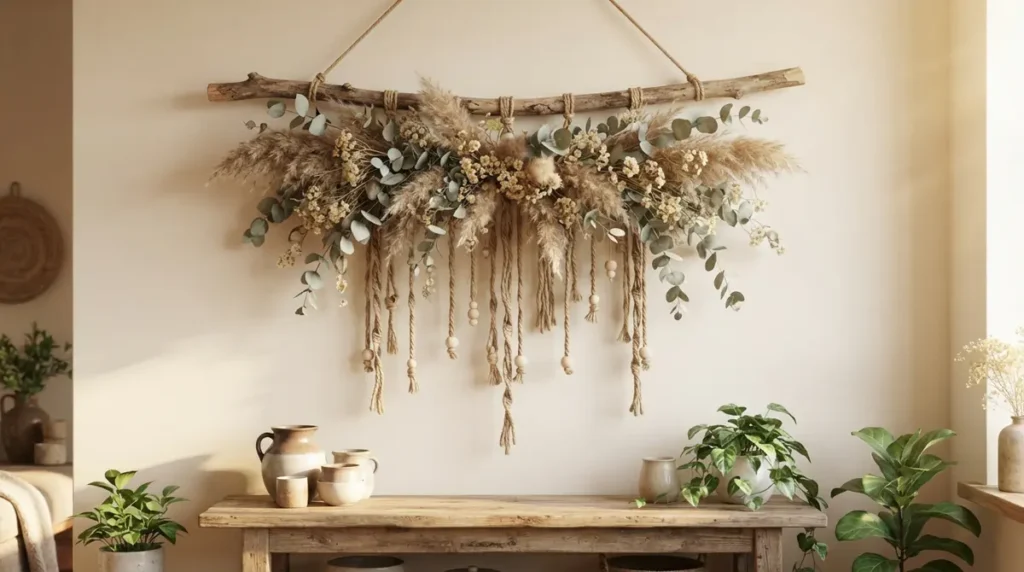
Nature-inspired wall hangings are a beautiful way to bring the peaceful appearance of the outdoors into your home. These decorations use natural or nature-themed materials such as dried flowers, leaves, twigs, feathers, small branches, pinecones, and pressed plants. They create a warm, organic appearance that works particularly well with rustic, farmhouse, cottagecore, and bohemian interior styles.
One of the biggest advantages of nature-inspired wall art is that many materials can be collected from your surroundings. Fallen branches, dried leaves, and naturally shed decorative materials can become the foundation of beautiful handmade decorations. However, it is important to collect materials responsibly and avoid taking protected plants, wildlife materials, or items from restricted natural areas.
You can create simple botanical arrangements or more detailed designs by combining natural textures with cotton rope, wooden frames, and handmade decorations.
Materials Needed
- Small dry branches or a wooden dowel.
- Dried flowers and leaves.
- Pressed botanical pieces.
- Jute rope or cotton cord.
- Artificial greenery if preferred.
- Craft glue or floral wire.
- Scissors and pruning shears.
- Optional wooden beads and small pinecones.
- Suitable hanging hardware.
Step-by-Step Instructions
1. Collect suitable materials: Choose clean, dry branches, fallen leaves, and suitable dried flowers. Make sure the materials are free from insects, moisture, and visible mold.
2. Prepare the base: Select a smooth wooden branch or dowel that can support the weight of your arrangement. Remove loose bark if necessary and check for sharp edges.
3. Plan the arrangement: Lay out the natural materials on a table. Experiment with different positions and combinations before attaching anything.
4. Prepare the decorations: Trim dried flowers, arrange pressed leaves, and remove unnecessary stems. If using natural materials, ensure they are completely dry.
5. Attach the botanical pieces: Use floral wire or suitable craft adhesive to secure the decorations to the wooden base. Work slowly to avoid crushing delicate flowers.
6. Add decorative strands: Attach jute rope, cotton cord, or lightweight ribbons to create hanging sections. You can also add wooden beads for additional texture.
7. Create a balanced design: Distribute heavier decorations evenly across the branch. Keep the arrangement visually balanced without overcrowding the natural elements.
8. Add hanging hardware: Secure a strong cord to both ends of the wooden support. Check that all decorative pieces are firmly attached before mounting the hanging.
Important Tips
- Always use completely dry botanical materials to reduce the risk of mold.
- Avoid collecting plants from protected areas.
- Use lightweight decorations to prevent the wooden support from bending.
- Keep dried flowers away from candles, fireplaces, and other heat sources.
- Avoid placing delicate botanical artwork in direct sunlight because some materials can fade.
Creative Decorating Ideas
A dried-flower wall hanging can look beautiful above a bedroom dresser or reading corner. You can also create a botanical branch decoration with cascading leaves and small cotton tassels.
For a farmhouse appearance, combine natural twigs with jute rope, dried grasses, and neutral-colored flowers. For a more modern look, arrange pressed leaves inside a lightweight wooden frame and attach a few decorative botanical strands beneath it.
You can even make seasonal nature-inspired wall hangings. Use dried autumn leaves and pinecones in fall, dried flowers in spring, and evergreen-inspired decorations during winter.
These crafts are perfect for people who appreciate natural textures and handmade home accessories. They offer a simple way to make your living space feel more relaxing, welcoming, and connected to nature.
Conclusion
DIY wall hanging crafts are a wonderful way to make your home more beautiful, personal, and inviting without spending a lot of money on store-bought decorations. From elegant macrame designs and colorful yarn creations to rustic wooden art, soft fabric hangings, paper decorations, beaded arrangements, and nature-inspired displays, there are countless ways to transform ordinary walls into attractive creative spaces.
The seven projects in this guide offer something for everyone, regardless of crafting experience or budget. Beginners can start with simple yarn or paper wall hangings, while people who enjoy more detailed projects can explore macrame knots, wooden designs, and decorative beadwork. You can also customize every project by choosing colors, materials, sizes, and patterns that complement your existing home decor.
Before starting, remember to prepare your materials, plan your design, and choose suitable hanging hardware. Small details such as balanced spacing, neat edges, secure knots, and coordinated colors can make a significant difference in the final appearance. You do not need expensive supplies or professional equipment to create something beautiful. Sometimes, leftover yarn, old fabric, wooden branches, and colorful paper are all you need to make an attractive handmade decoration.
Another wonderful benefit of DIY wall hanging crafts is that they allow you to express your creativity while making meaningful decorations for your home. You can create personalized gifts for family and friends, seasonal decorations for special occasions, or matching wall art for different rooms.
Start with one project that matches your skill level, gather a few simple materials, and enjoy the creative process. With a little patience and imagination, you can turn plain walls into beautiful displays that reflect your personal style and make your home feel even more special.