
Christmas Crafts to Sell: 7 Profitable Handmade Ideas to Make Extra Money This Holiday Season
Christmas is one of the busiest and most exciting shopping seasons of the year, making it a wonderful opportunity for creative people to turn their crafting hobbies into a profitable small business. During the holiday season, people look for unique decorations, thoughtful handmade gifts, personalized accessories, and festive home décor to make their celebrations more special. While stores are filled with mass-produced Christmas products, handmade crafts offer something different: creativity, originality, personal touches, and the charm of something made with care.
Selling Christmas crafts can be a great way to earn extra income from home without necessarily investing in an expensive business setup. Whether you enjoy sewing, painting, woodworking, crocheting, decorating, or making simple DIY projects, there are countless products you can create and sell during the holiday season. You can start with affordable materials, make a small collection, and gradually expand your business as customers discover your work.
The best part is that you do not need to be a professional artist to get started. Many Christmas crafts are beginner-friendly, inexpensive to produce, and easy to customize according to different customer preferences. From personalized ornaments and festive wreaths to handmade candles and cozy Christmas accessories, the possibilities are endless.
If you are looking for creative ways to make money during the holidays, here are seven profitable Christmas crafts to sell, along with their materials, step-by-step instructions.
Handmade Christmas Ornaments and Personalized Tree Decorations
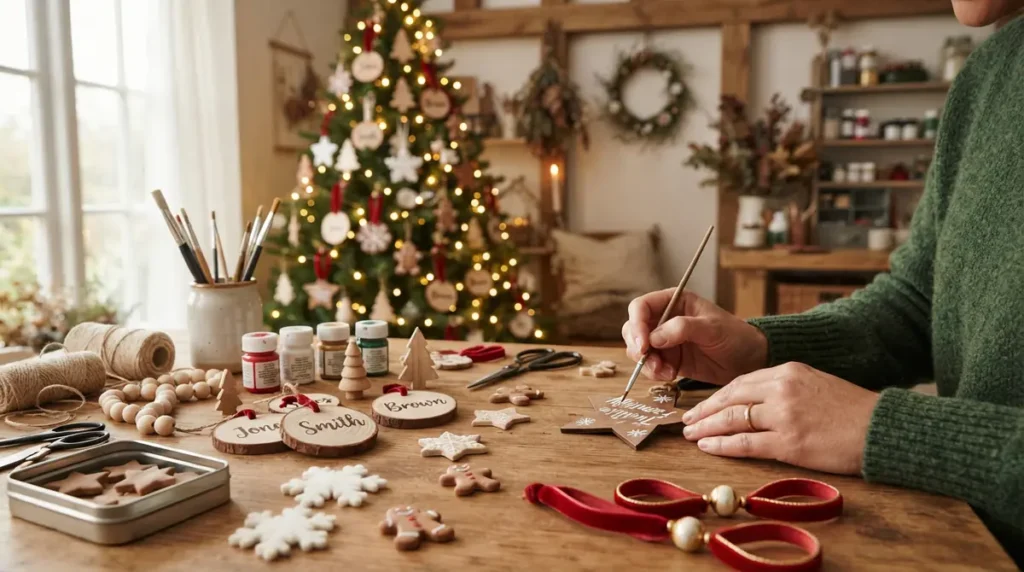
Handmade Christmas ornaments are among the most popular products to sell during the holiday season because almost every family decorates a Christmas tree. People enjoy decorating their homes with beautiful ornaments that reflect their personalities, family traditions, and favorite holiday memories. While traditional store-bought decorations are widely available, personalized handmade ornaments offer something more meaningful.
You can make Christmas ornaments using wood, felt, polymer clay, air-dry clay, acrylic, ribbons, beads, and natural elements. Wooden ornaments are especially attractive because they have a warm, rustic appearance that works beautifully with farmhouse, traditional, and minimalist Christmas decorations.
Personalized family ornaments are another profitable option. You can create small wooden houses with family names, ornaments featuring children’s names, or miniature decorations representing a family’s first Christmas in a new home. Pet-themed ornaments featuring paw prints or pet names can also attract customers.
Materials Needed
- Wooden ornament blanks or air-dry clay.
- Colorful felt sheets and embroidery thread.
- Acrylic paints and small paintbrushes.
- Decorative ribbons and cotton strings.
- Beads, glitter, and miniature embellishments.
- Hot glue gun and suitable adhesive.
- Scissors and craft cutters.
- Lettering stencils or permanent markers.
- Small kraft boxes and tissue paper for packaging.
Step-by-Step Instructions
1. Choose Your Ornament Design: Decide whether you want to make wooden Christmas trees, felt snowflakes, clay stars, gingerbread people, or personalized family ornaments. Start with three or four designs rather than making too many different products.
2. Prepare the Base: If you are using wooden blanks, sand rough edges and clean the surface. For clay ornaments, roll the clay evenly and cut it into your preferred shapes using cookie cutters.
3. Add Decorative Details: Paint the ornaments with Christmas colors such as red, green, white, gold, and silver. Add snowflakes, stars, reindeer, Christmas trees, or other festive patterns.
4. Personalize Each Piece: Write names, dates, short messages, or initials using paint pens or suitable lettering materials. You can also attach small wooden name tags.
5. Add Hanging Loops: Make a small hole in clay ornaments before drying or attach a strong ribbon loop to the finished wooden decorations.
6. Allow Everything to Dry: Follow the paint, clay, or adhesive manufacturer’s instructions. Make sure each piece is completely dry before packaging.
7. Package Your Ornaments: Place individual ornaments in small boxes or create matching sets of three, six, or twelve pieces.
Important Tips
- Keep the designs attractive but avoid making them unnecessarily complicated.
- Offer different color combinations to match traditional and modern Christmas decorations.
- Make sure hanging loops and decorative pieces are securely attached.
- Use lightweight materials to reduce shipping costs.
- Offer personalized options for families, couples, children, and pet owners.
- Test your ornaments before selling to ensure they are durable.
How to Sell and Make More Profit
Personalized ornaments can often command higher prices because customers are paying for customization as well as the decoration itself. Offer individual ornaments alongside matching sets to encourage larger orders.
You can also create themed collections, such as woodland animals, farmhouse Christmas, elegant gold and white, or traditional red and green.
For marketing, photograph your ornaments hanging on Christmas trees and show close-up pictures of names, painted details, and textures. Pinterest is particularly useful for sharing seasonal decoration ideas and directing interested shoppers toward your online store.
DIY Christmas Wreaths and Festive Door Decorations
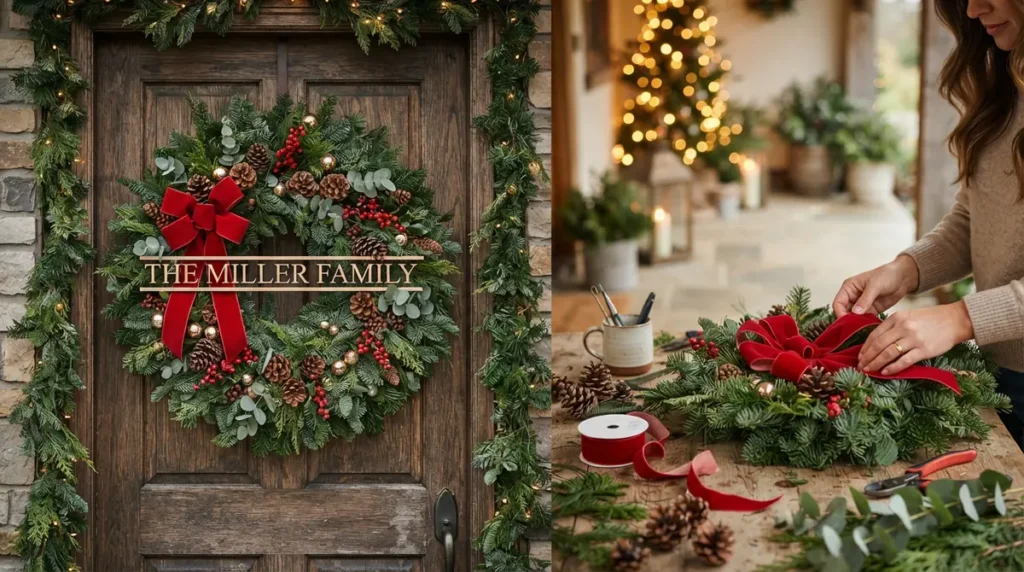
Christmas wreaths are timeless holiday decorations that can become an excellent source of seasonal income. Many people enjoy decorating their front doors, fireplaces, entryways, and dining areas with beautiful wreaths because they instantly create a welcoming Christmas atmosphere.
You can create wreaths using artificial greenery, natural pine branches, grapevine bases, wire frames, ribbons, ornaments, pinecones, berries, eucalyptus, and decorative flowers. Traditional evergreen wreaths are especially attractive to customers who enjoy classic Christmas decorations.
Modern minimalist wreaths are another excellent option. These can feature simple metal hoops, eucalyptus branches, neutral-colored ribbons, and small decorative accents. Personalized wreaths with family names or welcome messages can also become special holiday gifts.
Materials Needed
- Grapevine wreath base or wire wreath frame.
- Artificial evergreen branches or suitable natural greenery.
- Pinecones and decorative berries.
- Christmas ornaments and miniature decorations.
- Red velvet, burlap, or satin ribbons.
- Floral wire and wire cutters.
- Hot glue gun and suitable adhesive.
- Wooden family-name signs or decorative letters.
- Protective packaging and sturdy shipping boxes.
Step-by-Step Instructions
1. Select Your Wreath Base: Choose a suitable wreath frame according to the size and style you want to create. Grapevine bases work well for rustic designs, while wire frames are useful for fuller evergreen wreaths.
2. Prepare the Greenery: Separate artificial pine branches into smaller sections. Arrange the pieces according to the direction you want the greenery to follow.
3. Attach the Greenery: Use floral wire to secure the branches around the base. Overlap each section slightly to create a natural, full appearance.
4. Add Decorative Elements: Attach pinecones, red berries, miniature ornaments, and other seasonal decorations. Distribute the decorations evenly so the wreath looks balanced.
5. Create a Decorative Bow: Make a large bow using velvet, satin, or burlap ribbon. Attach it to the top, bottom, or side of the wreath depending on your design.
6. Personalize the Wreath: Add a wooden family-name sign, welcome message, or small seasonal decoration if the customer requests customization.
7. Check the Finished Product: Inspect all attachments, remove loose materials, and make sure the wreath maintains its shape.
8. Prepare for Selling: Use a sturdy box that protects the wreath from being crushed during storage and shipping.
Important Tips
- Use durable greenery and decorations that will maintain their appearance.
- Secure heavy ornaments properly so they do not fall during transportation.
- Offer different sizes for customers with different decorating spaces.
- Clearly explain whether the wreath is suitable for indoor or outdoor use.
- Create designs that match popular decorating styles, including farmhouse, traditional, and minimalist.
- Keep natural greenery products separate from artificial wreath collections and explain their care requirements.
How to Sell and Make More Profit
Wreaths can be sold as individual decorations or as part of a coordinated Christmas collection. Personalized wreaths may have higher prices because of the extra work involved.
Offer three main styles: traditional red and green, elegant white and gold, and rustic farmhouse. This gives customers enough variety without requiring you to maintain too many different designs.
You can also create matching wreath and tabletop decoration sets. Photograph your wreaths on front doors, above fireplaces, and against neutral walls to help customers imagine how they would look in their own homes.
Handmade Christmas Candles and Festive Candle Gift Sets
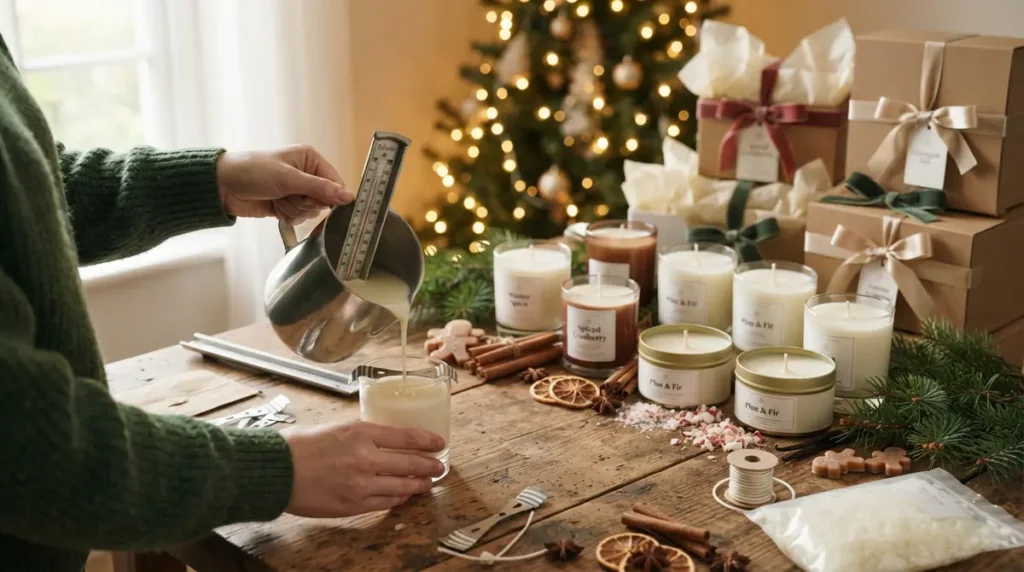
Handmade Christmas candles are beautiful seasonal products that combine decoration, fragrance, and gift-giving into one attractive item. During the holidays, people enjoy filling their homes with comforting scents such as cinnamon, vanilla, peppermint, pine, gingerbread, orange, and warm spices.
Candle-making can be an interesting small business for creative people because you can create different fragrances, containers, labels, and gift packages. Soy wax is a common choice for handmade container candles, although other suitable candle waxes are also available.
You can sell individual scented candles, decorative Christmas candles, personalized candles, or gift sets containing multiple fragrances.
Materials Needed
- Suitable candle wax, such as soy wax.
- Candle wicks and wick holders.
- Candle-safe fragrance oils.
- Heat-safe glass jars or candle tins.
- Double boiler or appropriate wax-melting equipment.
- Thermometer.
- Pouring pitcher.
- Digital weighing scale.
- Candle labels and decorative stickers.
- Gift boxes, ribbons, and tissue paper.
Step-by-Step Instructions
1. Choose Your Candle Collection: Select three or four Christmas fragrances, such as cinnamon vanilla, peppermint, evergreen, and gingerbread.
2. Prepare Your Containers: Clean and completely dry the glass jars or tins. Make sure they are suitable for candle-making and can withstand the heat of burning wax.
3. Attach the Wicks: Position the appropriate wick in the center of each container using a wick holder or suitable wick adhesive.
4. Measure the Wax: Weigh the wax according to the number and size of candles you want to make.
5. Melt the Wax: Follow the wax manufacturer’s recommended heating instructions. Monitor the temperature carefully using a thermometer.
6. Add the Fragrance: Add a suitable candle fragrance oil at the temperature and percentage recommended by the supplier. Stir thoroughly to distribute the fragrance evenly.
7. Pour the Wax: Carefully pour the prepared wax into the containers while keeping the wicks centered.
8. Allow the Candles to Set: Leave the candles undisturbed until completely solid. Follow the recommended curing period for your wax and fragrance combination.
9. Finish and Label: Trim the wick to the manufacturer’s recommended length, attach attractive labels, and include candle safety instructions.
10. Create Gift Sets: Package two or three candles together using coordinated boxes, ribbons, and personalized cards.
Important Tips
- Always test your candles before selling them.
- Choose the correct wick size for each container.
- Use only fragrance oils specifically suitable for candle-making.
- Follow the manufacturer’s wax and fragrance recommendations.
- Never leave melting wax unattended.
- Keep decorative materials away from the wick and burning area.
- Include clear candle-burning and fire-safety instructions.
- Make sure every candle has consistent quality and appearance.
How to Sell and Make More Profit
Create a limited Christmas candle collection with three or four signature fragrances. Give each candle an attractive name, such as Winter Forest, Gingerbread House, Cozy Cinnamon, or Candy Cane Morning.
Offer individual candles as affordable gifts and larger gift sets for customers who want something more special. Personalized labels can also make your products attractive for birthdays, corporate gifts, and holiday celebrations.
Use beautiful packaging and photograph your candles together in a cozy Christmas setting. Show the jars, labels, gift boxes, and different fragrance options clearly.
Personalized Christmas Stockings and Handmade Fabric Decorations
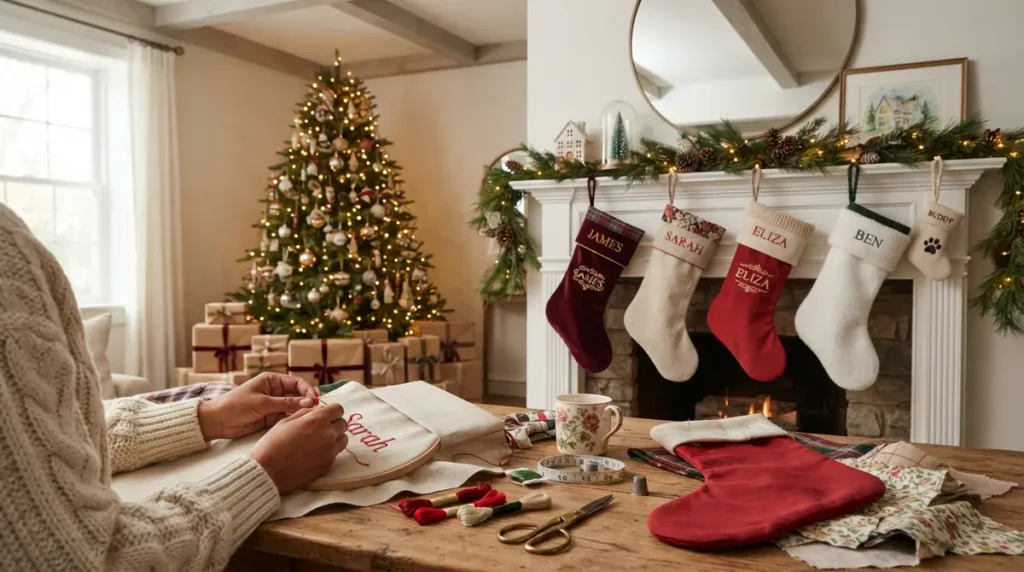
Personalized Christmas stockings are wonderful products to sell because they are closely connected to family traditions and holiday celebrations. Many families hang stockings near fireplaces, staircases, walls, or Christmas trees and fill them with small gifts and treats.
You can create stockings using cotton, linen, felt, velvet, fleece, burlap, and other suitable fabrics. Each material offers a different appearance, allowing you to create traditional, modern, farmhouse, and luxury-style collections.
Personalization is one of the biggest advantages of handmade stockings. You can embroider names, add decorative initials, or attach wooden name tags. Families may purchase matching stockings for their children, parents, and pets.
Materials Needed
- Cotton, felt, linen, velvet, or fleece fabric.
- Fabric scissors and measuring tape.
- Sewing machine or sewing needles.
- Matching sewing thread.
- Embroidery thread and embroidery needles.
- Fabric lining.
- Ribbon or fabric for hanging loops.
- Buttons and decorative embellishments.
- Fabric markers or stencils.
- Personalized name tags.
- Packaging boxes and tissue paper.
Step-by-Step Instructions
1. Choose Your Stocking Style: Decide whether you want traditional red and green stockings, farmhouse linen stockings, velvet stockings, or colorful felt designs.
2. Create a Pattern: Draw a stocking shape on paper or use a ready-made sewing pattern. Make sure the pattern includes enough space for seam allowances.
3. Cut the Fabric: Place the pattern over your selected fabric and cut two matching stocking pieces for the front and back.
4. Prepare the Lining: If you want a more finished appearance, cut matching lining pieces and prepare the stocking cuff separately.
5. Sew the Main Pieces: Place the fabric pieces together with their right sides facing inward. Sew around the edges while leaving the opening at the top.
6. Attach the Cuff: Add a contrasting fabric cuff around the opening. You can use white fleece, cream linen, red velvet, or another decorative material.
7. Add the Hanging Loop: Sew a sturdy ribbon or fabric loop near the top corner so the stocking can hang securely.
8. Personalize the Design: Embroider a name on the cuff or attach a decorative name tag.
9. Inspect the Stocking: Check all seams, remove loose threads, and make sure the stocking maintains its shape.
10. Package the Finished Product: Fold the stocking neatly and place it in a decorative gift bag or box.
Important Tips
- Choose strong fabric that can handle regular use.
- Keep the stocking sizes consistent within matching sets.
- Use comfortable and durable lining materials.
- Make personalization easy by offering a limited selection of fonts and thread colors.
- Attach buttons, bells, and other small decorations securely.
- Offer mini stockings for pets, coworkers, and small gifts.
- Clearly mention the stocking dimensions and materials in your product description.
How to Sell and Make More Profit
Offer family stocking bundles with different names and matching designs. You can also create personalized pet stockings, mini gift stockings, and matching Christmas fabric decorations.
Create different price levels according to fabric quality, size, and personalization. Velvet stockings with detailed embroidery can be positioned as premium products, while simple felt stockings can appeal to customers looking for affordable decorations.
Use product photographs showing the stockings hanging near fireplaces, Christmas trees, and wrapped presents. Include close-up pictures of embroidery and fabric details to demonstrate the quality of your work.
Christmas Door Signs and Handmade Wooden Holiday Signs
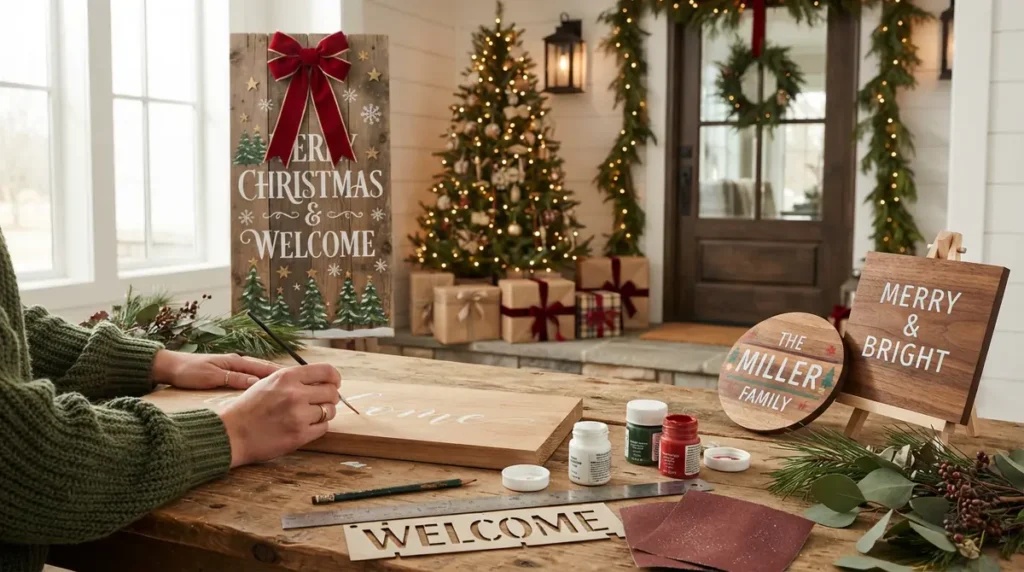
Handmade Christmas signs are excellent seasonal products for people who enjoy painting, lettering, woodworking, or decorating wooden surfaces. Many homeowners like adding festive signs to their front doors, entryways, living rooms, kitchen walls, and fireplace mantels.
Wooden Christmas signs can be designed in many different shapes, sizes, colors, and styles. You can use wooden boards, round wood slices, plywood, reclaimed wood, or ready-made wooden blanks.
Popular designs include Merry Christmas signs, farmhouse welcome signs, personalized family-name boards, wooden Christmas trees, and decorative tabletop messages.
Materials Needed
- Wooden boards, plywood, or wooden blanks.
- Sandpaper and a sanding block.
- Acrylic paints or suitable wood paint.
- Paintbrushes and small detail brushes.
- Lettering stencils or vinyl lettering.
- Pencil and measuring ruler.
- Decorative ribbons and small embellishments.
- Wood glue or suitable adhesive.
- Protective wood finish or sealant.
- Hanging hardware or tabletop supports.
- Packaging materials.
Step-by-Step Instructions
1. Choose Your Sign Design: Decide whether you want to create a traditional Merry Christmas sign, a farmhouse welcome sign, or a personalized family-name decoration.
2. Prepare the Wooden Surface: Sand the wood carefully to remove rough edges and create a smooth surface. Wipe away dust before painting.
3. Apply the Background Color: Paint the wooden board using your preferred Christmas color. White, cream, red, green, and natural wood tones are popular choices.
4. Plan the Lettering: Use a pencil and ruler to position your message. Make sure the letters are evenly spaced and easy to read.
5. Add the Main Design: Paint your lettering or use suitable stencils and vinyl lettering. Add snowflakes, stars, Christmas trees, or small seasonal illustrations.
6. Decorate the Sign: Attach small wooden ornaments, ribbons, miniature greenery, or other decorative elements.
7. Apply a Protective Finish: Once the paint is completely dry, apply a suitable protective finish according to the manufacturer’s instructions.
8. Add Hanging Hardware: Attach a secure hanging hook or prepare a stable tabletop support.
9. Inspect the Finished Sign: Check the lettering, edges, decorative attachments, and overall appearance.
10. Prepare for Selling: Wrap the sign carefully and use protective packaging to prevent scratches and damage.
Important Tips
- Sand the wood properly before applying paint.
- Use high-quality lettering materials for a clean finish.
- Keep messages short, attractive, and easy to read.
- Offer different sizes and color combinations.
- Make sure hanging hardware is secure.
- Use suitable weather-resistant materials for outdoor signs.
- Clearly explain the dimensions and intended placement of each sign.
How to Sell and Make More Profit
Personalized wooden signs can be especially attractive to customers looking for meaningful holiday decorations. Offer standard designs as well as customized versions featuring family names, special dates, or welcome messages.
You can also sell smaller shelf decorations and tabletop signs at more affordable prices. Create matching collections so customers can purchase several coordinated pieces.
For Pinterest marketing, photograph your signs in beautifully decorated entryways, living rooms, and farmhouse-style interiors. Include close-up pictures of the lettering, painted details, and wood texture.
DIY Christmas Gift Baskets and Handmade Holiday Gift Boxes
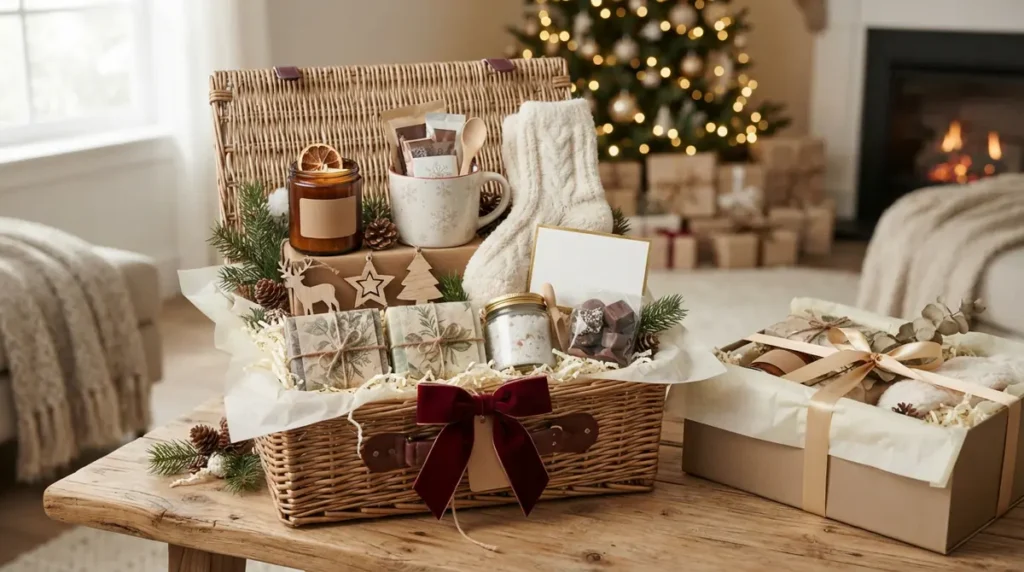
Christmas gift baskets are an excellent business idea because they allow you to combine several small products into one attractive gift. During the holiday season, people often need presents for friends, relatives, teachers, coworkers, neighbors, clients, and hosts.
A beautifully arranged Christmas gift basket offers convenience while giving the recipient several enjoyable items to discover. You can include handmade products such as candles, ornaments, soaps, fabric decorations, small knitted accessories, and personalized cards alongside carefully selected packaged products.
Different themes allow you to reach different customers. For example, a cozy Christmas basket could contain a candle, a mug, hot chocolate, marshmallows, and soft socks. A self-care basket might include handmade soaps, bath salts, body scrubs, and a candle.
Materials Needed
- Decorative baskets or sturdy gift boxes.
- Shredded paper or gift-box filler.
- Tissue paper and wrapping materials.
- Christmas ribbons and bows.
- Handmade candles or ornaments.
- Mugs, socks, and small gift accessories.
- Hot chocolate packets or packaged treats.
- Handmade greeting cards.
- Personalized gift tags.
- Scissors and adhesive.
- Protective shipping boxes.
Step-by-Step Instructions
1. Choose a Gift Basket Theme: Decide whether you want to create a cozy winter basket, self-care gift box, teacher appreciation basket, family activity basket, or luxury Christmas collection.
2. Set Your Budget: Calculate how much you can spend on each basket before purchasing materials. This helps you control production costs.
3. Select the Products: Choose items that complement one another. For example, a cozy basket could include a candle, mug, hot chocolate, and winter socks.
4. Choose the Container: Select a basket or gift box that fits all the products comfortably without leaving too much empty space.
5. Prepare the Base: Add shredded paper, tissue paper, or another suitable filler to create a stable foundation.
6. Arrange the Products: Place taller items at the back and smaller products toward the front. Make sure every item is visible and attractive.
7. Add Decorative Details: Use Christmas ribbons, miniature ornaments, pine-inspired decorations, and festive gift tags.
8. Include a Greeting Card: Add a blank or personalized message card so customers can send the basket directly to someone special.
9. Wrap and Protect the Basket: Use suitable wrapping materials and secure fragile products so they do not move during transportation.
10. Photograph and List the Product: Take clear photographs and provide an accurate list of everything included in the basket.
Important Tips
- Select products that match the theme of the basket.
- Avoid overcrowding the container.
- Keep fragile items protected during transportation.
- Offer different sizes and price levels.
- Clearly mention every included product.
- Check expiration dates when including packaged food.
- Use appropriate labeling for handmade cosmetic products.
- Offer optional personalized greeting cards.
How to Sell and Make More Profit
Create three versions of your gift baskets: budget-friendly, standard, and premium. This gives customers options without making your product collection too complicated.
You can also offer themed gift boxes for teachers, coworkers, friends, couples, and families. Customized baskets can be priced higher because they require additional planning and arrangement.
Photograph each basket from the front, top, and side. Show all included items clearly so customers know exactly what they are purchasing. Pinterest posts featuring beautifully arranged Christmas gift baskets can help attract shoppers searching for holiday gift inspiration.
Handmade Christmas Crochet, Knitted, and Cozy Winter Accessories
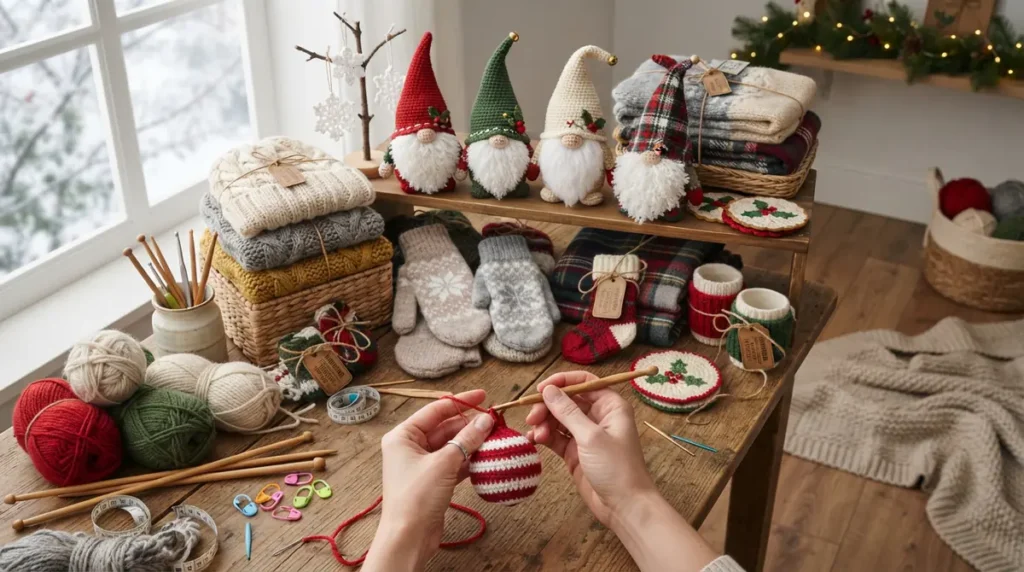
Handmade crochet and knitted Christmas products are wonderful items to sell because they combine practical usefulness with seasonal charm. During the colder months, many people look for cozy accessories, warm decorations, and thoughtful handmade presents.
If you enjoy crocheting or knitting, you can create products in different sizes and styles. Simple projects such as Christmas tree ornaments, small decorative stockings, mug cozies, coasters, and miniature Christmas characters can be suitable for beginners.
Crochet Christmas gnomes are particularly attractive decorative products. You can make them using red, green, white, and gray yarn, with a long beard, a pointed hat, and a small decorative nose. You can also create knitted scarves, beanies, mittens, headbands, and fingerless gloves.
Materials Needed
- Yarn in Christmas colors such as red, green, white, and cream.
- Crochet hooks or knitting needles.
- Yarn needles for finishing.
- Scissors.
- Stitch markers.
- Measuring tape.
- Suitable stuffing for decorative toys.
- Embroidery thread.
- Decorative ribbons and tags.
- Packaging bags or small gift boxes.
- Printed washing and care instructions.
Step-by-Step Instructions
1. Choose Your Product: Decide whether you want to make crochet gnomes, Christmas tree ornaments, knitted scarves, beanies, mittens, or decorative stockings.
2. Select the Yarn: Choose yarn that matches the purpose of your product. Soft, comfortable yarn works well for wearable accessories, while suitable decorative yarn can be used for ornaments.
3. Prepare Your Pattern: Select a beginner-friendly pattern or create your own design. Check the measurements before beginning.
4. Start Crocheting or Knitting: Follow your pattern carefully and maintain consistent stitches throughout the project.
5. Add Christmas Details: Use different yarn colors to create snowflakes, stripes, stars, Christmas trees, and other festive designs.
6. Assemble the Product: Join the separate pieces carefully. For decorative characters, add suitable stuffing and attach the body parts securely.
7. Finish Loose Ends: Use a yarn needle to weave in loose threads and make sure the product looks neat.
8. Check the Size and Quality: Measure your finished product and inspect the stitches, seams, and decorative attachments.
9. Add Product Tags: Include the product name, material information, and washing or care instructions.
10. Package Your Handmade Items: Use small boxes, paper bags, or decorative wrapping to create a gift-ready appearance.
Important Tips
- Begin with small projects that require less time and yarn.
- Choose comfortable and durable materials.
- Maintain consistent sizing across matching products.
- Secure all loose ends carefully.
- Avoid small detachable parts in products intended for young children.
- Provide accurate measurements and washing instructions.
- Calculate your labor costs instead of charging only for materials.
- Offer different colors and sizes to attract more customers.
How to Sell and Make More Profit
Start with small crochet products such as ornaments, coasters, mug cozies, and keychains. These can be easier to produce in batches and are suitable for affordable gift purchases.
Once you understand customer demand, introduce larger products such as scarves, beanies, decorative gnomes, and matching family sets.
You can also offer personalized colors, initials, and matching accessories. Photograph your products in cozy winter settings, showing their textures and handmade details. Create coordinated collections to encourage customers to purchase multiple items together.
Conclusion
Selling Christmas crafts can be a rewarding way to turn your creativity into extra holiday income while offering customers beautiful, meaningful, and personalized products. From handmade Christmas ornaments and decorative wreaths to scented candles, personalized stockings, wooden signs, gift baskets, and cozy crochet accessories, there are plenty of opportunities to create products that shoppers will love.
The most important thing is to choose crafts that match your skills, budget, available time, and interests. You do not need to create all seven product categories at once. Start with two or three ideas that you can make consistently and confidently. Test your designs, calculate your costs, and pay attention to which products attract the most interest.
Remember that successful craft selling involves more than making beautiful items. Quality materials, attractive packaging, clear product descriptions, reasonable pricing, and good customer service all contribute to building a trustworthy small business. Personalized products and coordinated gift collections can also help your shop stand out during the busy holiday shopping season.
Start preparing your products early so you have enough time to photograph them, promote your collection, manage custom orders, and organize packaging. You can share your creations on Pinterest, Instagram, Etsy, local handmade marketplaces, and community groups to reach potential customers.
Most importantly, enjoy the creative process. Handmade Christmas products carry a special charm because every piece reflects someone’s time, imagination, and effort. With thoughtful planning, consistent quality, and a little creativity, your Christmas crafting hobby could become a profitable seasonal business that brings both extra income and holiday joy.