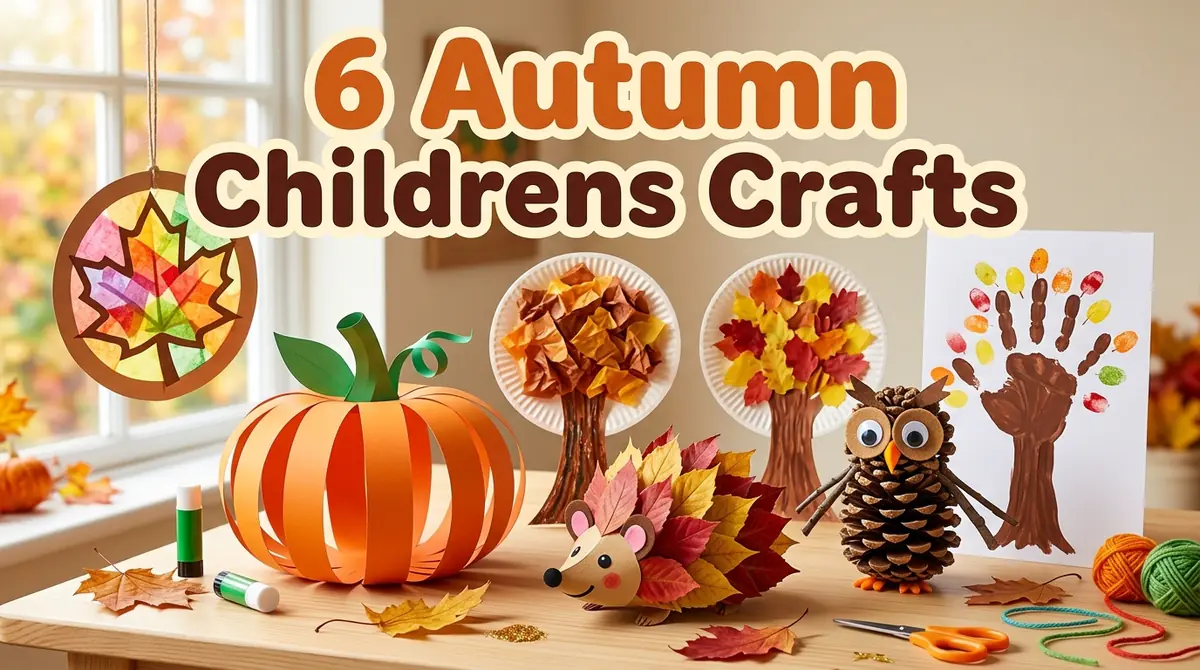
6 Easy Autumn Crafts for Children to Make This Fall
Autumn is the perfect time to bring a little creativity into your home. With colorful leaves, tiny pumpkins, acorns, and beautiful fall colors all around, children can turn simple materials into fun seasonal decorations. The best part? You don’t need expensive supplies or complicated instructions to get started.
These 6 autumn crafts for children are easy, affordable, and suitable for a variety of ages. From colorful leaf animals to cute paper pumpkins, each project gives kids a chance to explore their imagination while enjoying the beauty of fall.
Whether you’re looking for a rainy-day activity, a classroom art project, or a fun afternoon at home, these autumn crafts will keep little hands busy and creative.
- Colorful Autumn Leaf Animals
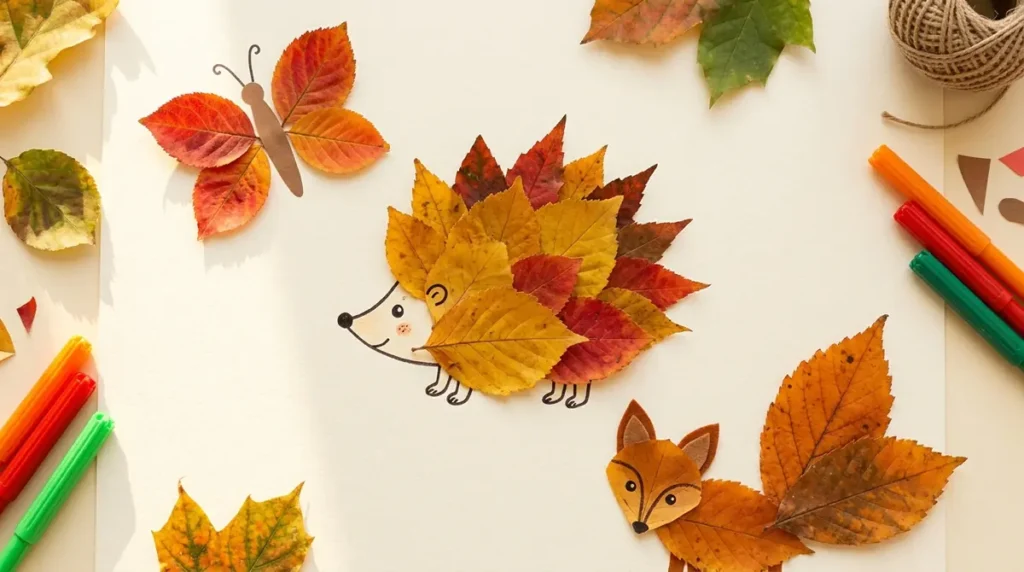
Turn ordinary fallen leaves into adorable animals! This simple nature craft lets children experiment with different shapes, colors, and textures while creating their own little woodland creatures.
Materials You’ll Need
- Colorful fallen leaves
- White or colored cardstock
- Child-safe glue
- Markers or crayons
- Googly eyes (optional)
- Safety scissors
How to Make It
- Collect the leaves: Take children on a short nature walk and gather leaves in different shapes and colors. Choose dry leaves that are not too fragile.
- Choose an animal: Encourage kids to imagine what each leaf could become. A wide leaf might look like a hedgehog, while several small leaves could form a butterfly.
- Arrange the leaves: Place the leaves on cardstock to create the animal’s body, wings, ears, or tail.
- Glue everything down: Once the design looks right, carefully glue the leaves in place.
- Add the details: Use markers to draw legs, noses, whiskers, and other features. Add googly eyes if desired.
Creative Tip: Children can make a whole autumn animal collection, including foxes, owls, hedgehogs, and butterflies. Display their finished creations on a wall or turn them into homemade greeting cards.
Best for: Preschoolers and elementary-age children, with help for younger kids.
- Paper Plate Autumn Trees
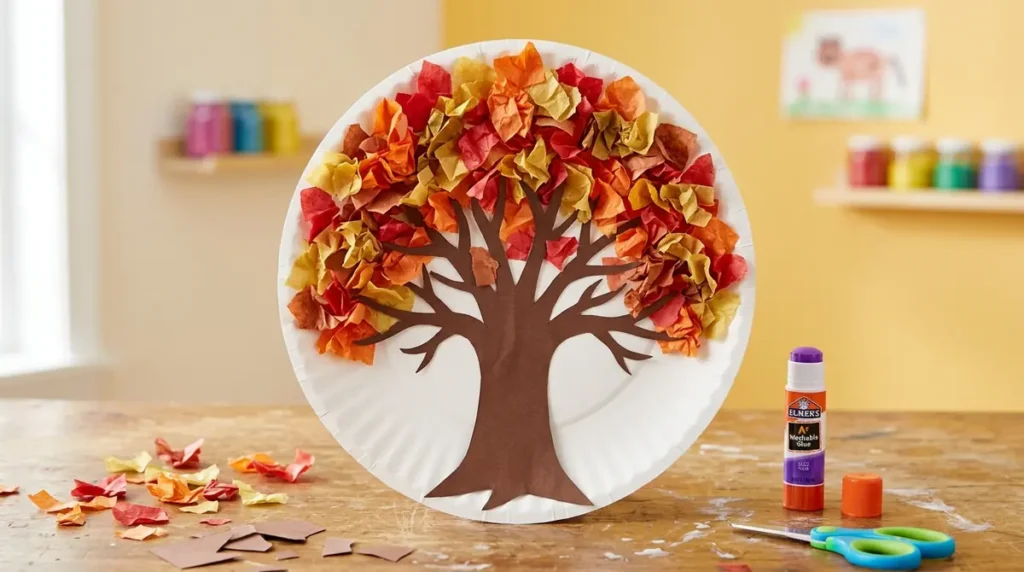
A paper plate can become a beautiful autumn tree filled with red, orange, yellow, and brown leaves. This craft is ideal for teaching children about seasonal changes while giving them plenty of room to experiment with color.
Materials You’ll Need
- White paper plates
- Brown construction paper
- Red, orange, yellow, and brown tissue paper
- Child-safe glue
- Scissors
- Crayons or paint
How to Make It
- Prepare the tree trunk: Cut a simple tree trunk and a few branches from brown construction paper.
- Attach the trunk: Glue the trunk and branches onto the center of a paper plate.
- Create colorful leaves: Tear tissue paper into small squares. Tearing is a great activity for younger children who are still developing their hand coordination.
- Fill the branches: Add glue around the branches and press the tissue-paper pieces onto the plate to create a colorful autumn canopy.
- Finish the scene: Use crayons to draw falling leaves, grass, or a few pumpkins around the bottom of the tree.
Creative Tip: Make three trees together: one with green leaves for summer, one with colorful leaves for autumn, and one with bare branches for winter. Children can compare how trees change throughout the year.
Best for: Toddlers with adult assistance, preschoolers, and school-age children.
- DIY Paper Pumpkins
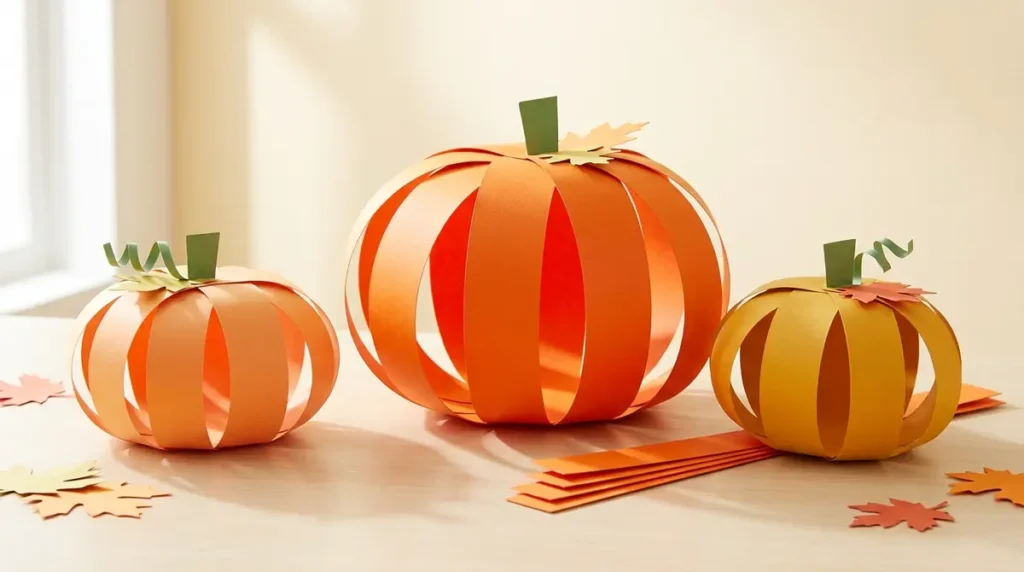
Pumpkins are one of the most recognizable symbols of fall. These easy paper pumpkins are a fun way for children to create seasonal decorations without carving real pumpkins or using sharp tools.
Materials You’ll Need
- Orange construction paper
- Green construction paper
- Child-safe scissors
- Glue or a stapler operated by an adult
- Pencil
- Ruler (optional)
How to Make It
- Cut paper strips: Cut several orange paper strips of approximately the same width and length. Six to eight strips work well for a small pumpkin.
- Create a rounded shape: Curve the strips gently and arrange them so their ends meet at the top and bottom, forming a round pumpkin shape.
- Secure the strips: Glue or staple the ends together. An adult should handle the stapler if one is used.
- Add the stem: Cut a small rectangle or leaf-shaped piece from green paper and attach it to the top.
- Decorate the pumpkin: Draw a smiling face, add paper leaves, or use markers to create patterns and designs.
Creative Tip: Use different shades of orange, yellow, and brown to make a colorful pumpkin display. Children can also create tiny pumpkins for a pretend autumn market or a seasonal centerpiece.
Best for: Preschoolers with assistance and elementary-age children.
- Handprint Fall Tree
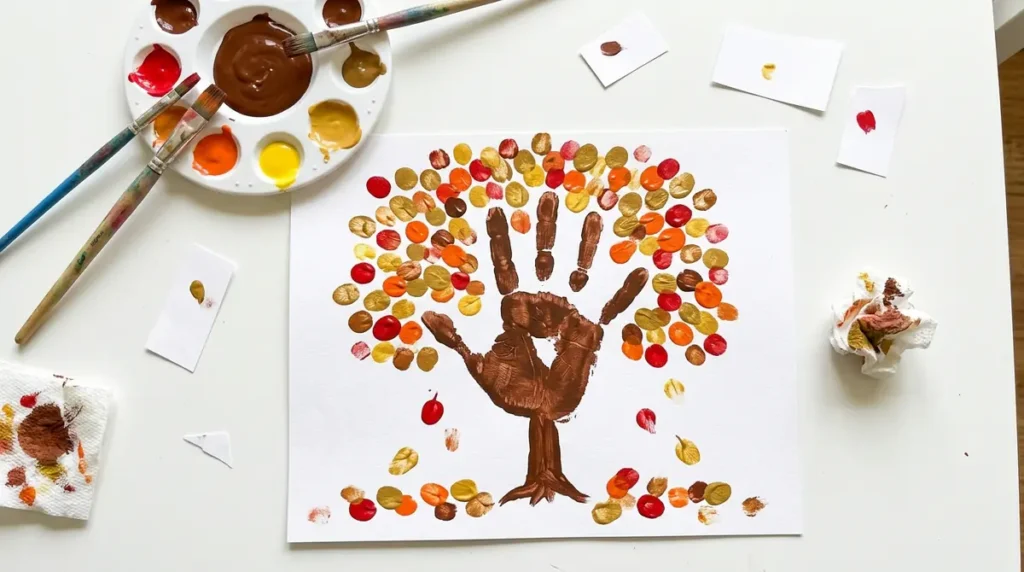
Handprint crafts are a lovely way to combine creativity with a keepsake. Children use their own hands to create the branches of an autumn tree, making each finished picture unique.
Materials You’ll Need
- White cardstock or drawing paper
- Brown, red, orange, and yellow washable paint
- Paintbrush
- Paper plate or paint tray
- Baby wipes or a damp cloth
How to Make It
- Prepare the workspace: Cover the table with scrap paper or a washable mat. Pour a small amount of brown paint onto a paint tray.
- Make the handprint: Help children coat one hand with brown paint and press it onto the paper, with their fingers spread out. The palm becomes the trunk, while the fingers form the branches.
- Let it dry: Allow the brown handprint to dry before adding the leaves.
- Add autumn colors: Children can use their fingertips to stamp red, orange, and yellow leaves around the branches.
- Complete the picture: Add falling leaves, grass, a sun, or a few small pumpkins using paint or crayons.
Creative Tip: Write the child’s name and the year at the bottom of the artwork. You can repeat the activity every autumn and keep the pictures as a growing collection of childhood memories.
Best for: Toddlers, preschoolers, and young children with adult supervision.
- Pinecone Owls
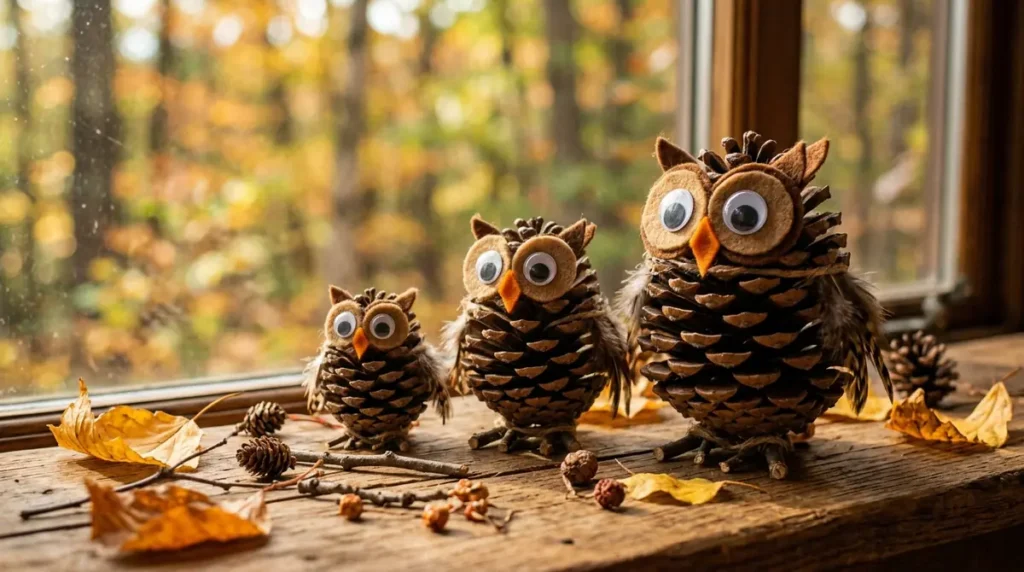
Pinecones make wonderful natural craft materials because their textured surfaces resemble feathers. With a few simple additions, children can transform them into cute little owls for an autumn display.
Materials You’ll Need
- Clean, dry pinecones
- Brown, orange, or cream felt
- Child-safe craft glue
- Googly eyes or paper circles
- Safety scissors
- Small pieces of cardstock
How to Make It
Prepare the pinecones: Choose clean, dry pinecones without sharp or loose pieces. An adult should inspect them before children begin.
- Create the eyes: Cut two small circles from felt or cardstock. Glue them near the top of the pinecone and add googly eyes or smaller paper circles.
- Make a beak: Cut a tiny orange triangle and glue it beneath the eyes.
- Add the wings: Cut two simple wing shapes from brown or cream felt and attach one to each side.
- Give your owl character: Add small paper feet, eyebrows, or a little felt belly to personalize the design.
Creative Tip: Create a family of owls in different sizes and display them on a shelf with colorful leaves and small pumpkins. If collecting pinecones outdoors, avoid using ones that are damp, moldy, or full of insects.
Best for: Elementary-age children, with adult help for cutting and attaching small pieces.
- Autumn Leaf Suncatchers
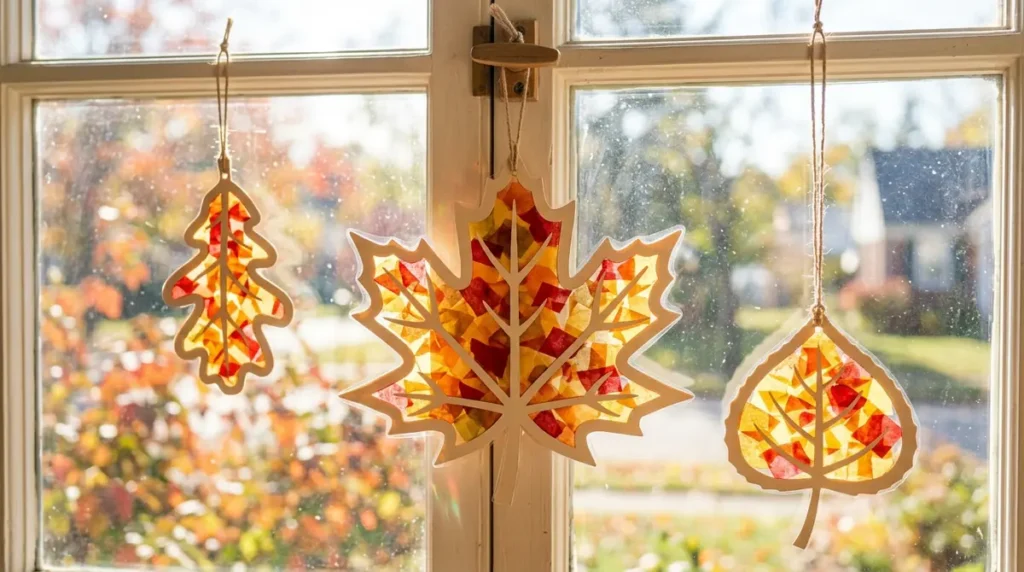
Bring the warm colors of autumn indoors with homemade leaf suncatchers. When placed near a sunny window, these decorations allow light to shine through their colorful designs.
Materials You’ll Need
- Clear contact paper
- Tissue paper in red, orange, yellow, and gold
- Cardstock
- Pencil
- Child-safe scissors
- String or removable window-safe tape
How to Make It
- Create a leaf frame: Draw a large leaf outline on cardstock and carefully cut out the center, leaving a border. An adult can prepare the frames for younger children.
- Prepare the sticky surface: Cut a piece of clear contact paper larger than the leaf frame. Peel off the backing and place it sticky-side up on the table.
- Add colorful pieces: Let children arrange small pieces of tissue paper across the sticky surface. Overlapping colors can create beautiful patterns.
- Attach the frame: Place the cardstock leaf frame over the tissue paper, then cover the back with another piece of contact paper to seal the design.
- Display the craft: Trim the edges and attach the suncatcher to a sunny window using removable tape or another suitable method.
Creative Tip: Make several suncatchers in different leaf shapes, such as maple, oak, and simple oval leaves. Hang them together to create a colorful autumn window display.
Best for: Preschoolers with assistance and elementary-age children.
Tips for Making Autumn Crafts Fun and Easy
A successful craft session doesn’t need a long shopping list or a perfectly organized workspace. A few simple preparations can make the experience more enjoyable for everyone.
- Use what nature provides: Collect fallen leaves, pinecones, and small twigs from safe areas. Check natural materials for dirt, insects, sharp edges, or mold before using them.
- Choose age-appropriate projects: Younger children often enjoy tearing tissue paper, finger painting, and sticking down large shapes. Older children may prefer cutting, arranging, and building more detailed crafts.
- Prepare materials in advance: Cut difficult shapes before the activity begins, especially when working with toddlers.
- Let children make their own choices: Their trees don’t need to look realistic, and their animals don’t need to match a picture. Creativity is part of the fun.
- Keep cleanup simple: Use washable paint, glue sticks, old newspapers, and a designated craft tray.
- Display finished projects: Hang artwork on a wall, place paper pumpkins on a shelf, or arrange pinecone owls on a table to make children feel proud of their work.
For young children, supervise the use of scissors, small decorations, and craft materials. Keep small pieces away from children who may put objects in their mouths.
Why Autumn Crafts Are Great for Children
Autumn crafts offer more than seasonal decorations. They give children opportunities to develop useful skills while enjoying a creative activity.
Fine motor skills: Cutting paper, placing tissue pieces, and gluing small decorations help children practice hand coordination.
Creativity and imagination: Children can invent their own animals, choose unexpected colors, and experiment with different designs.
Nature awareness: Collecting leaves and pinecones helps children notice seasonal changes and explore natural textures.
Learning through play: Crafts can introduce colors, shapes, patterns, and basic ideas about trees, leaves, and seasonal weather.
Family bonding: Working on a project together creates opportunities for conversation, cooperation, and happy memories.
The goal isn’t to make perfect artwork. It’s to give children a welcoming space where they can explore, experiment, and enjoy the process.
Final Thoughts
These 6 easy autumn crafts for children offer plenty of ways to celebrate fall using simple materials and a little imagination. From colorful leaf animals and paper plate trees to pinecone owls and sunny window decorations, every project can become a special part of the season.
Choose one craft for a quiet afternoon at home, or set up a small craft station and let children try several throughout the week. You can adjust each activity to suit different ages, available materials, and skill levels.
Most importantly, let children lead the creative process. Their unusual color choices, funny animal faces, and imaginative designs are what make homemade crafts memorable. This autumn, gather a few simple supplies, enjoy some creative time together, and turn the beauty of the season into something wonderful.