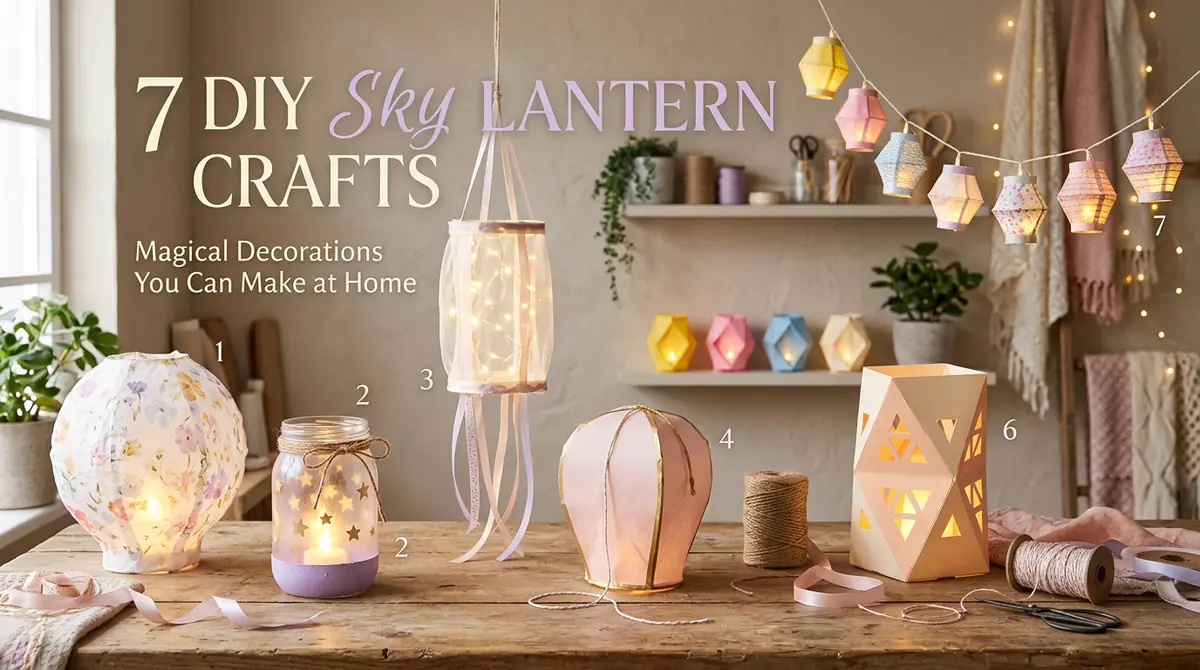
7 Magical DIY Sky Lantern Crafts You Can Make at Home
Imagine a room glowing with warm golden lights, beautiful handmade lanterns hanging near the window, and tiny illuminated decorations creating a peaceful, magical atmosphere. That’s the charm of sky lantern-inspired crafts!
Inspired by the beautiful lantern traditions of Thailand’s Yi Peng Festival, these DIY projects bring the same enchanting appearance into your home without releasing anything into the sky.
The best part? You don’t need expensive supplies or professional crafting skills. With simple materials like colored paper, tissue paper, bamboo-style sticks, recycled jars, fairy lights, and LED candles, you can create beautiful lanterns that are both decorative and useful.
Whether you’re looking for aesthetic bedroom decor, creative lighting for your study corner, handmade gifts, or unique party decorations, these seven DIY sky lantern crafts offer something exciting to try.
Let’s explore some beautiful lantern projects that are easy to customize, practical to use, and perfect for adding a little magic to everyday spaces.
1. Traditional-Inspired DIY Paper Sky Lantern
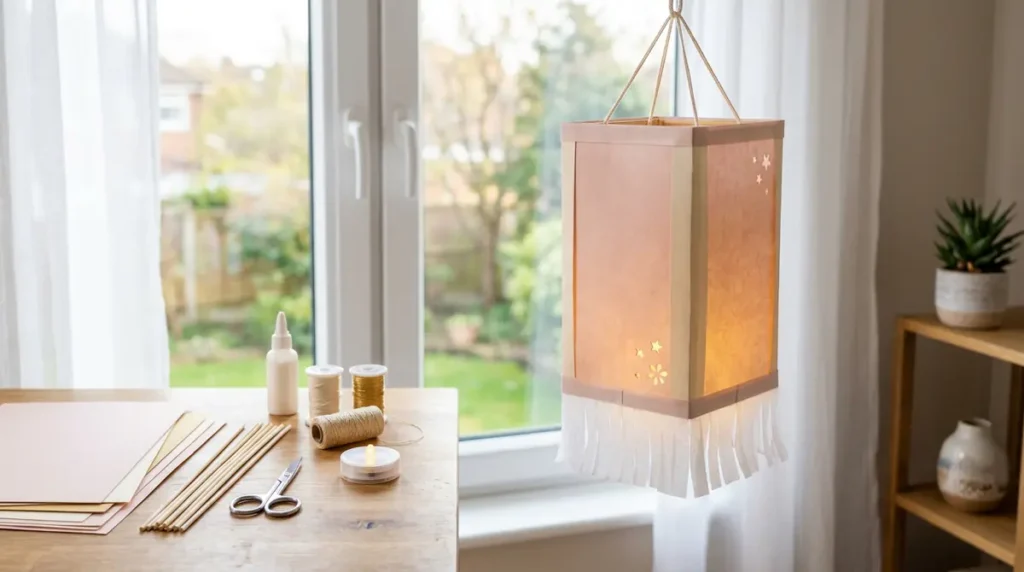
Create a beautiful hanging paper lantern inspired by the glowing lanterns seen during Thailand’s Yi Peng Festival. Its lightweight structure and soft illumination make it a lovely addition to bedrooms, balconies, and cozy indoor spaces.
Materials You’ll Need
- Colored craft paper or lightweight cardstock
- Thin bamboo craft sticks
- White tissue paper
- Craft glue
- Scissors
- String or decorative thread
- Battery-operated LED light
How to Make It
- Start by cutting four equal rectangular pieces of colored craft paper. These will form the main sides of your lantern.
- Create a lightweight square or rectangular frame using thin bamboo craft sticks.
- Attach the paper panels to the frame with craft glue, keeping the structure neat and balanced.
- Cut small decorative shapes, stars, or floral patterns from contrasting paper and attach them to the outside.
- Add a small tissue-paper border around the bottom opening for a softer, traditional-inspired appearance.
- Attach a loop of decorative thread at the top so the lantern can hang securely.
- Place a battery-operated LED light inside to create a beautiful warm glow.
How You Can Use It
Hang this lantern near a bedroom window, above a reading corner, or in a covered balcony area. You can also create several lanterns in different colors and hang them together for a beautiful decorative display.
2. Glowing Glass Jar Sky Lantern
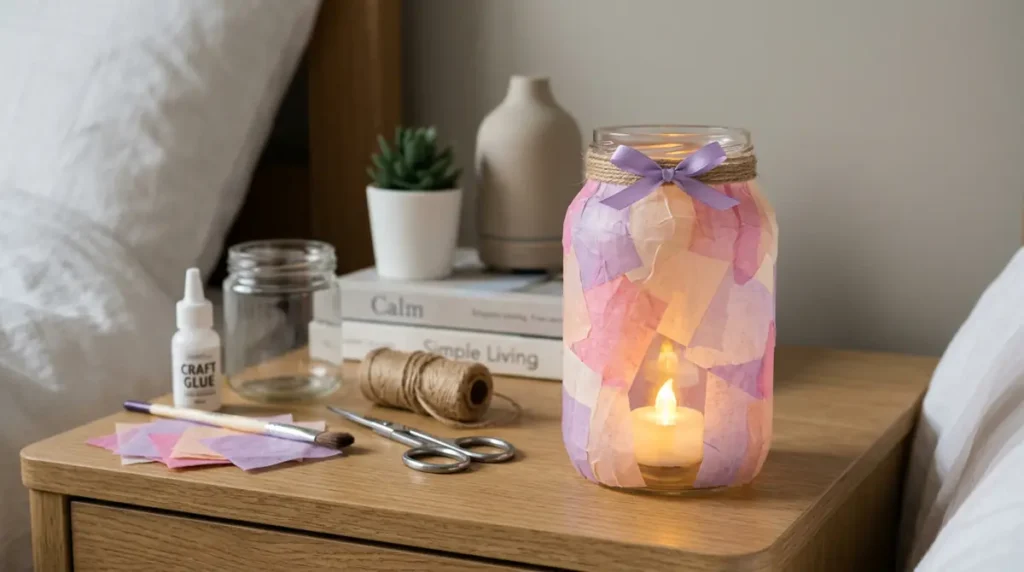
If you love warm lighting and minimalist decorations, this glass jar lantern is a perfect project. It transforms an ordinary glass jar into a glowing decorative light that looks beautiful on desks, bedside tables, and shelves.
Materials You’ll Need
- One clean glass jar
- Colored tissue paper
- Mod Podge or suitable craft glue
- Soft paintbrush
- Jute string or thin decorative ribbon
- Small LED tea light
- Scissors
How to Make It
- Clean and dry your glass jar completely before starting.
- Cut colored tissue paper into small squares, circles, or decorative shapes.
- Apply a thin layer of craft glue to the outside of the jar.
- Carefully place the tissue-paper pieces over the glued surface, slightly overlapping their edges.
- Add another thin layer of glue over the paper to secure it in place.
- Wrap jute string or decorative ribbon around the upper rim of the jar.
- Once everything is completely dry, place a battery-operated LED tea light inside.
How You Can Use It
Use your finished lantern as a bedside night light, a decorative desk accessory, or a centerpiece for a dinner table. Different tissue-paper colors can create different lighting effects when the LED is switched on.
3. DIY Hanging Fairy Light Lantern
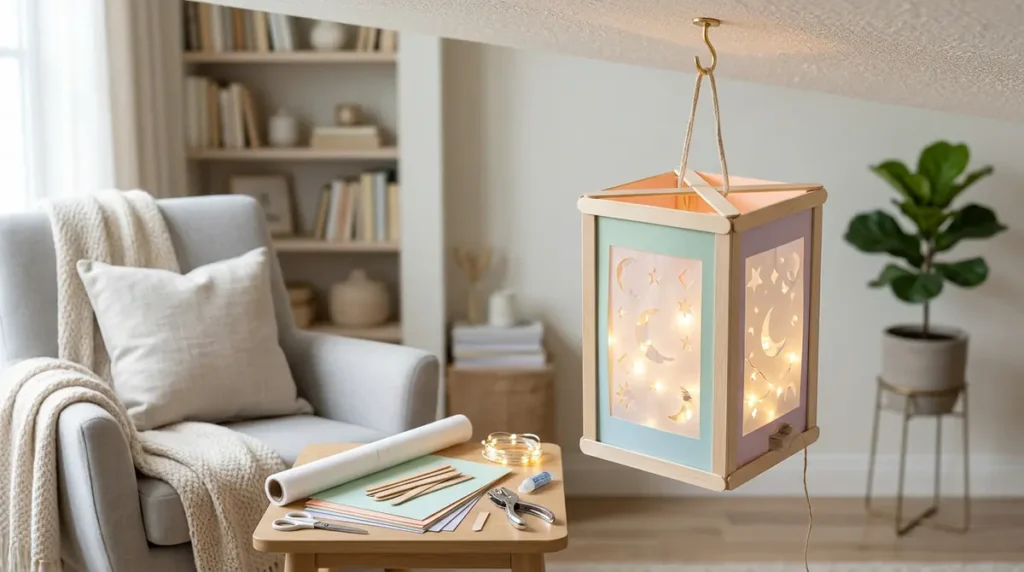
Want something that makes your bedroom feel like a dreamy Pinterest inspiration board? This hanging fairy light lantern combines delicate paper decorations with warm LED lighting to create an elegant hanging display.
Materials You’ll Need
- Lightweight cardstock
- Translucent tracing paper
- Warm-white battery-powered fairy lights
- Thin wooden craft sticks
- Craft glue
- Decorative thread
- Hole punch
- Scissors
How to Make It
- Cut four equal rectangular pieces of cardstock to create the sides of your lantern.
- Cut a slightly smaller rectangle from the center of each panel, leaving a paper border around the edges.
- Attach translucent tracing paper behind each opening to create a soft glowing effect.
- Decorate the outer borders with small stars, moons, flowers, or geometric patterns.
- Assemble the four panels into a box-shaped lantern using wooden craft sticks as corner supports.
- Attach a decorative thread loop at the top.
- Place a battery-powered fairy-light strand inside, securing the battery pack so it remains accessible.
How You Can Use It
Hang it above a reading chair, beside your bed, or in a cozy study corner. You can also make three lanterns in different sizes and arrange them together for a layered decorative effect.
4. Mini Origami Sky Lanterns
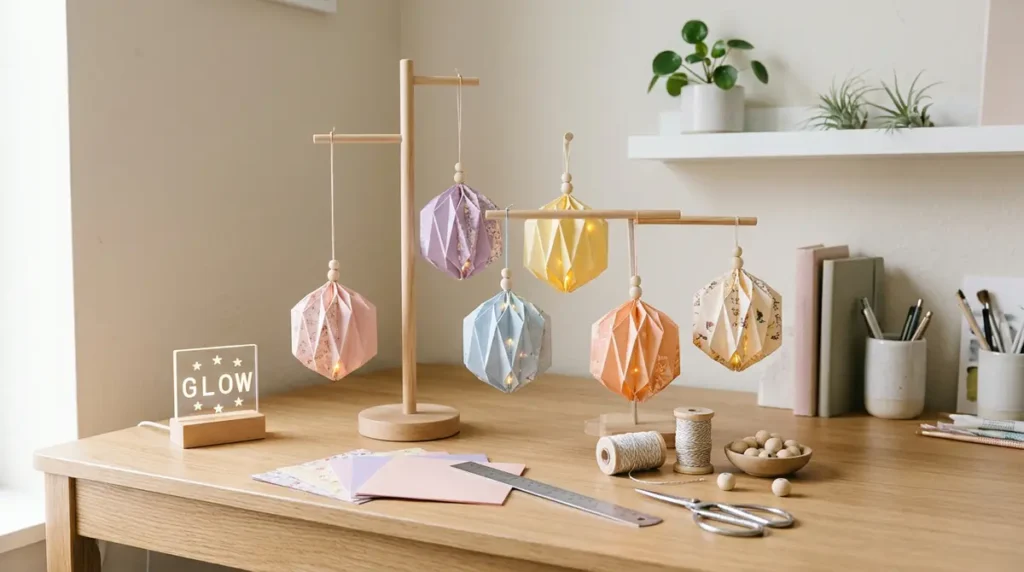
Origami lanterns are a fun way to combine paper folding with creative home decoration. These miniature lanterns look especially attractive when arranged in groups and can be customized using different colors and patterns.
Materials You’ll Need
- Square origami paper
- Colored cardstock
- Craft glue
- Scissors
- Thin decorative thread
- Small battery-powered LED lights
- Ruler
How to Make It
- Choose colorful origami paper in shades such as pastel pink, lavender, cream, or soft blue.
- Fold the paper into a traditional origami lantern-inspired shape using evenly spaced creases.
- Carefully open the folded structure to create a dimensional lantern form.
- Cut a small decorative strip of cardstock and attach it around the bottom edge.
- Make a tiny loop using decorative thread and attach it to the top.
- Repeat the process with different paper colors and patterns.
- Arrange the finished lanterns around a small battery-powered LED display rather than inserting lights into delicate paper folds.
How You Can Use It
Place your miniature lanterns on a bookshelf, decorate your study desk, or use them as part of a handmade party display. They also make lovely handmade gifts for friends.
5. DIY Floral Tissue Paper Lantern
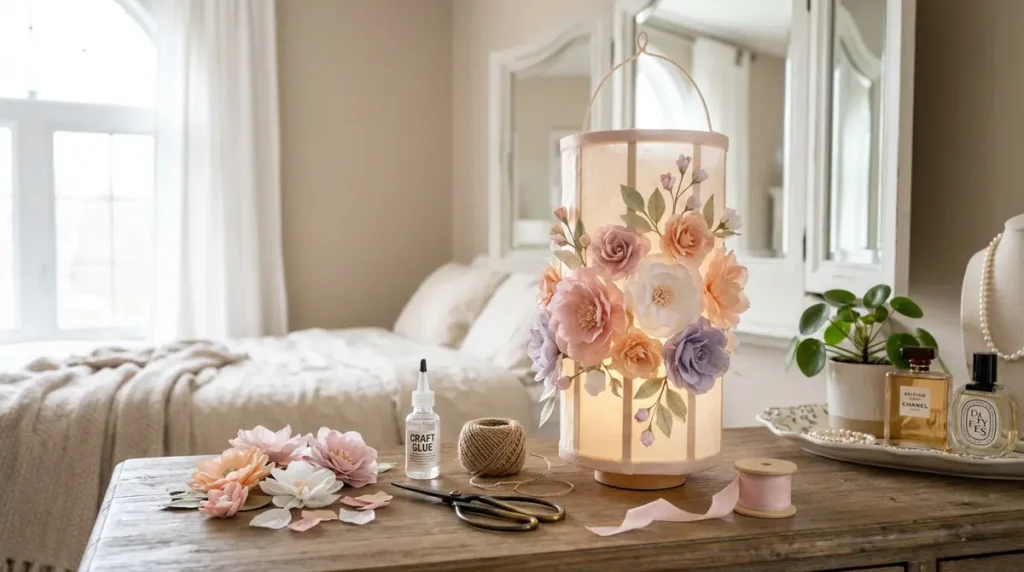
Bring a soft and romantic look to your space with a floral tissue-paper lantern. Its delicate flowers and warm illumination make it a beautiful choice for bedrooms, creative corners, and small celebrations.
Materials You’ll Need
- A lightweight wire or craft-stick frame
- White or pastel tissue paper
- Floral craft paper
- Craft glue
- Scissors
- Thin ribbon
- Battery-operated LED light
How to Make It
- Build a small cylindrical or square lantern frame using lightweight craft materials.
- Cut tissue paper into panels that fit around the frame.
- Attach the panels carefully, leaving the bottom opening accessible.
- Create small paper flowers by layering several tissue-paper circles and gently folding their centers.
- Attach the flowers around the lantern in a balanced arrangement.
- Add a thin ribbon around the top and bottom edges for a polished finish.
- Place a battery-operated LED light inside to illuminate the floral details.
How You Can Use It
Use this lantern as a decorative centerpiece, place it on a vanity table, or display it on a bedroom shelf. Pastel colors work especially well for soft, romantic room decor.
6. Recycled Cardboard Geometric Lantern
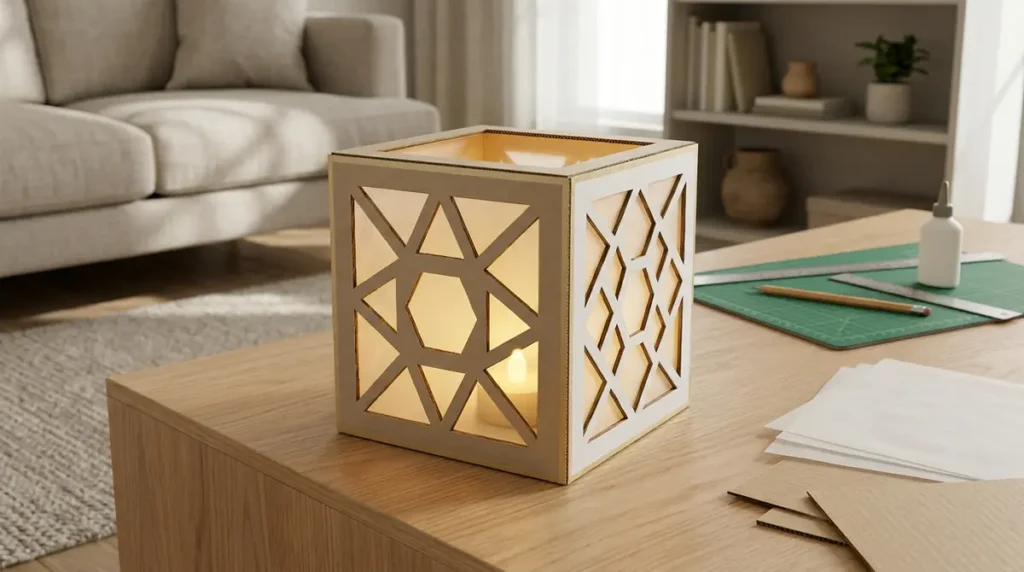
Turn leftover cardboard into a stylish geometric lantern that looks like a modern home decor accessory. This project is especially useful if you enjoy minimalist designs and sustainable crafting.
Materials You’ll Need
- Clean recycled cardboard
- Tracing paper or translucent colored sheets
- Craft knife
- Metal ruler
- Pencil
- Strong craft glue
- Acrylic paint
- Battery-operated LED tea light
How to Make It
- Draw four equal geometric panels on recycled cardboard.
- Carefully cut out the panels, creating decorative geometric openings in the center.
- Cover the openings with translucent tracing paper or colored sheets.
- Paint the cardboard edges in your preferred colors, such as matte white, beige, gold, or black.
- Join the panels together to create a cube-shaped lantern.
- Add a matching cardboard base with enough space for an LED tea light.
- Once the glue and paint have dried, place the battery-operated light inside.
How You Can Use It
Display it on a coffee table, bookshelf, or office desk. You can also create a matching set of geometric lanterns in different sizes for a modern decorative arrangement.
Safety tip: Craft knives should be handled carefully on a cutting mat, with adult supervision where appropriate.
7. DIY Outdoor-Inspired Lantern Hanging Garland
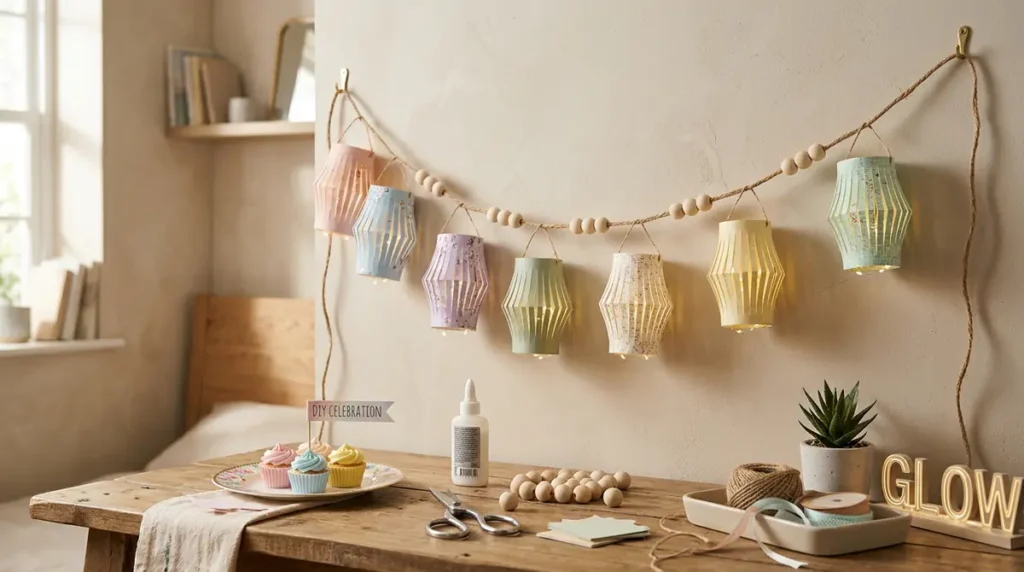
Create a beautiful lantern garland that brings the atmosphere of a festive evening into your home. Instead of making one large lantern, this project combines several miniature lanterns into one decorative arrangement.
Materials You’ll Need
- Colored cardstock
- Lightweight decorative paper
- Jute string or cotton cord
- Small wooden beads
- Scissors
- Craft glue
- Hole punch
- Battery-powered mini LED lights
How to Make It
- Cut several rectangular strips of colored cardstock in different lengths.
- Fold each strip in half lengthwise without pressing the fold too sharply.
- Make evenly spaced vertical cuts along the folded edge, leaving a border at the top.
- Unfold the paper and roll it into a cylinder, securing the edges with glue.
- Attach a small paper handle to the top of each lantern.
- Thread the lanterns onto a long piece of jute string, adding wooden beads between them.
- Arrange battery-powered mini LED lights near the lantern openings, keeping the battery packs accessible and secure.
How You Can Use It
Hang the garland across a bedroom wall, above a party table, or along a covered balcony. It is especially useful for birthdays, small gatherings, and festive indoor decorations.
Tips for Making Your DIY Sky Lantern Crafts Look Beautiful
A few simple design choices can make handmade lanterns look much more polished and professional.
- Choose a consistent color palette: Combine warm cream, blush pink, lavender, peach, and golden shades for a soft aesthetic look.
- Use warm-white lighting: Warm LED lights create a cozy atmosphere and make paper textures look more attractive.
- Mix different shapes: Combine cylindrical, square, and geometric lanterns for visual variety.
- Add handmade details: Small flowers, stars, ribbons, beads, and decorative cutouts can make simple designs look special.
- Think about placement: Hang larger lanterns higher and arrange smaller ones on tables or shelves.
- Reuse your materials: Save leftover cardstock, ribbons, and decorative paper for future projects.
Important Safety Tips for DIY Lanterns
Traditional sky lanterns use open flames to rise into the air, which can create fire hazards and cause environmental problems. These DIY projects are designed as decorative alternatives rather than flying lanterns.
- Never use candles or open flames inside handmade paper lanterns.
- Always choose battery-operated LED tea lights or low-heat LED fairy lights.
- Avoid placing lanterns near curtains, heaters, or other heat sources.
- Keep battery packs accessible and follow the manufacturer’s instructions.
- Use weather-resistant materials only if displaying lanterns outdoors.
- Never release homemade lanterns into the sky.
Final Thoughts
Creating your own sky lantern-inspired decorations is a wonderful way to bring the beauty of the Yi Peng Festival into everyday life. From glowing glass jars and floral paper lanterns to modern geometric designs, each project offers a different way to experiment with colors, textures, and lighting.
You don’t need expensive materials or advanced crafting skills to create something beautiful. Start with a simple paper lantern, try a more detailed design, and gradually build your own collection of handmade decorations.
Whether you’re decorating your bedroom, preparing for a celebration, or making a thoughtful handmade gift, these seven DIY lantern crafts can turn ordinary materials into something magical.
Pick your favorite design, gather your supplies, and let your creativity glow!