The Ultimate Guide to DIY Bead Crafts: 7 Creative Projects to Transform Your Home and Style
Bead crafting is one of the most versatile, budget-friendly, and visually captivating creative outlets available today. Whether you are looking to elevate your personal style, add rich tactile textures to your living space, or craft thoughtful handmade gifts, working with beads offers endless possibilities. The magic of beading lies in its accessibility: with a few basic tools and a bit of technique, simple materials can be turned into high-end accessories and home accents.
This comprehensive guide breaks down 7 actionable DIY bead craft projects, complete with exact material lists, step-by-step techniques, and professional tips to ensure your finished pieces look polished and durable.
Aesthetic Bead & Wire Drink Coasters
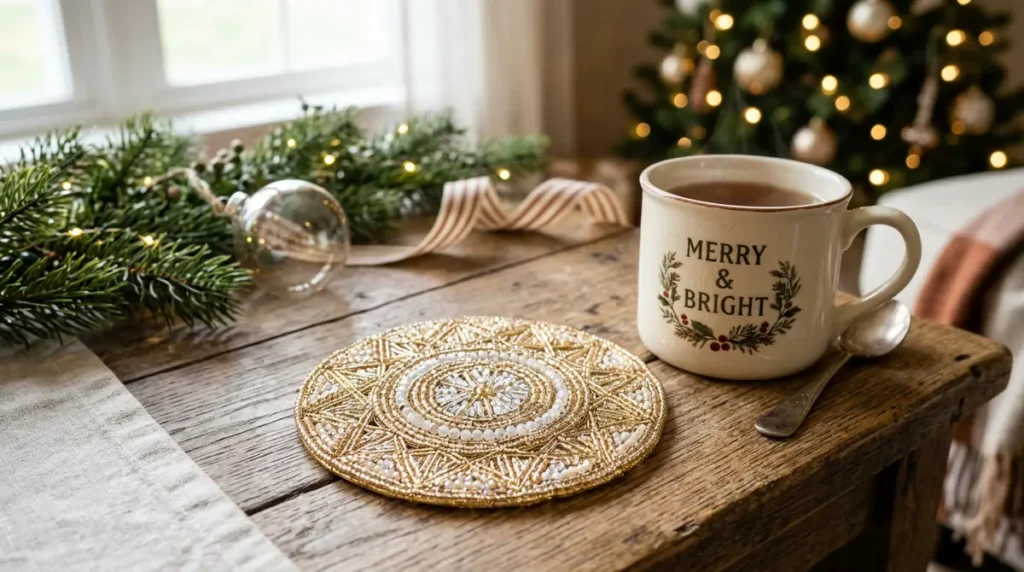
Beaded drink coasters bring texture, color, and elegance to any coffee table or nightstand. Unlike flat plastic or paper coasters, the raised profile of beads catches condensation effectively while serving as a vibrant visual centerpiece for your living space.
Materials Needed
- 16-gauge craft wire (for the structural outer frame)
- 24-gauge jewelry wire (for weaving and bead wrapping)
- Assorted glass beads (4mm to 6mm size range works best)
- Wire cutters and round-nose pliers
- Cork backing sheet or felt circles (optional, for protecting furniture surfaces)
Step-by-Step Execution
- Form the Outer Frame: Using wire cutters, snip a 12-inch piece of 16-gauge wire. Shape it into a flat geometric outline—such as a circle, hexagon, or soft square—measuring roughly 4 inches across. Lock the ends together by twisting them neatly with round-nose pliers.
- Anchor the Weaving Wire: Cut a 3-foot length of 24-gauge wire. Wrap one end around your outer frame 4 to 5 times tightly to create an anchor point.
- String and Weave: Thread 6 to 8 glass beads onto the thin wire. Stretch the wire across the interior of the frame, wrapping it around the opposite side of the frame twice to secure the line.
- Fill the Surface: Continue threading beads and traversing the frame back and forth in a tight grid or spiral pattern. Ensure each pass sits snugly against the previous line so no open gaps remain.
- Finish and Protect: Wrap the final tail of wire around the outer frame multiple times, trim any excess, and press the sharp end flat with pliers. For extra surface protection, glue a cut circle of felt to the underside of the wire grid.
Professional Finishing Tip
Mix matte-finish glass beads with polished metallic accent beads (such as gold or silver seed beads). The contrast in reflectivity gives the coaster a multi-dimensional, store-bought finish.
Layered Y2K-Style Phone Charms and Wristlets
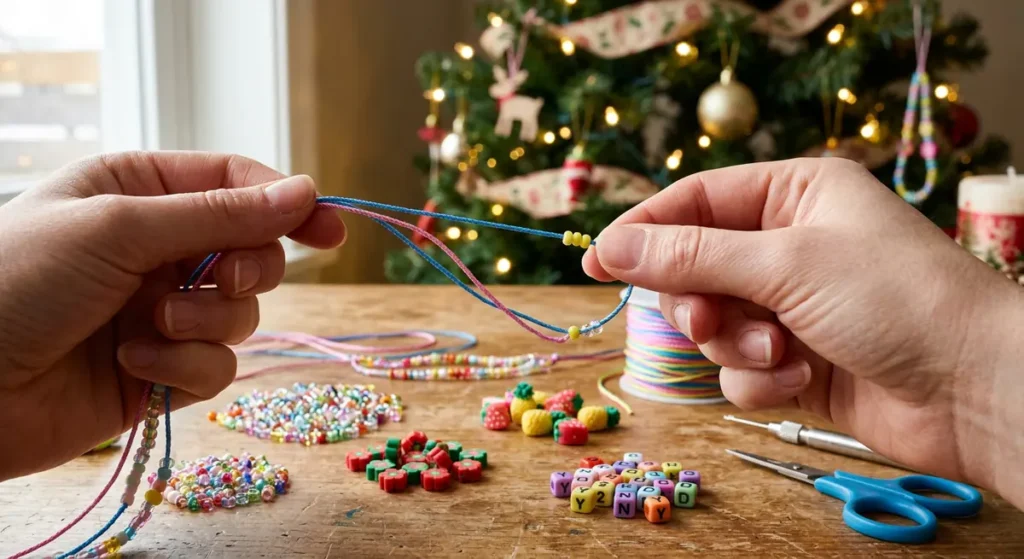
Custom phone straps and wristlets remain one of the strongest visual trends across personal accessory styling. They combine everyday functional utility—giving you an easy way to hold your device—with personalized aesthetic flair.
Materials Needed
- 1mm braided nylon cord or durable satin cord (12–15 inches long)
- Polymer clay beads (fruit, flower, or abstract geometric shapes)
- Pastel glass seed beads (size 8/0 or 6/0)
- Acrylic letter beads (for names, words, or mantras)
- Lighter or clear jewelry glue (for sealing knots)
Step-by-Step Execution
- Prepare the Mounting Loop: Fold your 15-inch cord precisely in half. Measure 2 inches down from the folded midpoint and tie a tight overhand knot. This forms the top loop that hitches into your phone case anchor point.
- Design Your Pattern: Lay your beads out flat before stringing. Aim for asymmetry: cluster polymer clay motifs near the top, place letter beads in the center, and frame them with uniform glass seed beads.
- String the Strands: Divide the two trailing ends of the cord. Thread beads onto both strands simultaneously, or treat them as two separate decorative legs that mirror each other.
- Secure the Base: Once you reach your desired length (usually 4 to 5 inches of beadwork), pull both cord ends together and tie a triple surgeon’s knot as close to the final beads as possible.
- Seal the Ends: Trim excess cord leaving about 1/16 of an inch. Carefully touch the knot with a lighter flame to melt synthetic cords together, or apply a drop of clear jewelry glue to prevent fraying.
Professional Finishing Tip
Always test your phone case attachment loop before stringing. Ensure the cord thickness fits comfortably through the silent switch opening or lanyard port of your specific phone case.
Pearl & Daisy-Chain Beaded Necklaces
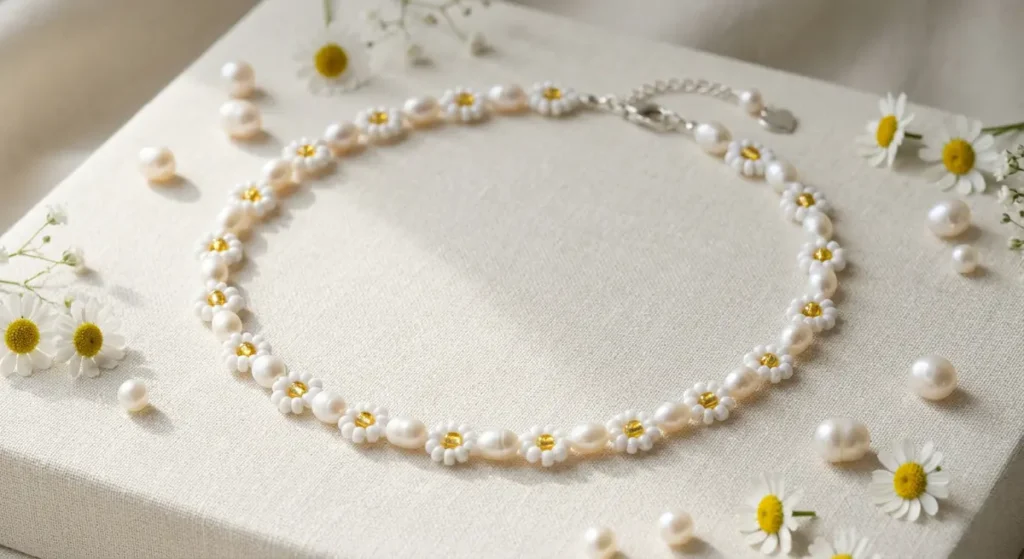
The daisy-chain stitch is a classic bead-weaving pattern that creates continuous floral motifs. Combined with freshwater pearls, this technique creates timeless jewelry pieces that balance vintage charm with modern elegance.
Materials Needed
- 0.3mm flexible multi-strand bead crimping wire
- Size 11/0 seed beads in two contrasting shades (Petal Color and Center Color)
- Small freshwater pearls (3mm–5mm)
- 2 Crimp beads & 1 Lobster clasp set
- Flat-nose pliers
Step-by-Step Execution
- Set Up the Clasp: Thread a crimp bead onto one end of your wire, follow it with one half of your lobster clasp, and loop the wire back through the crimp bead. Squeeze the crimp bead firmly flat using flat-nose pliers to lock the wire.
- Build the Daisy Base: String 4 petal-colored seed beads onto the wire.
- Form the First Half-Loop: Pass the working end of the wire back through the very 1st bead you strung, pulling tight to form a small half-circle.
- Add the Center: Thread 1 center-colored bead onto the wire.
- Complete the Flower: Pass the wire forward through the 4th petal bead. Pull the wire flush—the center bead will lock into the middle of your 4 petal beads, forming a complete 6-bead flower motif.
- Integrate Pearls: String 3 to 4 freshwater pearls onto the line before starting your next daisy stitch. Repeat this sequence until the necklace reaches your desired length (14 to 16 inches for a choker style).
- Attach the Terminating Clasp: Finish by crimping the opposite end of the wire to your clasp ring, trimming any excess wire cleanly.
Professional Finishing Tip
Maintain consistent thread tension. Pulling too tight will make the necklace stiff and cause it to kink on your neck, while leaving too much slack exposes bare wire between the pearls and flowers.
Catch-the-Light Beaded Window Suncatchers
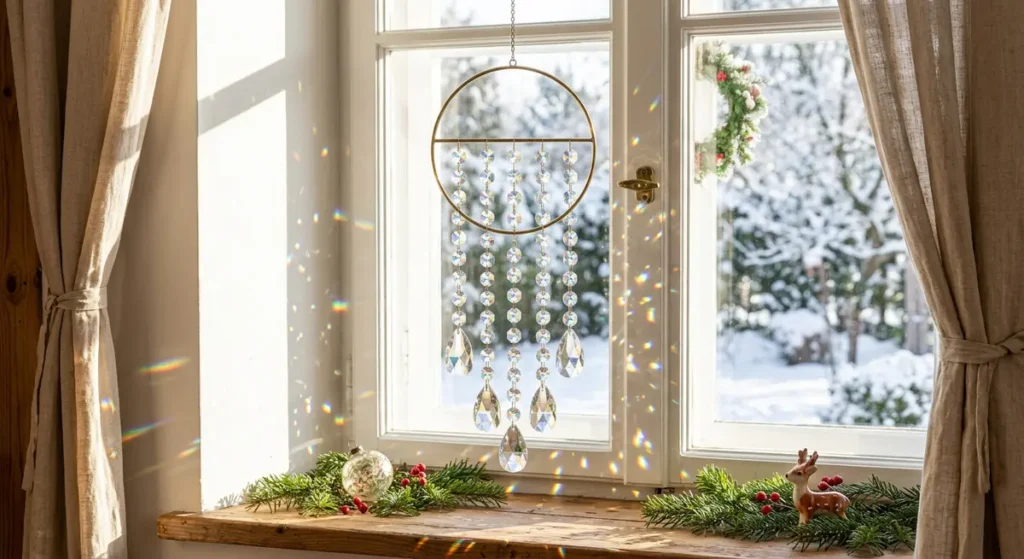
Hanging beaded strands near natural light sources fills interior spaces with dynamic visual warmth. Suncatchers catch direct sunlight and project vibrant rainbow reflections across your walls and ceilings.
Materials Needed
- 0.4mm clear monofilament line (fishing line or clear bead cord)
- Faceted glass crystals (various sizes: 6mm, 8mm, 12mm)
- Heavy crystal glass prisms (chandelier drop style for the bottom weight)
- 3-inch to 5-inch brass metal ring or driftwood branch
- Crimp beads and hanging ribbon
Step-by-Step Execution
- Prepare Strands: Cut 5 lengths of monofilament line ranging from 12 inches to 20 inches to create a staggered, layered cascade.
- Anchor the Prisms: Slide a crimp bead onto the bottom of a line, pass the line through your heavy crystal drop prism, and back through the crimp bead. Crimp tightly to hold the main weight.
- Build the Pattern: Thread faceted glass crystals up the line. Vary the size gradient—place the largest beads near the bottom prism, tapering up to smaller beads toward the top anchor point.
- Attach to Frame: Tie each finished strand securely to your brass hoop or driftwood branch using double square knots. Space them evenly apart.
- Balance the Assembly: Tie a sturdy hanging ribbon or chain to the top of your frame, adjust the balance so it hangs perfectly level, and trim any remaining line tails.
Professional Finishing Tip
Choose beads featuring an AB (Aurora Borealis) coating. This iridescent vacuum finish drastically increases refraction, transforming plain sunlight into vivid rainbow patterns inside your room.
Beaded Bookmark Tassels

Elevate standard reading sessions with weighted, custom-crafted page markers. Beaded book thongs use a thin middle cord that rests between pages without damaging the spine, while weighted beaded tassels hang elegantly from the top and bottom of the book.
Materials Needed
- 1/8-inch wide velvet ribbon or thin rat-tail satin cord (approx. 15 inches)
- Ornate metal alloy beads and 6mm to 8mm natural stone beads
- Jewelry headpins (2-inch length)
- Round-nose pliers and wire cutters
Step-by-Step Execution
- Measure Your Book Base: Cut your velvet ribbon to 15 inches—this leaves roughly 2 to 3 inches extending from both the top and bottom of a standard hardcover book.
- Construct Beaded Dangles: Slide 3 to 4 complementary beads onto a metal headpin.
- Make a Wrapped Loop: Using round-nose pliers, bend the top bare portion of the headpin 90 degrees, wrap it over the plier jaw to create a loop, and wrap the remaining wire tail around the base of the loop twice. Trim excess wire.
- Attach to Cord: Sew or clamp the loop of your beaded dangle to the end of your velvet ribbon.
- Repeat for Bottom: Repeat the process for the opposite end of the ribbon, using a slightly smaller or lighter bead cluster so the top remains visually distinct.
Professional Finishing Tip
Use heavy natural gemstone beads—like amethyst, rose quartz, or tiger’s eye—for the bottom tassel. The natural weight keeps the ribbon taut against the pages so your mark is never lost.
Woven Seed Bead Fringe Earrings
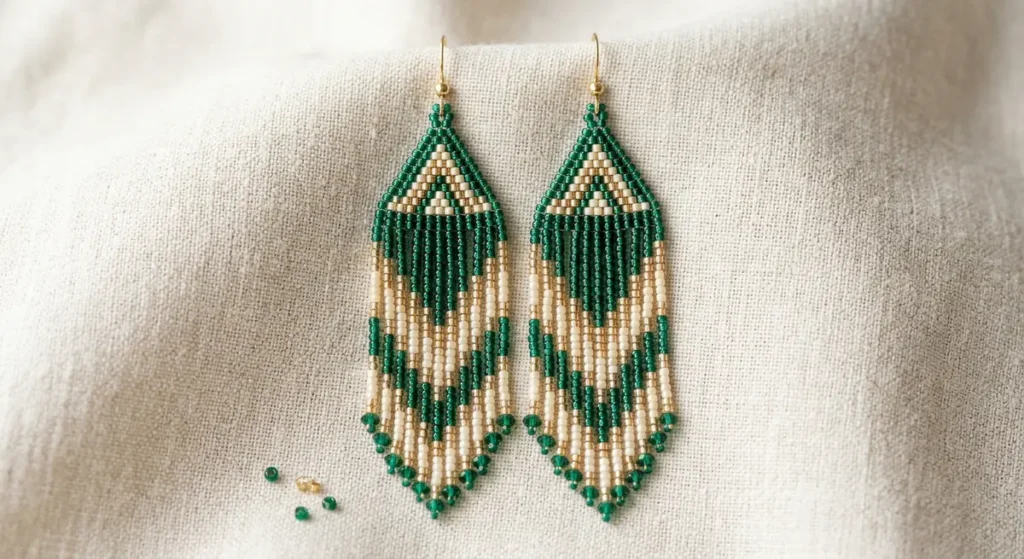
Lightweight, eye-catching, and full of fluid movement, beaded fringe earrings offer bold visual impact. Using brick stitch weaving techniques, you can create intricate geometric headers that cascade down into delicate linear strands.
Materials Needed
- Size 11/0 Japanese precision seed beads (such as Miyuki Delica or Toho)
- Nymo or FireLine bead weaving thread (Size D)
- Size 10 or 12 bead weaving needle
- Earring fishhooks
- Jewelry scissors
Step-by-Step Execution
- Create the Foundation Row: Thread your needle with 3 feet of thread. Weave a row of 6 to 8 seed beads side-by-side using ladder stitch to establish the flat top header of your earring.
- Build the Brick Stitch Triangle: Weave 2 to 3 rows of brick stitch on top of your foundation row, reducing one bead per row to create a clean, pointed triangle shape.
- Attach the Earring Hook: Pass your thread through the top apex bead, loop through the ring of your earring hook twice, and weave back down into the beadwork to lock it in place.
- Drop the Fringe Strands: Bring your needle out through the bottom hole of the first bead in your foundation row. Pick up 25 to 35 seed beads to create your first fringe strand.
- Turn the Strand: Skip the very last bead on your strand, pass the needle back up through all the remaining beads of that strand, and go straight up into the next foundation bead.
- Complete the Fringe: Repeat step 5 across all foundation beads, adjusting the count on each strand if you want to create a chevron or curved lower hemline.
- Weave in Ends: Pass remaining thread tails through multiple neighboring beads in a zig-zag pattern to lock them by friction before trimming. Never rely on simple knots at the ends.
Professional Finishing Tip
Keep your thread tension moderate while stringing the dangling fringe. Pulling the fringe strands too tight causes the seed beads to buckle and stick out stiffly rather than hanging straight and swaying naturally.
Custom Wooden Bead Plant Hangers
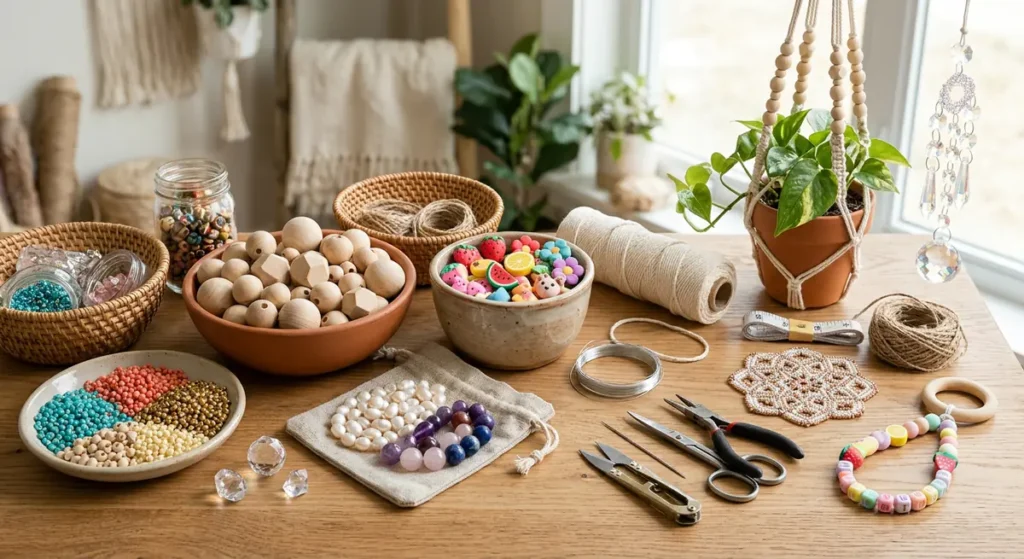
Combining warm, natural wood tones with textured woven cords creates striking plant hangers that elevate your houseplants into wall art and hanging accents.
Materials Needed
- 3mm cotton macramé cord (cut into 4 pieces, 8 feet each)
- Large unfinished wooden beads (20mm to 30mm with large center holes, at least 6mm wide)
- 2-inch wood or brass mounting ring
- Painter’s tape and acrylic paint (optional, for custom bead designs)
Step-by-Step Execution
- Mount the Cords: Fold your four 8-foot cords in half through the mounting ring. Tie a tight gathering knot directly under the ring. You will now have 8 working strands dangling down.
- Prep Your Wooden Beads: (Optional) Tape off sections of your wooden beads and paint geometric color blocks using acrylic paint. Let them dry completely.
- Group and Thread: Separate your 8 strands into 4 working pairs (2 cords per pair). Slide a large wooden bead over each cord pair, pushing the beads up to sit roughly 6 inches below the top ring knot.
- Knot to Lock: Tie a solid overhand knot directly beneath each wooden bead to hold it securely at your desired height.
- Create the Pot Basket: Measure 4 inches down from your first set of knots. Take one cord from Pair A and one cord from neighboring Pair B, and tie them together with an overhand knot. Slide a bead over this new pair and knot beneath it. Repeat around all cords to form a criss-cross net.
- Finish the Base Gathering Knot: Bring all 8 strands together 4 to 5 inches below your net knots. Wrap a separate 2-foot piece of cord around the bundle tightly to tie a final gathering knot. Trim the tassel ends evenly.
Professional Finishing Tip
Before stringing large wooden beads over macramé cord, wrap a small piece of clear tape tightly around the ends of the cords. This acts like a shoe-lace aglet, allowing the thick cord to slide effortlessly through the bead holes without fraying.
Bead Selection Quick Reference Guide
To ensure long-term durability and the best visual results for your DIY projects, match your materials according to this quick-reference chart:
| Bead Category | Dominant Features | Ideal Project Applications | Best Stringing & Threading Material |
| Glass Seed Beads | Uniform size, massive color variety, precise geometry | Jewelry, Fringe Earrings, Wire Coasters | Nymo Thread, FireLine, 0.3mm Wire |
| Faceted Glass Crystals | High light refraction, sharp reflective edges | Suncatchers, Chandelier Accents, Pendants | Monofilament Line, 0.4mm Wire |
| Natural Wood Beads | Lightweight, warm tactile texture, large center holes | Plant Hangers, Garland Decor, Curtain Ties | 3mm Macramé Cord, Jute Twine |
| Polymer Clay Beads | Playful shapes, vibrant matte colors, durable | Phone Straps, Casual Bracelets, Keychains | 1mm Nylon Cord, Elastic Thread |
| Freshwater Pearls | Organic shapes, soft iridescent sheen, classic look | Chokers, Elegant Necklaces, Fine Bracelets | Flexible Bead Wire, Silk Cord |