DIY Christmas Front Porch Crafts: 7 Step-by-Step Projects for Maximum Curb Appeal
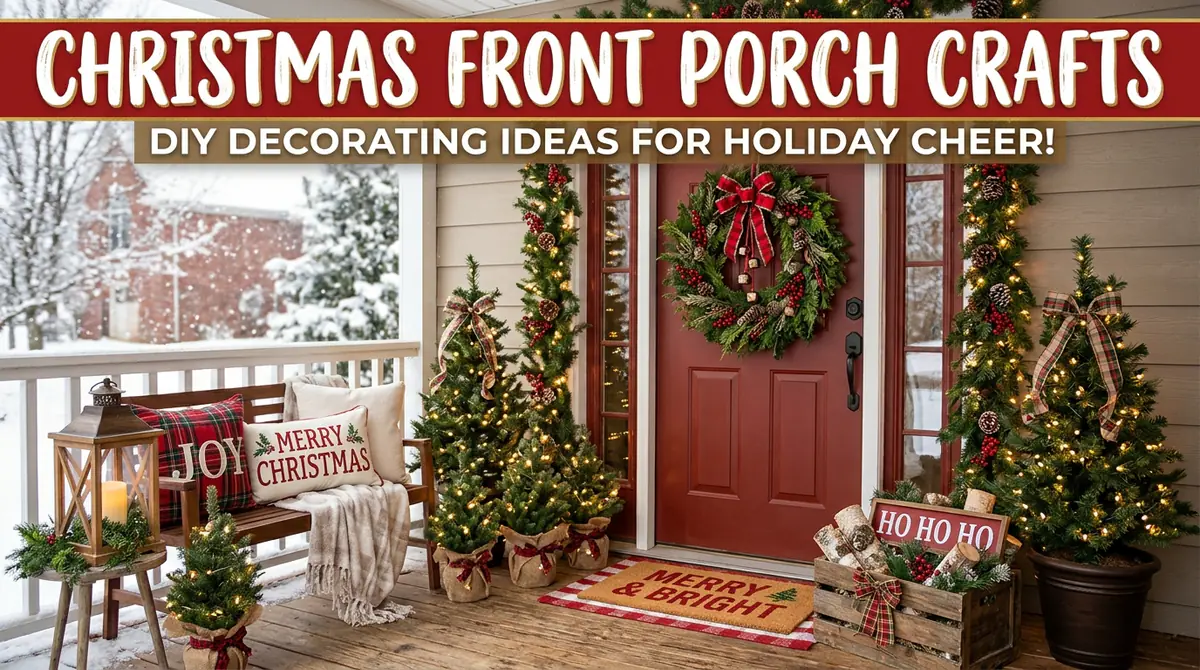
Creating a cozy, welcoming entrance for the holiday season doesn’t require spending hundreds of dollars on store-bought decor. Handcrafted outdoor decorations let you customize colors, textures, and dimensions to complement your home’s exterior while using durable, weather-resistant materials built to handle winter conditions.
Below is an expanded, comprehensive guide to 7 high-impact DIY Christmas front porch crafts, complete with exact material measurements, detailed assembly steps, styling notes, and essential weatherproofing tips.
Oversized Wooden Scrap Snowmen Trio
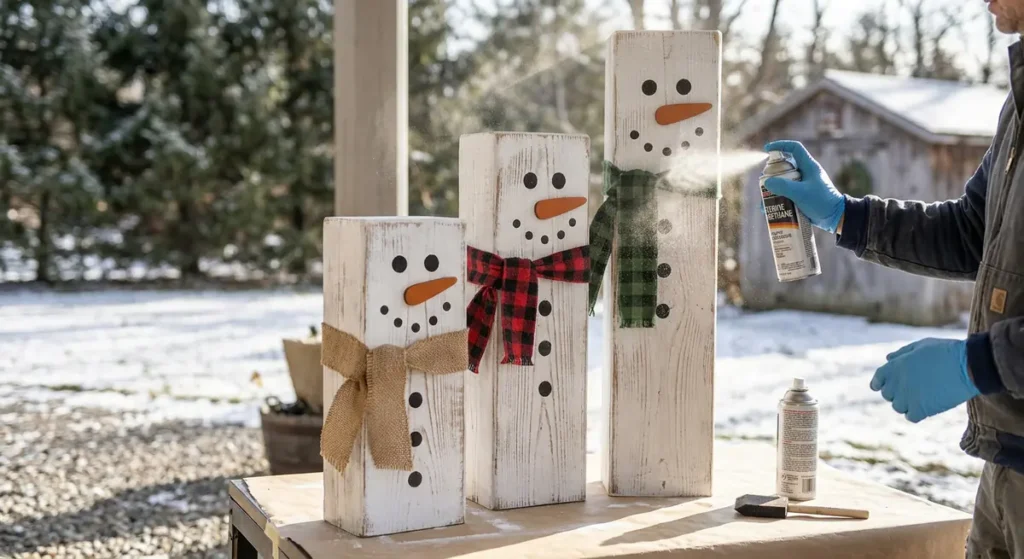
Repurposed wood crafts provide natural weight against high winter winds while adding rustic charm to entry corners, porch steps, or alongside seating.
Material & Tool Checklist
- Wood: 4×4 lumber post cut into three lengths (12 inches, 18 inches, and 24 inches)
- Paint: White exterior latex paint (satin or semi-gloss), black exterior acrylic paint, orange exterior acrylic paint
- Fabric: 2-inch wide burlap strip, plaid flannel scraps, or vintage scarves
- Tools: Sandpaper (80-grit and 120-grit), foam brushes, detail paintbrushes, wood sealer
Step-by-Step Construction
- Prepare the Wood Base: Sand each 4×4 block thoroughly using 80-grit sandpaper to remove splintering and smooth sharp edges. Follow with 120-grit for a clean painting surface.
- Apply Base Coat: Apply two full coats of white exterior latex paint to all six sides of each post. Allow 2 hours of drying time between coats.
- Distress the Edges (Optional): Take 80-grit sandpaper and lightly rub the corners and edges to expose raw wood underneath for an antique, farmhouse look.
- Paint Facial Features & Buttons:
- Use black acrylic paint to dab small circles for eyes, a dot-matrix smile, and 3 vertical coal buttons down the front of each block.
- Paint a elongated triangle using orange acrylic paint for the carrot nose.
- Attach Weather Resistant Accessories: Tie a strip of burlap or plaid flannel securely around the top third section of each block to create a scarf. Fasten the knot with a dab of exterior hot glue or a small finish nail so winter winds won’t untie it.
- Seal the Finish: Coat the entire assembly with a spray-on clear matte exterior polyurethane.
Pro Styling & Placement
Group the three snowmen in a tight triangular cluster on top of a low wooden crate or vintage sled near your entryway. Flank the cluster with battery-operated lantern lights to illuminate their faces after sunset.
Giant Metallic Outdoor Christmas Ornaments
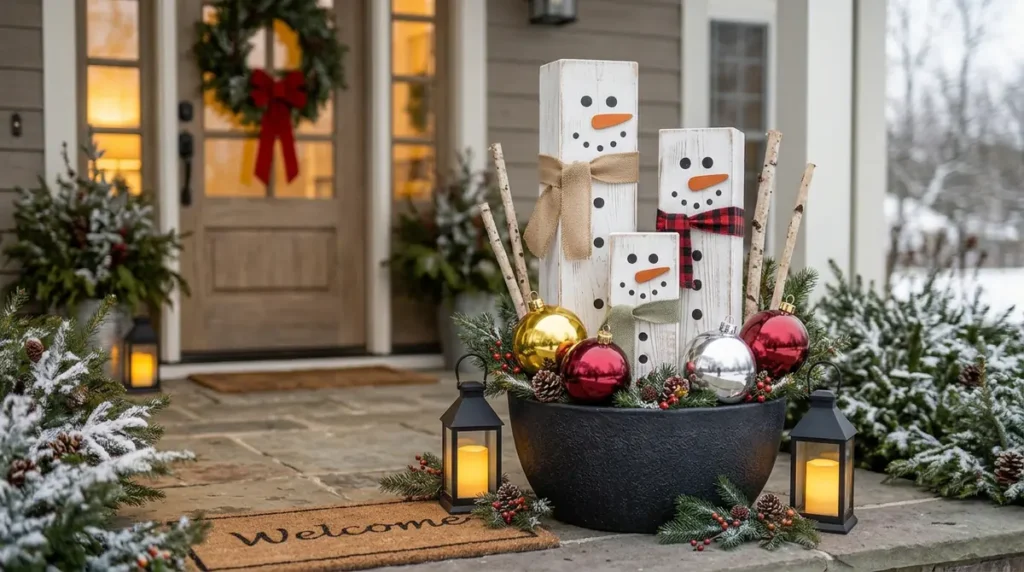
Large-scale ornaments create visual drama that reads clearly from the street, adding high-end festive flair without high-end prices.
Material & Tool Checklist
- Base Form: Hard plastic play balls, smooth plastic exercise balls, or large plastic light globes (8–12 inches in diameter)
- Cap Element: Empty plastic deli containers, tuna cans, or plastic floral pots (3–4 inches wide)
- Hardware: 2-inch heavy-duty metal eye hooks, 2 metal washers, 2 matching nuts
- Adhesive & Paint: E6000 industrial craft adhesive, spray primer, UV-resistant metallic spray paint (Gold, Crimson Red, Silver)
Step-by-Step Construction
- Build the Ornament Cap:
- Drill a 1/4-inch hole directly through the center of the bottom of your plastic deli container or tuna can.
- Insert the eye hook through the hole, placing a washer and nut on both the inside and outside of the cap to lock it rigidly in place.
- Spray paint the cap silver or bright gold; let dry for 1 hour.
- Prep & Paint the Spheres:
- Lightly scuff the outer plastic surface of the ball with fine steel wool so the paint adheres properly. Wipe clean of dust.
- Apply one coat of plastic-bonding primer, followed by two heavy coats of high-gloss metallic spray paint.
- Attach Cap to Sphere: Apply a thick ring of E6000 industrial adhesive along the rim of the painted cap. Press the cap firmly onto the top center of the sphere.
- Cure: Secure the cap with painter’s tape while it cures for a full 24 hours to ensure a waterproof, freeze-proof bond.
- Hanging Prep: Thread heavy outdoor velvet ribbon or thick jute rope through the eye hook.
Pro Styling & Placement
Nest 3 to 5 ornaments of varying sizes inside large, empty outdoor planters, layering them among fresh evergreen boughs, pinecones, and birch sticks.
Frosted Epsom Salt Luminary Steps
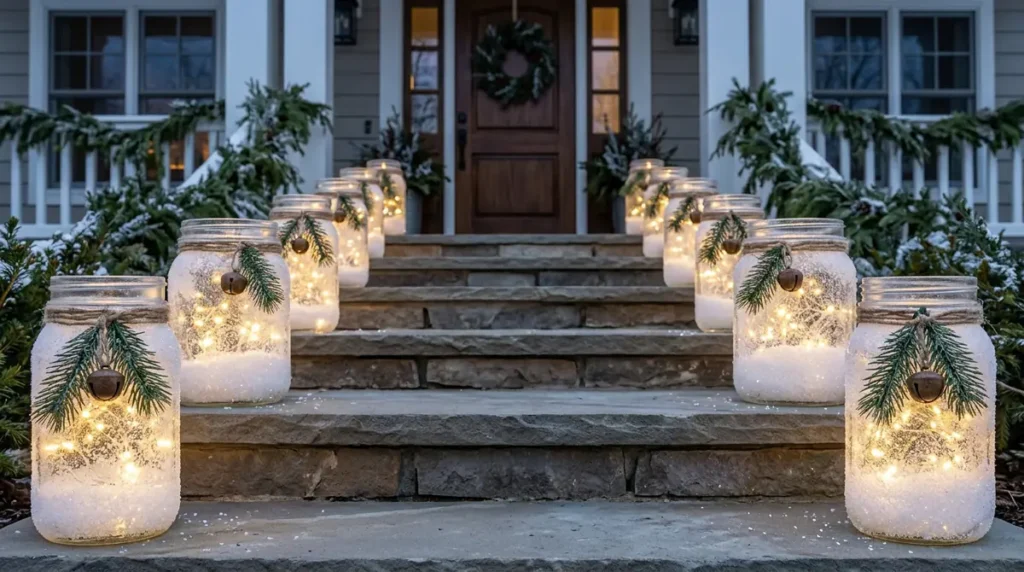
Custom step lighting creates a warm, inviting path to your front door while defining architectural features during dark winter evenings.
Material & Tool Checklist
- Containers: Gallon-sized wide-mouth glass pickle jars, mason jars, or glass hurricane vases
- Frosting Medium: Outdoor Mod Podge (water-resistant formula), coarse Epsom salt, white fine glitter
- Greenery Accent: Faux pine sprigs, red holly berries, small rust-resistant metal bells, jute twine
- Lighting: Submersible or outdoor-rated LED fairy light strands with built-in automatic 6-hour timers
Step-by-Step Construction
- Mix the Snow Texture: In a wide shallow tray, blend 2 cups of Epsom salt with 2 tablespoons of fine white craft glitter.
- Coat the Glass: Using a wide paint sponge, apply a generous, even layer of Outdoor Mod Podge across the exterior sides of the glass jar (avoiding the bottom base and inner rim).
- Apply the Frost: Roll the wet jar through the Epsom salt mixture until the entire painted surface is evenly coated in a heavy layer of sparkling “snow.” Allow it to dry for at least 4 hours.
- Seal Against Moisture: Lightly mist the frosted exterior with a spray-on clear acrylic sealer. This prevents melting or shedding when exposed to atmospheric humidity or light frost.
- Decorate the Rim: Wrap jute twine around the jar neck 4–5 times. Tie in a secure knot, embedding a mini pine pick and small metal jingle bell into the front.
- Insert Lighting: Drop an outdoor-rated battery pack with LED fairy lights inside each jar, setting the timer to turn on automatically at dusk.
Pro Styling & Placement
Place one jar on each side of every step leading up your front staircase to form a symmetrical, illuminated runaway straight to your front door.
Fresh Evergreen & Birch Topiary Urns
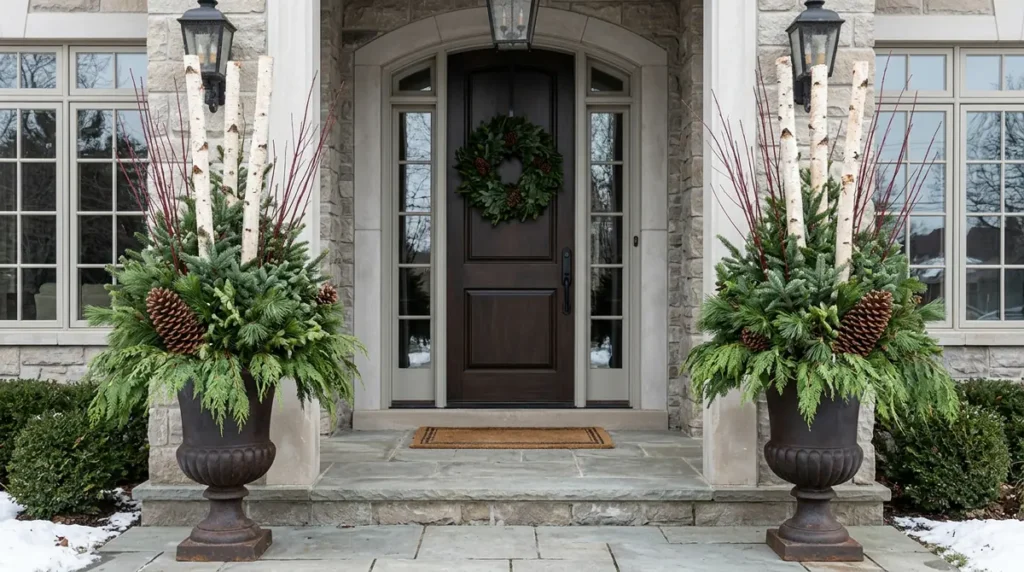
Utilizing natural forage cuts decoration costs dramatically while keeping natural pine scents fresh at your doorstep throughout the entire season.
Material & Tool Checklist
- Containers: Heavy concrete planters, cast iron urns, or sturdy wooden barrels
- Structural Fillers: Drainage gravel, potting soil, floral foam bricks (for wet/outdoor use)
- Foraged Greenery: White pine boughs, noble fir branches, incense cedar sprigs, red osier dogwood twigs
- Accents: 3-foot white birch logs, oversized pinecones, 18-gauge floral wire, wooden floral picks
Step-by-Step Construction
- Weight the Base: Fill the bottom third of your planter with heavy gravel or bricks to lower its center of gravity and prevent high winds from knocking it over.
- Secure the Logs: Pack damp potting soil or dense floral foam firmly above the gravel. Drive 2 or 3 white birch logs straight down into the center of the container until anchored firmly.
- Establish the Tall Backdrop: Insert tall red dogwood twigs or upright noble fir boughs directly behind the birch logs to build vertical height.
- Add Volume and Spill:
- Push thick fir and pine branches into the center space to build out a dense middle volume.
- Insert draping incense cedar boughs around the rim, angling them downward so they spill over the edges of the urn.
- Wire Accents: Wrap 18-gauge floral wire around the base scales of large pinecones, twisting the wire onto 12-inch wooden picks. Push these picks firmly into the greenery to lock the pinecones in place.
Pro Styling & Placement
Flank both sides of your main front entryway door with matching urns for classic architectural symmetry.
Rustic 5-Point Wooden Star Porch Signs
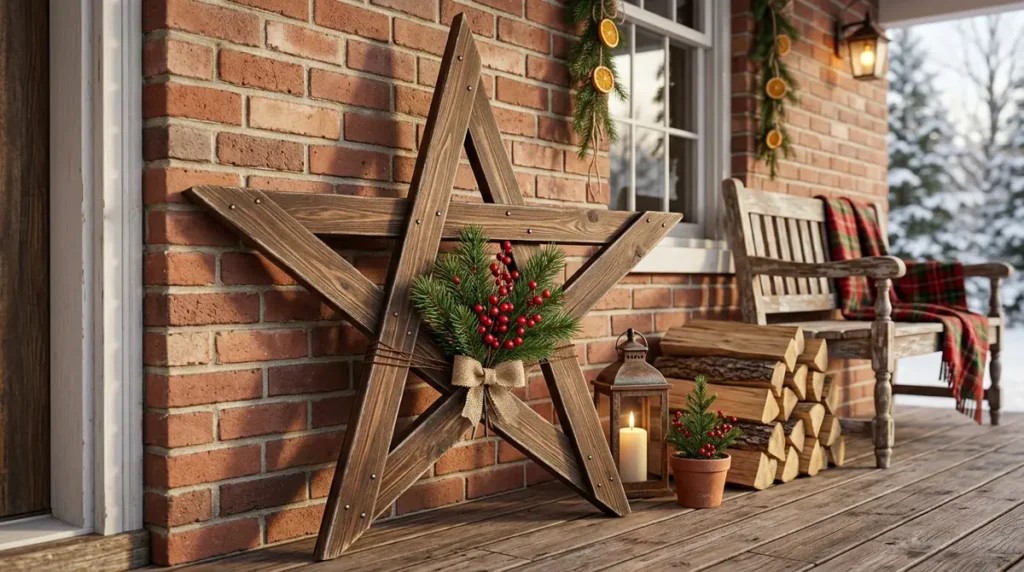
Geometric wooden stars provide bold visual structure and clean lines that stand out against brick, vinyl siding, or wood paneling.
Material & Tool Checklist
- Lumber: 5 pieces of 1×2 furring strips (cut to 36 inches each) or 5 heavy-duty wooden paint stir sticks
- Fasteners: Wood glue, 5/8-inch brad nails (or staple gun), 18-gauge wire
- Finish: Dark walnut exterior wood stain or weathered gray finish, clear matte exterior sealer
- Embellishments: Fresh pine sprigs, faux red berries, burlap ribbon
Step-by-Step Construction
- Layout the Geometry: Lay the 5 wood strips out on a flat workspace in an overlapping star shape:
- Strip 1 forms the left diagonal leg up to the top peak.
- Strip 2 goes from the top peak down to the right bottom foot.
- Strip 3 goes from the right foot up to the left horizontal arm point.
- Strip 4 goes across from the left arm point straight to the right arm point.
- Strip 5 connects the right arm point down to the left bottom foot.
- Secure Intersections: Apply a dab of wood glue at each of the 5 outer corner overlaps and the inner crossing points. Fasten each joint using a brad nailer or heavy-duty wood staples.
- Stain and Dry: Apply a dark walnut wood stain across all surfaces using a rag, wiping away excess to accentuate the natural grain. Let dry for 6 hours.
- Attach Greenery Focal Point: Bundle three small pine sprigs and a stem of red berries together. Wire the bundle tightly onto the bottom crossing point or center of the star.
- Seal: Spray the entire assembly with a UV-resistant clear exterior sealer.
Pro Styling & Placement
Lean a tall 3-to-4-foot wooden star casually against your house wall next to a stacked firewood pile, outdoor bench, or entry doorframe.
Monogrammed Winter Wreath Alternative
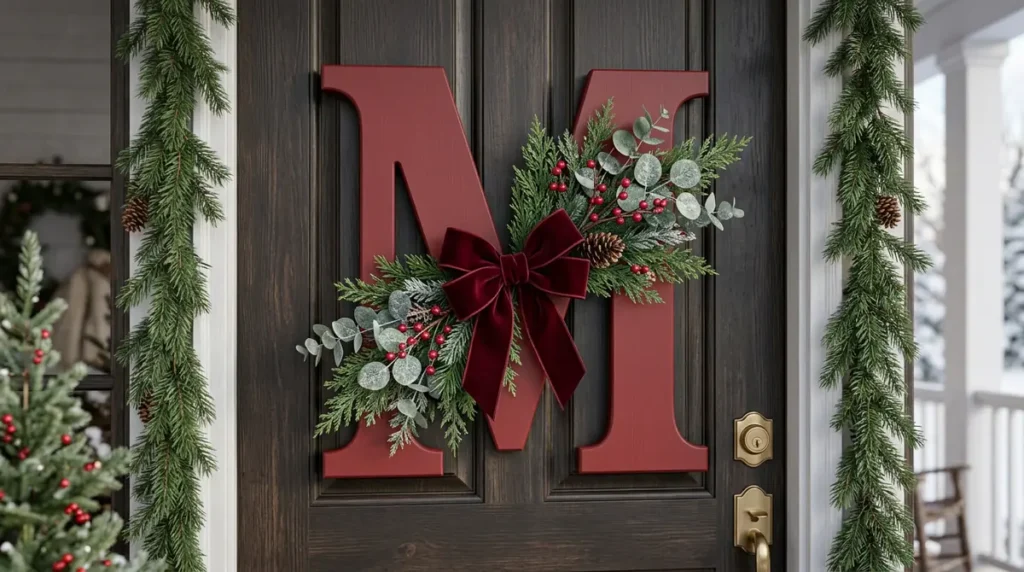
Custom door signage replaces standard circular green wreaths with personalized, modern typography that catches the eye immediately.
Material & Tool Checklist
- Base: 18-inch to 24-inch unpainted wooden or MDF monogram letter
- Paint: Red, off-white, or black exterior acrylic paint, foam roller
- Greenery: Faux cedar sprigs, frosted eucalyptus stems, faux winter berries
- Hardware & Hanging: Heavy-duty staple gun, 22-gauge floral wire, 2.5-inch wide outdoor velvet ribbon with wire edges
Step-by-Step Construction
- Paint the Letter: Apply 2–3 smooth coats of exterior acrylic paint to the letter using a high-density foam roller to prevent brush strokes. Ensure all sides and outer cutouts are completely covered.
- Create the Greenery Arrangement: Arrange cedar sprigs, eucalyptus, and red berries into a double-ended arrangement (where stems overlap in the center and greenery fans outward in opposite directions).
- Bind the Swag: Wrap 22-gauge floral wire tightly around the center overlap point to create one cohesive greenery piece.
- Mount to Letter: Position the greenery swag over a structural section of the letter (e.g., the center crossbar of an ‘H’, or the upper stem of a ‘P’). Secure it to the wooden letter using floral wire threaded through small drilled holes, or staple directly into the back of the wood using a staple gun.
- Add Ribbon: Create a simple bow from wired outdoor velvet ribbon and wire it over the exposed center stems of the greenery swag.
- Hanging Loop: Staple a loop of matching ribbon onto the back top edge of the letter for easy hanging.
Pro Styling & Placement
Center the letter on your main front door, replacing traditional circular wreaths for a clean, customized look.
Upcycled Vintage Milk Can & Birch Display
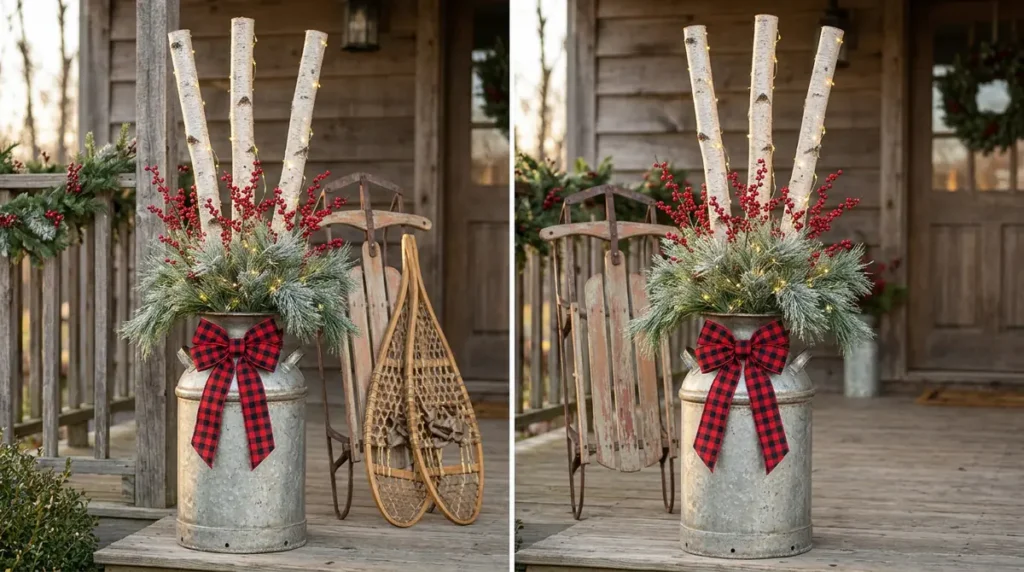
Heavy metal containers withstand harsh weather conditions and low temperatures without cracking, providing an authentic farmhouse foundation for holiday displays.
Material & Tool Checklist
- Vessel: Antique metal milk can, galvanized steel bucket, or vintage coal scuttle
- Weight: 20 lb sandbag or heavy paving stones
- Structural Elements: 3-4 tall white birch poles (4–5 feet tall), tall faux red berry branches, frosted pine sprays
- Lighting & Accents: Outdoor battery-operated mini LED lights on brown wire, weather-resistant wired plaid bow
Step-by-Step Construction
- Prep the Metal Vessel: Clean the exterior of the milk can. If rust is present, wire-brush loose flakes off and spray with a clear rust-inhibiting exterior coat to preserve the vintage patina while stopping further corrosion.
- Anchor the Base: Drop a small sandbag or two paving stones inside the bottom of the can. This ensures the arrangement remains upright even during severe winter windstorms.
- Position Primary Poles: Stand the tall birch poles straight up in the center of the milk can, wedging them firmly between the sandbags at the bottom.
- Layer Decorative Stems:
- Insert long red berry stems around the central birch poles to add height and color.
- Surround the outer opening with dense pine sprays that cascade outward over the metal lip of the can.
- Weave Lights & Add Bow: Weave a string of outdoor battery-operated LED lights from top to bottom through the birch poles and greenery. Tie a large weather-resistant plaid bow around the narrow neck of the milk can.
Pro Styling & Placement
Position the assembled milk can on your porch deck alongside a vintage pair of wooden snowshoes or a antique wooden sled to complete a multi-layered holiday scene.
Essential Guidelines for Outdoor Craft Longevity
| Protection Factor | Recommended Material / Technique | Key Benefit |
| Moisture & Snow | Exterior-grade Mod Podge, Marine Varnish, Clear Acrylic Spray | Prevents paint peeling, wood rot, and frosted salt dissolution. |
| High Winds | Gravel, Sandbags, Bricks, Paving Stones | Adds low center of gravity to lightweight containers and vessels. |
| Freezing Temps | E6000 Glue, Exterior Brad Nails, Mechanical Fasteners | Standard hot glue snaps in freezing weather; industrial bonds hold up. |
| UV Fading | UV-Resistant Exterior Latex & Spray Finishes | Keeps bright reds, greens, and metallics from dulling under sunlight. |
| Automated Lighting | Outdoor LED strands with built-in 6-hr timer cycles | Saves battery life and ensures porch lights up automatically every evening. |