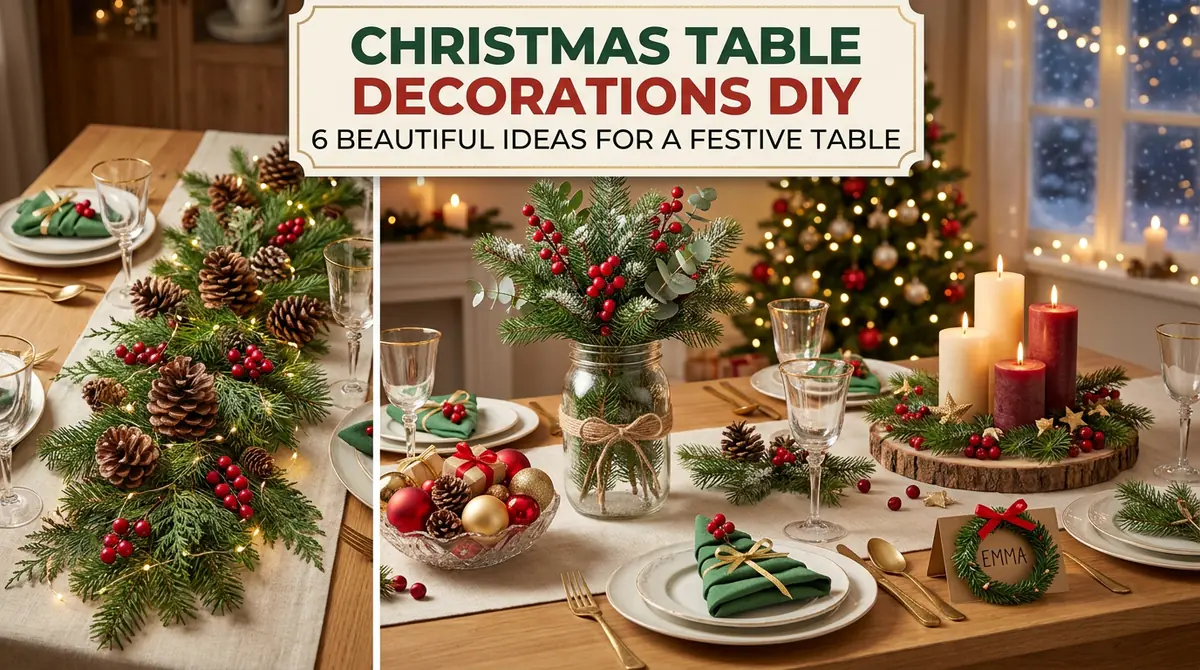
Christmas Table Decorations DIY: 6 Beautiful Ideas for a Festive Table
A beautifully decorated Christmas table can make a holiday meal feel extra special. From handmade centerpieces to personalized place settings, small decorative details can transform an ordinary dining table into a warm and welcoming space.
The best part is that you do not need expensive decorations to create a festive look. With items such as mason jars, pinecones, candles, greenery, ribbons, and leftover Christmas ornaments, you can make attractive table decorations at home.
In this guide, you will discover six easy DIY Christmas table decoration ideas that work for family dinners, holiday parties, and cozy Christmas gatherings. Each project includes simple materials and step-by-step instructions, so you can choose the designs that suit your table, budget, and personal style.
1. DIY Mason Jar Christmas Centerpiece
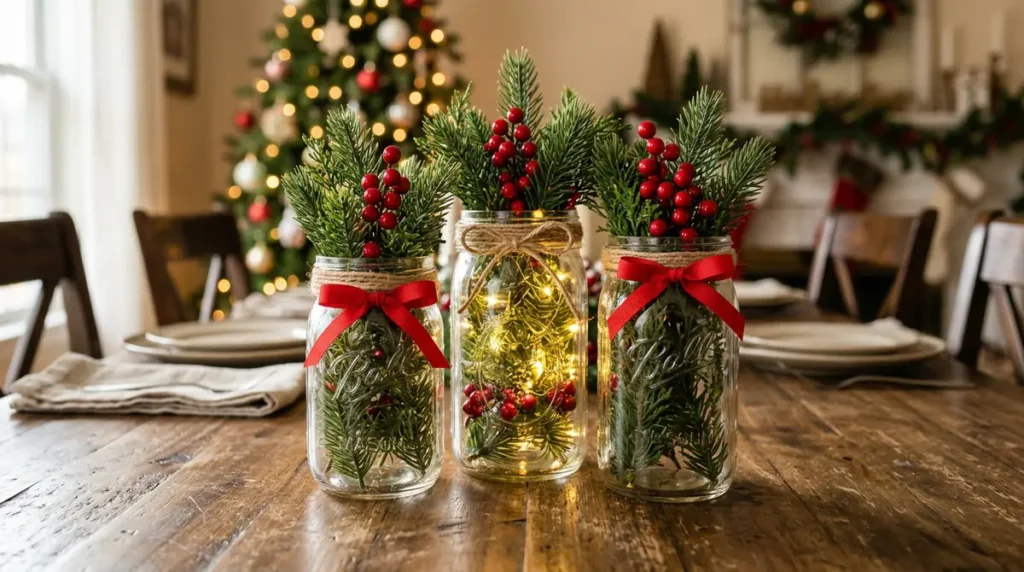
Mason jars are versatile craft supplies that can become beautiful Christmas centerpieces. Filled with seasonal greenery, decorative berries, or battery-operated fairy lights, they add a cozy festive touch to the table.
Materials Needed
- One or three clean mason jars
- Artificial pine branches or other seasonal greenery
- Red decorative berries
- Ribbon or twine
- Battery-operated LED fairy lights, if desired
- Scissors
How to Make It
- Clean the jars: Wash and dry the mason jars thoroughly so the glass looks clear and polished.
- Add greenery: Place small artificial pine branches inside each jar. Keep the arrangement loose rather than packing the jar too tightly.
- Include festive accents: Add a few artificial red berries for a traditional red-and-green color scheme.
- Add optional lights: Carefully place battery-operated fairy lights inside the jar. Keep the battery pack accessible and follow the manufacturer’s safety instructions.
- Decorate the outside: Tie a ribbon or piece of twine around the neck of each jar and finish it with a simple bow.
- Arrange the centerpiece: Place one jar in the middle of the table or group three jars of different heights together.
Styling Tips
Use clear jars for a classic rustic appearance or lightly frosted jars for a snowy winter look. If you are decorating a small table, one medium-sized jar may be enough.
For a dining table, keep the arrangement low enough that guests can see one another comfortably.
Best for: Rustic Christmas tables, farmhouse decor, and inexpensive holiday centerpieces.
2. DIY Pinecone and Evergreen Table Runner
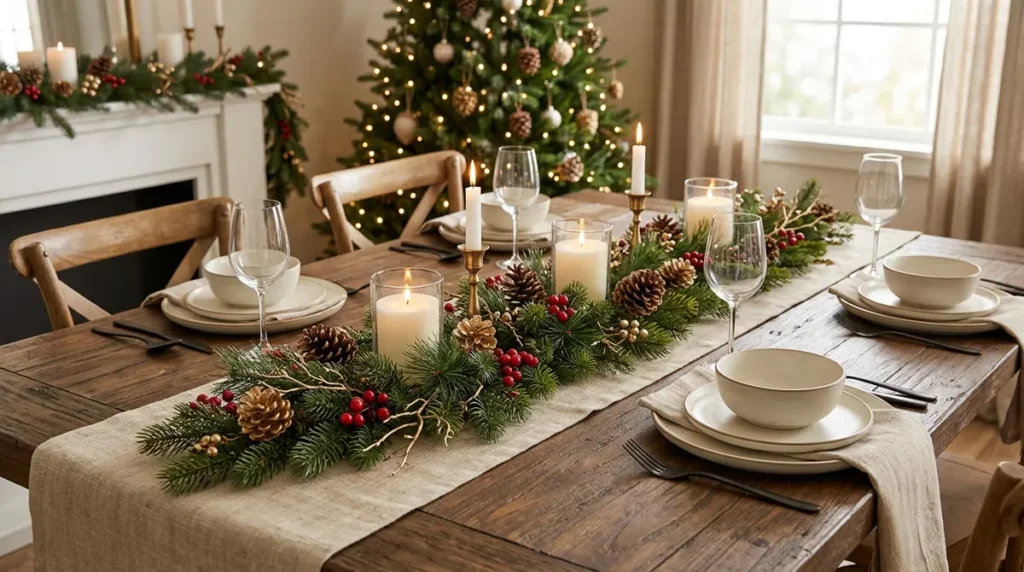
A natural table runner is an easy way to bring the beauty of winter greenery into your dining room. Pinecones, evergreen branches, and a few decorative accents create a simple centerpiece that looks especially attractive on a wooden table.
Materials Needed
- A plain table runner or a strip of natural fabric
- Artificial evergreen branches
- Clean, dry pinecones
- A few artificial red berries
- Ribbon or small decorative ornaments
- Scissors
How to Make It
- Prepare the base: Place the fabric runner along the center of the table. Choose a neutral color such as cream, beige, or natural linen.
- Arrange the greenery: Lay evergreen branches along the middle of the runner, alternating their direction to create a natural flowing arrangement.
- Add pinecones: Place clean, dry pinecones at regular intervals. Use a mixture of sizes for a more natural appearance.
- Introduce color: Add small clusters of artificial red berries or a few lightweight Christmas ornaments.
- Balance the design: Step back and check that the arrangement looks balanced from both ends of the table.
- Secure loose elements: Use small pieces of floral wire or suitable craft ties if needed to keep the arrangement in place.
Styling Tips
For a minimalist table, use only greenery and pinecones. For a traditional Christmas look, add red berries and a few gold accents.
If you use natural evergreen branches, check that they are clean and free of insects. Artificial greenery is a convenient reusable option.
Best for: Rustic dining rooms, farmhouse Christmas decor, and long family dining tables.
3. DIY Christmas Candle Centerpiece
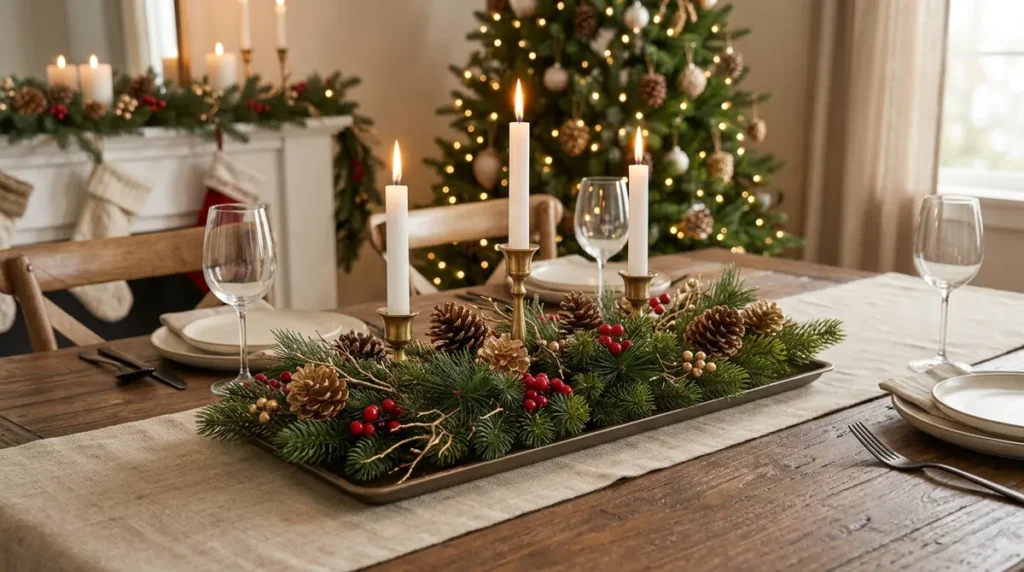
Candles create a warm atmosphere for Christmas dinner. A simple arrangement using candleholders, greenery, and seasonal accents can become an elegant centerpiece without requiring advanced crafting skills.
Materials Needed
- Stable candleholders
- Unscented candles or battery-operated LED candles
- Artificial evergreen sprigs
- Small decorative pinecones
- A heat-resistant tray or base
- Lightweight Christmas ornaments, optional
How to Make It
- Choose a base: Place a heat-resistant tray or stable decorative base in the center of the table.
- Position the candleholders: Arrange two or three candleholders at different heights, ensuring they are stable and cannot tip easily.
- Add greenery: Place small evergreen sprigs around the base, keeping them well away from candle flames.
- Decorate with pinecones: Add a few pinecones and small ornaments to fill empty spaces.
- Check the balance: Make sure the centerpiece looks attractive from every side and does not block guests’ views.
- Prepare the table: Before dinner, confirm that the arrangement is stable and that all decorations are clear of flames and hot surfaces.
Styling Tips
White candles create a clean, elegant appearance, while red candles add a traditional festive touch. Gold candleholders can complement neutral table linens.
For a safer option, use battery-operated LED candles, especially if children or pets may be near the table. Never leave burning candles unattended, and keep greenery, ribbons, and other flammable materials well away from open flames.
Best for: Elegant Christmas dinners, formal holiday tables, and cozy evening gatherings.
4. DIY Christmas Ornament Bowl Centerpiece
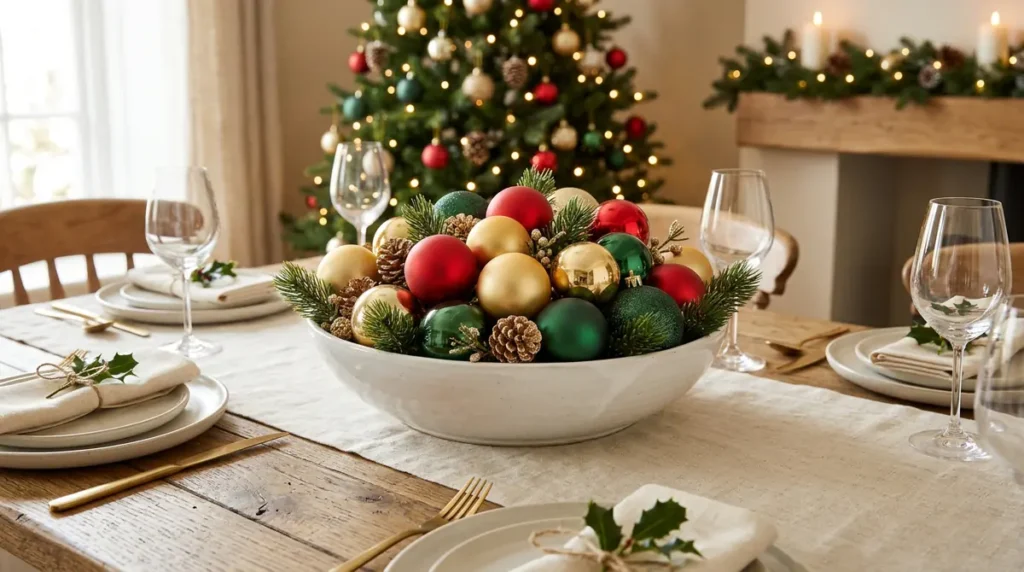
If you have spare Christmas tree ornaments, turn them into an attractive table centerpiece. A decorative bowl filled with colorful baubles is one of the simplest ways to add holiday color without spending much money.
Materials Needed
- A wide decorative bowl or shallow tray
- Unused Christmas ornaments
- A few sprigs of artificial greenery
- Ribbon, optional
- Decorative pinecones, optional
How to Make It
- Select the bowl: Choose a bowl that complements your tableware. A white, wooden, metallic, or clear glass bowl can work well.
- Choose a color palette: Select two or three colors, such as red and gold, silver and white, or green and gold.
- Place larger ornaments first: Position the largest baubles at the bottom of the bowl to create a stable foundation.
- Fill the gaps: Add smaller ornaments until the bowl looks full but not overcrowded.
- Add natural accents: Tuck a few artificial evergreen sprigs or small decorative pinecones between the ornaments.
- Position the bowl: Place it in the middle of the table, ensuring that it does not interfere with serving dishes or guests’ movement.
Styling Tips
Mix matte and shiny ornaments to add visual interest. For a modern appearance, use ornaments in similar shades rather than mixing every color.
Choose shatter-resistant ornaments if the centerpiece will be near children, pets, or a busy dining area. Avoid filling the bowl so high that ornaments can easily roll out.
Best for: Quick Christmas decorating, modern festive tables, and using leftover holiday ornaments.
5. DIY Christmas Place Cards with Mini Wreaths
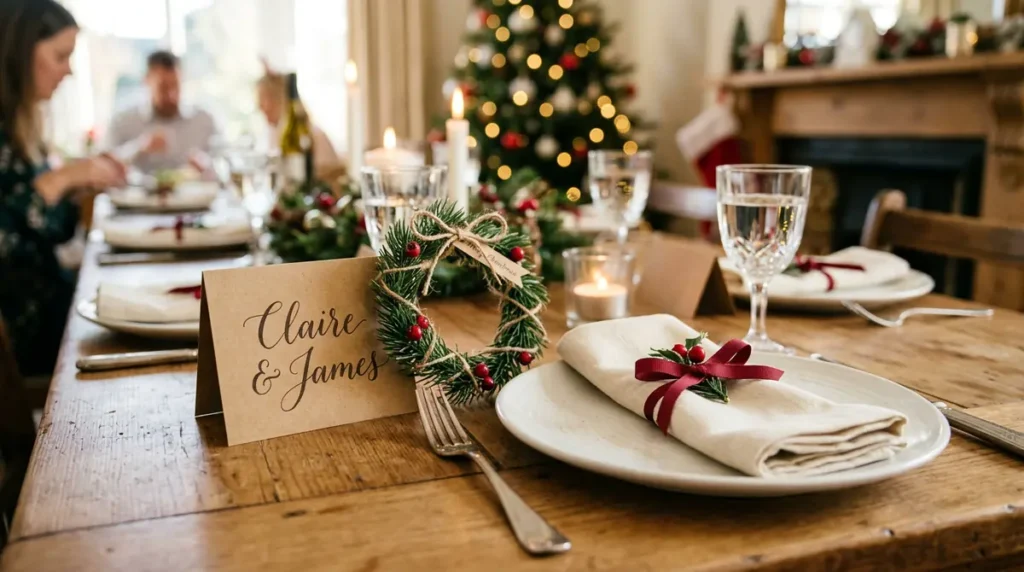
Personalized place cards help guests find their seats and make a Christmas dinner feel thoughtful. Mini wreaths paired with handwritten name cards create a charming decoration that can also serve as a small keepsake.
Materials Needed
- Cardstock in white, cream, or kraft brown
- Small artificial evergreen sprigs
- Thin ribbon or twine
- Scissors
- Pen or fine-tip marker
- Small wreath-shaped craft rings, optional
- Craft glue or floral wire
How to Make It
- Cut the cards: Cut cardstock into small rectangles or fold each piece to create a tent-style name card.
- Write the names: Write each guest’s name clearly on the front. Use a decorative pen if you want a more polished finish.
- Prepare the mini wreaths: Shape small artificial evergreen sprigs into circles. Alternatively, decorate small ready-made craft rings with greenery.
- Secure the greenery: Use floral wire or suitable craft glue to hold the greenery in place.
- Add ribbon: Tie a small ribbon around each wreath for a festive finishing touch.
- Arrange the place settings: Place one name card at each guest’s seat, positioning the mini wreath beside or around the card.
Styling Tips
Use the same cardstock and ribbon colors throughout the table to create a coordinated look. For a rustic theme, choose kraft paper and natural twine. For an elegant table, use cream cardstock and narrow gold ribbon.
Prepare the cards in advance so you can focus on the meal and other decorations on Christmas Day.
Best for: Family Christmas dinners, formal place settings, and personalized holiday tables.
6. DIY Folded Christmas Tree Napkins
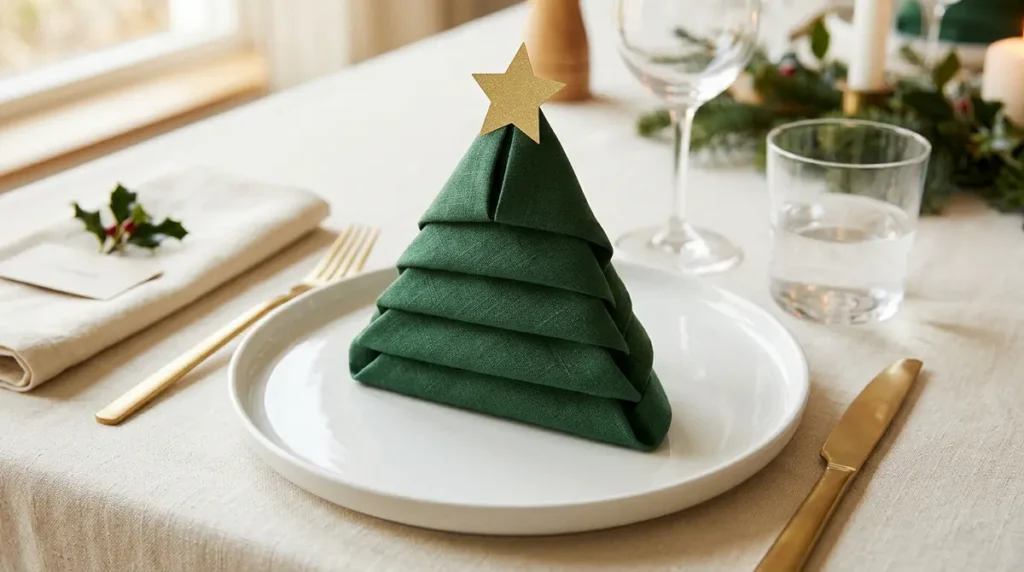
Folded napkins shaped like Christmas trees are a simple way to decorate individual place settings. They add height and color to the table without taking up much space or requiring additional purchases.
Materials Needed
- Square cloth napkins or sturdy paper napkins
- Optional small ribbon pieces
- Small star-shaped cardstock decorations, optional
- A flat surface for folding
How to Make It
- Choose the napkins: Select square napkins in green, red, cream, or another color that matches your table theme. Cloth napkins with a little structure are often easier to shape.
- Lay the napkin flat: Place it on a clean surface and fold it in half to form a rectangle, then fold it again to form a square if needed.
- Layer the corners: With the open corners facing you, fold each layer upward one at a time, leaving a small gap between the folded points.
- Turn the napkin over: Carefully flip it over while keeping the folds in place.
- Fold the sides inward: Bring the left and right corners toward the center to create a tapered tree shape.
- Reveal the branches: Turn the napkin over again. Fold each loose tip upward and tuck it into the layer above, working from the bottom to the top.
- Finish the design: Place the folded napkin on each plate. Add a small cardstock star nearby if desired.
Styling Tips
Practice with one napkin before folding the rest. If the fabric is too soft, press it lightly beforehand according to its care instructions. Paper napkins can also work, although some folding patterns hold better with thicker material.
Use green napkins for a recognizable Christmas tree or cream napkins for a subtle, minimalist version.
Best for: Individual place settings, small dining tables, and festive dinners where every detail matters.
Extra Tips for Styling Your Christmas Table
Once your decorations are ready, a few finishing touches can make the whole table look more coordinated.
- Choose a color palette: Red and green create a traditional Christmas look, while white and silver feel wintry and elegant. Natural wood, cream, and greenery work well for rustic decor.
- Keep the table practical: Leave enough room for plates, serving dishes, glasses, and cutlery.
- Vary the heights: Combine low greenery with a modest centerpiece, but avoid tall decorations that block conversation.
- Reuse what you have: Leftover ornaments, fabric scraps, ribbon, jars, and pinecones can all become useful craft materials.
- Think about safety: Keep flammable decorations away from open flames, and avoid fragile ornaments if young children or pets can reach the table.
- Prepare ahead: Make place cards and assemble centerpieces before the day of your gathering.
Final Thoughts
You do not need expensive store-bought decorations to create a beautiful Christmas table. A mason jar centerpiece, natural table runner, candle arrangement, ornament bowl, personalized place cards, or folded tree napkins can each bring a festive touch to your home.
Choose two or three ideas that complement one another rather than using every decoration at once. With a consistent color scheme and a little creativity, you can create a welcoming Christmas table that looks thoughtful, feels personal, and is ready for memorable holiday meals.