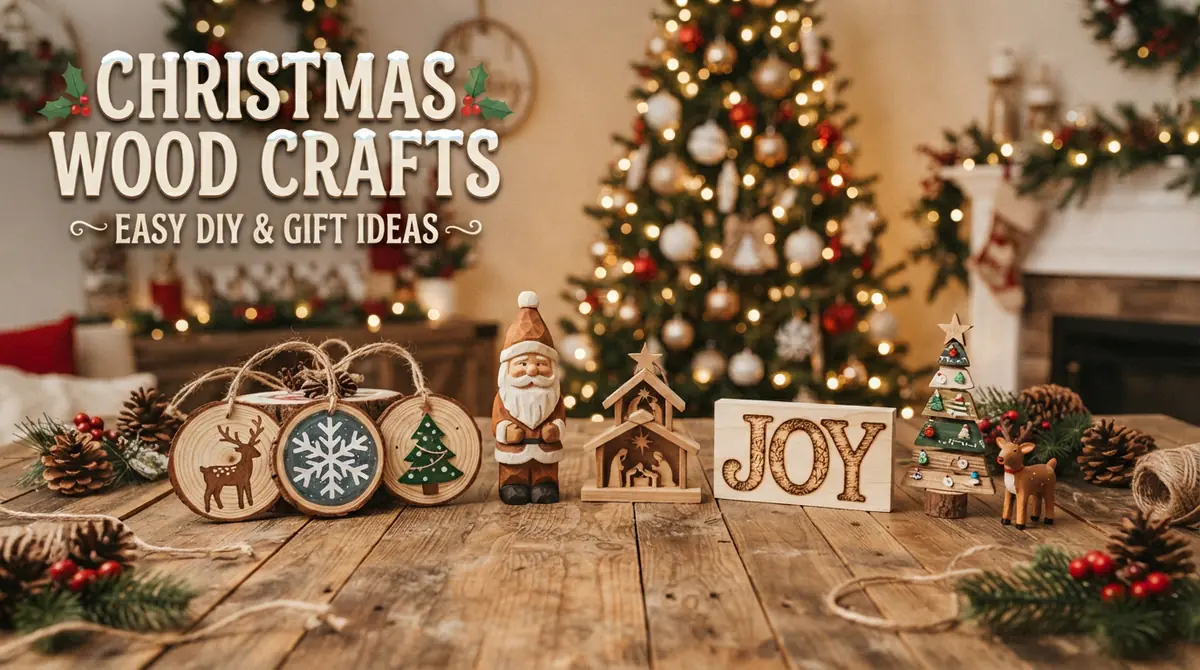
7 Beautiful Christmas Wood Crafts to Make Your Holiday Season Special
Christmas is the perfect time to bring creativity, warmth, and handmade charm into your home. As the holiday season approaches, many people start looking for unique decorations, thoughtful gifts, and fun DIY projects that make their celebrations more memorable. One wonderful way to add a personal touch to Christmas is by making Christmas wood crafts. Wooden decorations have a natural beauty that blends perfectly with traditional holiday colors, rustic farmhouse styles, modern interiors, and cozy winter themes.
Wood crafts are also excellent projects for beginners, experienced DIY enthusiasts, families, and anyone who enjoys creating handmade decorations. You can use affordable materials such as scrap wood, wooden slices, old pallets, plywood, craft sticks, and small wooden blocks to create beautiful Christmas decorations without spending too much money. From charming wooden Christmas trees and festive signs to adorable snowmen and handmade ornaments, there are countless possibilities to explore.
Another great advantage of wooden Christmas crafts is their durability. Unlike many temporary decorations, properly finished wooden pieces can last for several holiday seasons. You can store them carefully and reuse them every year, making them practical and meaningful additions to your Christmas collection.
Whether you want to decorate your living room, create handmade gifts, prepare Christmas market products, or enjoy a creative family activity, these projects offer something for everyone.
In this guide, we will explore seven beautiful Christmas wood crafts, including the materials you need, step-by-step instructions, helpful decorating ideas, and practical tips to achieve attractive results.
DIY Wooden Christmas Trees
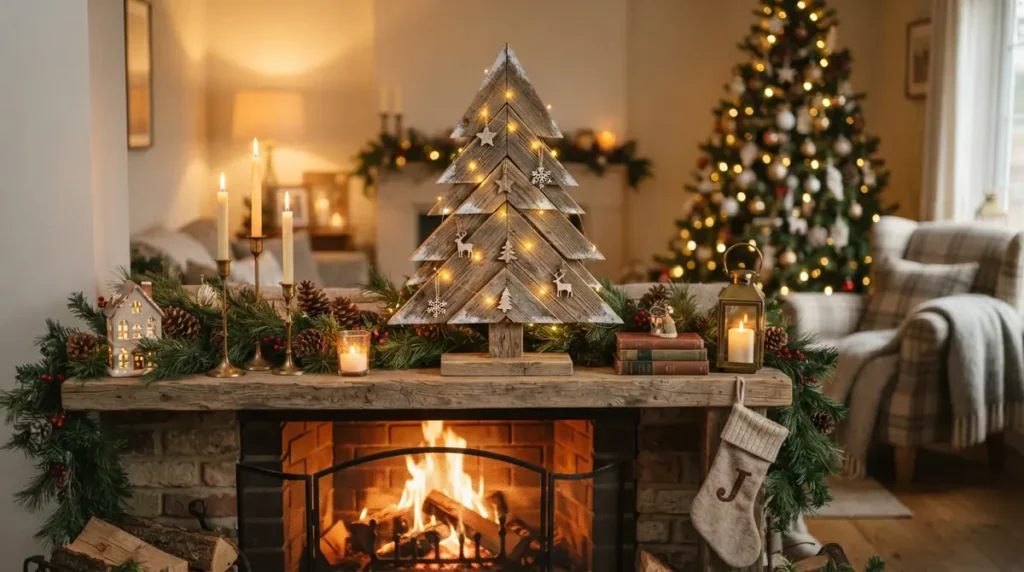
Wooden Christmas trees are among the most popular holiday woodworking projects because they are simple, affordable, and incredibly versatile. Unlike traditional artificial trees, wooden versions offer a rustic appearance that brings natural warmth into your holiday decorations. You can make them in different sizes, colors, and designs depending on your decorating style. Small wooden trees look wonderful on coffee tables and shelves, while larger versions can become attractive floor decorations near your fireplace or Christmas tree.
The best part about this project is that you do not need expensive woodworking materials. Scrap wood, leftover boards, plywood, and wooden craft sticks can all be transformed into beautiful miniature Christmas trees. You can leave the wood natural for a farmhouse look or paint it green, white, red, or gold for a more traditional holiday appearance.
Materials You Will Need
- Scrap wood or thin wooden boards.
- A wooden base or small rectangular block.
- Pencil and ruler.
- Hand saw or jigsaw.
- Sandpaper.
- Wood glue or suitable screws.
- Acrylic paint or wood stain.
- Paintbrushes.
- Small decorative stars, bells, or wooden ornaments.
- Clear protective wood finish.
Step-by-Step Instructions
1. Choose your tree size: Decide whether you want a small tabletop decoration or a larger wooden Christmas tree. Draw a simple triangular tree outline on your wooden board.
2. Cut the wooden pieces: Carefully cut along the outline using an appropriate saw. If you prefer a layered appearance, cut several smaller triangular pieces to create branches.
3. Smooth the edges: Use sandpaper to remove rough surfaces, splinters, and sharp corners. This step gives your decoration a cleaner and more professional appearance.
4. Create the base: Attach a small rectangular wooden block underneath the tree to help it stand upright. Make sure the base is stable.
5. Paint and decorate: Apply green paint for a traditional Christmas look, white paint for a snowy appearance, or natural wood stain for rustic farmhouse styling.
6. Add festive details: Attach small wooden stars, miniature bells, ribbons, or decorative beads. You can also use white paint to create a snow-covered effect.
7. Apply a protective finish: Once everything is completely dry, apply a suitable clear wood finish to protect the decoration.
Important Decorating Tips
- Create trees in different heights to make an attractive Christmas display.
- Use reclaimed wood for a naturally weathered farmhouse appearance.
- Add battery-operated fairy lights around larger wooden trees.
- Combine natural wood with white and gold decorations for an elegant look.
- Use a wider base if your wooden tree is tall or heavy.
Creative Variations
You can make Scandinavian-style wooden trees with simple geometric shapes, rustic pallet trees with horizontal branches, or miniature layered trees for Christmas village displays. Another attractive idea is to create a wooden tree with small shelves where you can place tiny ornaments, miniature houses, and holiday decorations.
These wooden Christmas trees also make thoughtful handmade gifts. You can personalize them with family names, Christmas dates, or small engraved messages. Because they are easy to customize and store, they are excellent decorations to reuse every year.
Rustic Wooden Christmas Signs

Rustic wooden Christmas signs are wonderful decorations for anyone who loves farmhouse-style interiors and handmade holiday accessories. They are simple to create, require relatively few materials, and can be customized with almost any Christmas message. Whether you want to write “Merry Christmas,” “Believe in the Magic,” “Joy to the World,” or “Welcome Santa,” a wooden sign can become a beautiful focal point in your holiday decorating arrangement.
These signs are particularly useful because they can be displayed in several areas of your home. You can hang them on your front door, place them above the fireplace, decorate an empty hallway wall, or use them as part of a Christmas mantel display. Their natural wooden texture creates a cozy appearance that works beautifully with greenery, pinecones, ribbons, and warm holiday lighting.
Materials You Will Need
- A wooden board or reclaimed pallet wood.
- Sandpaper.
- Acrylic paint or wood stain.
- Paintbrushes and small detail brushes.
- Pencil and ruler.
- Letter stencils or printed lettering templates.
- Painter’s tape.
- Wood glue if adding decorative pieces.
- Hanging hardware or picture hooks.
- Clear protective sealer.
Step-by-Step Instructions
1. Select your wooden board: Choose a board that matches the space where you want to display your sign. A long rectangular board works well for welcome messages, while smaller square boards are suitable for short Christmas quotes.
2. Prepare the surface: Remove dust, dirt, and loose wood fibers. Sand the entire surface until it feels smooth. You can leave some natural imperfections if you prefer a rustic farmhouse appearance.
3. Apply the background color: Use white, cream, dark green, red, or natural wood stain. Allow the background to dry completely before adding lettering.
4. Plan your message: Decide which Christmas phrase you want to display. Lightly mark the center and spacing of your words with a pencil.
5. Add the lettering: Use stencils, printed templates, or freehand painting to create your message. Apply paint carefully to prevent letters from looking uneven.
6. Decorate the sign: Add painted snowflakes, stars, Christmas trees, holly leaves, or small wooden ornaments around the message.
7. Install the hanging hardware: Attach suitable picture hooks, D-rings, or other hanging hardware. If you prefer a tabletop decoration, attach a sturdy wooden stand.
8. Seal the finished piece: Apply a protective finish appropriate for the intended display location.
Important Decorating Tips
- Use contrasting colors so your message is easy to read.
- Choose simple fonts for a clean and attractive appearance.
- Combine handwritten lettering with small painted illustrations.
- Use distressed paint techniques for a vintage farmhouse style.
- Keep the message short enough to remain readable from a distance.
Creative Ideas for Personalization
One beautiful idea is to create a family Christmas sign with your surname and a festive greeting. You can also make a countdown sign with interchangeable numbers to help children enjoy the days leading up to Christmas. Another option is a welcome sign featuring a painted wreath, small wooden snowflakes, or a red bow.
If you want to make these signs as handmade gifts or products for a Christmas craft fair, offer different sizes, color combinations, and personalized lettering options. You can even create matching signs for kitchens, living rooms, porches, and entryways.
Wooden Christmas Ornaments
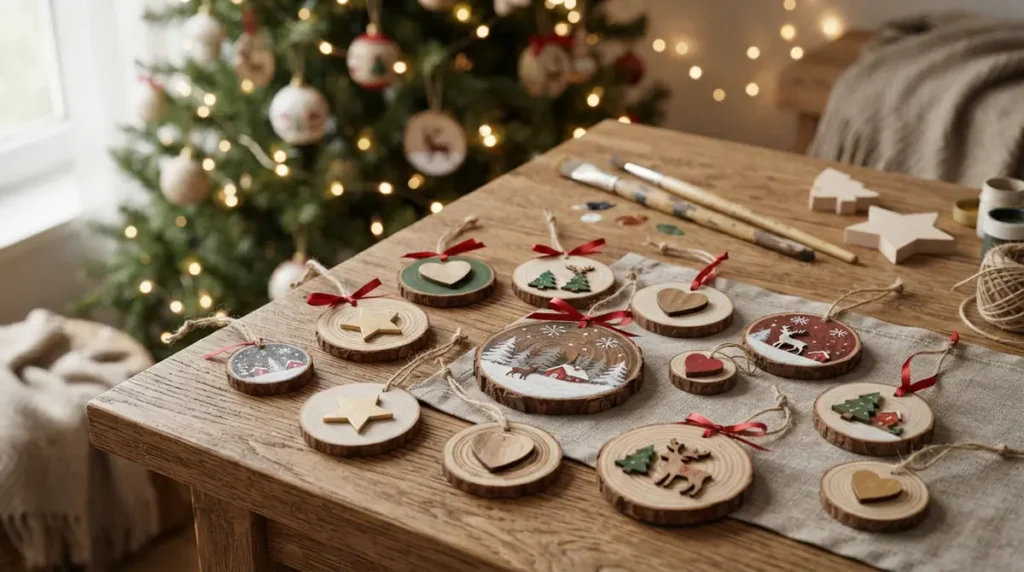
Wooden Christmas ornaments are excellent craft projects because they are affordable, easy to personalize, and suitable for both adults and children with appropriate supervision. These small decorations can make an ordinary Christmas tree feel more special while adding a handmade touch to your holiday celebrations. You can create stars, hearts, snowflakes, miniature trees, reindeer, gingerbread figures, and many other festive shapes using simple wooden materials.
One of the biggest advantages of wooden ornaments is their versatility. You can make them from thin plywood, wooden discs, unfinished wooden shapes, or natural branches. Each material creates a slightly different appearance. Wooden slices with visible grain provide a natural rustic look, while painted plywood ornaments are ideal for colorful and playful Christmas themes.
Materials You Will Need
- Thin plywood or unfinished wooden ornaments.
- Natural wooden slices or small wooden shapes.
- Pencil and Christmas shape templates.
- Sandpaper.
- Acrylic paints.
- Small paintbrushes.
- Wood glue.
- Decorative ribbon, twine, or jute string.
- Small eye screws or suitable hanging hardware.
- Clear protective sealer.
- Optional glitter, miniature bells, or decorative beads.
Step-by-Step Instructions
1. Choose your ornament designs: Select simple shapes such as stars, Christmas trees, snowflakes, hearts, or reindeer. Beginners can start with ready-made wooden shapes.
2. Prepare the wood: Sand each piece carefully to remove rough edges and splinters. Wipe away the dust before painting.
3. Create a base color: Apply white, green, red, gold, or natural wood stain. You can also leave the wood unpainted to highlight its natural grain.
4. Add Christmas designs: Paint small snowflakes, stars, holiday messages, or miniature trees. Use thin brushes for delicate details.
5. Personalize your ornaments: Add names, initials, family dates, or short festive messages. A personalized ornament can become a memorable keepsake.
6. Attach the hanging loop: Install a suitable small eye screw or use a pre-drilled hole with ribbon or twine. Make sure the attachment is secure.
7. Add decorative details: Finish the ornaments with tiny bells, ribbons, beads, or subtle glitter accents.
8. Protect your work: Apply a suitable clear finish after the paint has completely dried.
Important Decorating Tips
- Keep ornaments lightweight so they do not weigh down Christmas tree branches.
- Use matching colors if you want a coordinated Christmas tree theme.
- Make different shapes to create an interesting ornament collection.
- Use permanent paint or a suitable finish to prevent decorations from wearing away.
- Avoid sharp edges and small detachable decorations when making ornaments for young children.
Creative Variations
Try making rustic wooden slice ornaments with miniature winter landscapes. Paint a snowy forest, a tiny red house, or a single Christmas tree on each wooden disc. You can also create Scandinavian-inspired ornaments using simple white geometric patterns on natural wood.
Another lovely idea is to make yearly family ornaments. Write the year on each piece and add a family member’s name or a small memory from that Christmas season.
Wooden ornaments are also excellent handmade gifts. Place several matching pieces inside a small gift box, wrap them with kraft paper, and finish with natural twine. They are lightweight, attractive, and easy to store for future holiday celebrations.
DIY Wooden Christmas Snowmen
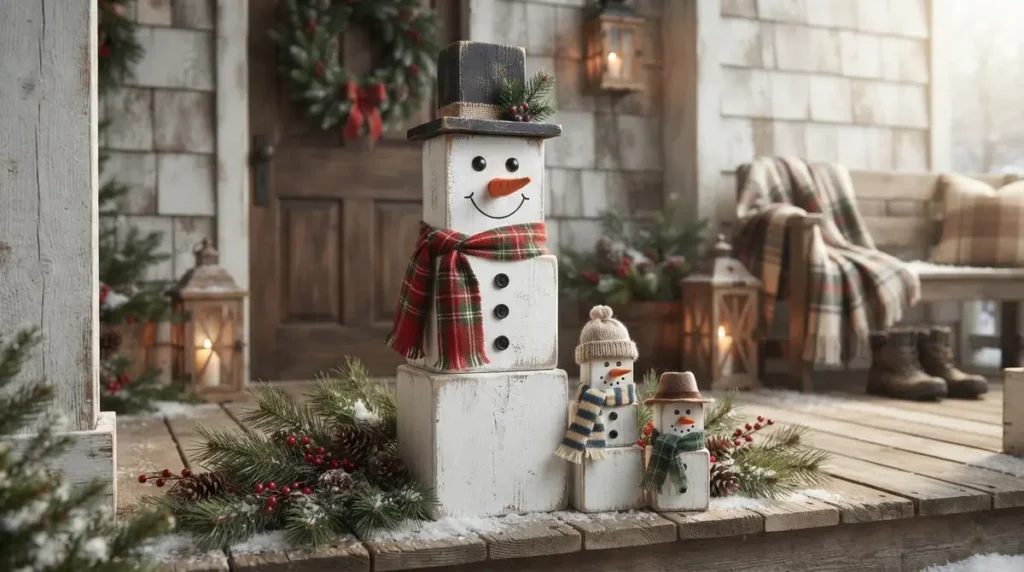
Wooden Christmas snowmen are adorable holiday decorations that can bring a cheerful winter atmosphere to your home. They are particularly popular for rustic farmhouse decorating because their simple shapes and painted details create a warm, handmade appearance. Unlike traditional snowmen made from real snow, wooden versions can be displayed indoors or outdoors when properly finished and protected.
You can create a snowman using stacked wooden blocks, a single wooden post, or three different-sized wooden pieces arranged vertically. Each method offers a slightly different style. Small wooden snowmen are perfect for shelves and tabletops, while taller wooden post snowmen can decorate porches, entryways, and garden areas.
This is also a wonderful craft for using leftover wood from previous DIY projects. Instead of throwing away small pieces of timber, you can turn them into attractive Christmas decorations.
Materials You Will Need
- Wooden blocks, wooden posts, or reclaimed timber.
- Sandpaper.
- White acrylic paint or outdoor-rated paint.
- Black paint for eyes and buttons.
- Orange paint for the carrot-shaped nose.
- Paintbrushes.
- Wood glue or suitable screws.
- Fabric scraps for scarves.
- Ribbon or small decorative buttons.
- Small pieces of wood for hats.
- Clear protective wood finish.
Step-by-Step Instructions
1. Choose your snowman design: Decide whether you want a small stacked-block snowman or a tall wooden post decoration. Select wood pieces according to the desired size.
2. Prepare the wood: Remove dirt, loose paint, and rough surfaces. Sand the edges carefully to make the pieces smooth.
3. Arrange the wooden pieces: For a stacked snowman, place three blocks of decreasing size on top of each other. For a post snowman, use one long piece of timber.
4. Paint the snowman white: Apply an even coat of white paint. Allow it to dry and add another coat if necessary.
5. Paint the facial features: Use black paint for the eyes and mouth. Add an orange triangular nose to create the traditional snowman appearance.
6. Add buttons and accessories: Paint black buttons down the front or attach suitable decorative buttons securely.
7. Create a winter scarf: Tie a piece of red, green, plaid, or knitted fabric around the neck. Make sure it is proportionate to the snowman’s size.
8. Make a festive hat: Use a small wooden block, fabric, or another suitable material to create a top hat or winter cap.
9. Apply protective finishing: Once all decorations are dry, apply a suitable protective finish based on whether the snowman will be displayed indoors or outside.
Important Decorating Tips
- Use different wooden sizes to create more interesting snowman designs.
- Add a slightly distressed paint finish for a rustic farmhouse look.
- Use weather-resistant paint and sealant for outdoor decorations.
- Make sure stacked blocks are securely attached.
- Choose scarves and hats that complement your Christmas decorating colors.
Creative Variations
You can create a family of wooden snowmen in different heights and decorate each one with a different scarf or hat. Another fun idea is to make a snowman welcome sign by painting a greeting across the wooden body.
For outdoor decorations, place a tall wooden snowman beside your front door with evergreen branches, a small lantern, and a Christmas wreath. For indoor displays, combine miniature snowmen with wooden Christmas trees and artificial snow to create a beautiful winter village.
These decorations also make thoughtful handmade gifts for friends, neighbors, and family members who enjoy rustic Christmas decorations.
Wooden Christmas Candle Holders and Lanterns
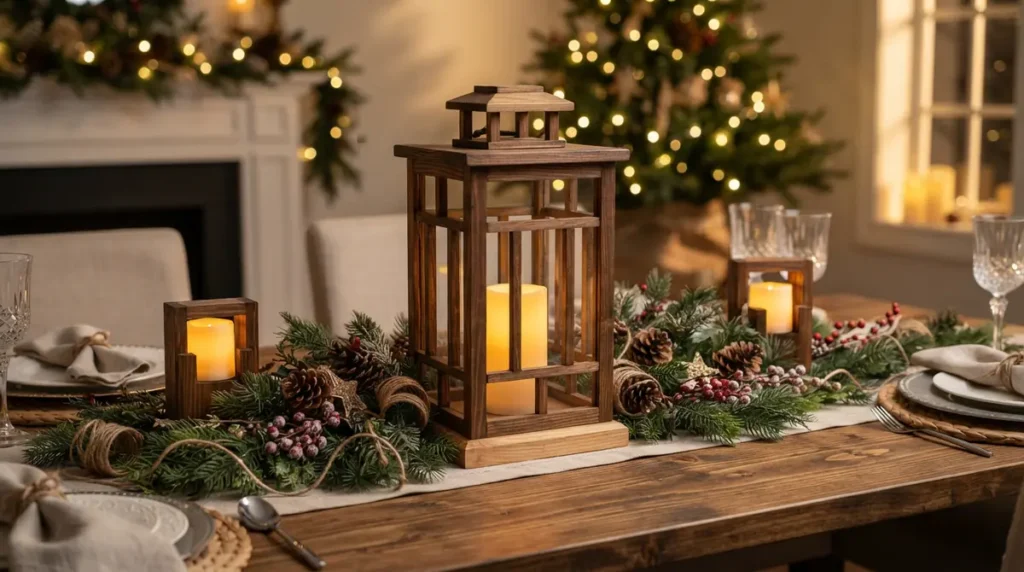
Wooden Christmas candle holders and lanterns are beautiful additions to holiday decorations because they combine natural materials with warm lighting. During Christmas, soft lighting creates a comfortable and welcoming atmosphere, especially when paired with evergreen branches, pinecones, ribbons, and festive table decorations.
Wood is an attractive material for candle holders because its natural grain creates a warm, rustic appearance. You can make simple wooden tea-light holders, long centerpiece candle holders, or decorative lantern-style displays. These projects are suitable for people who enjoy woodworking and want to create practical decorations that can be reused throughout the winter season.
However, safety is especially important when combining wood with candles. Real flames should never be placed in direct contact with wooden decorations, loose fabric, dried greenery, or other combustible materials. Battery-operated LED candles are generally a safer option for these projects.
Materials You Will Need
- A suitable wooden block or wooden board.
- Sandpaper.
- Pencil and measuring tape.
- Wood saw if cutting is required.
- Wood stain or acrylic paint.
- Paintbrushes.
- Wood glue and suitable fasteners.
- Evergreen artificial branches.
- Pinecones and decorative berries.
- Ribbon or jute twine.
- Battery-operated LED candles.
- Suitable protective wood finish.
Step-by-Step Instructions
1. Select the design: Choose between a simple tea-light display, a rectangular centerpiece, or a wooden lantern. Consider the available table or shelf space before deciding on dimensions.
2. Prepare the wooden base: Cut the wood to your preferred size if necessary. Sand all surfaces and edges until they are smooth.
3. Choose the finish: Apply natural wood stain for a farmhouse appearance or paint the base white, dark green, or deep red for a more colorful Christmas decoration.
4. Plan the candle arrangement: Mark where the LED candles will sit. Leave enough room between the candles and decorative materials.
5. Add decorative elements: Arrange artificial evergreen branches, pinecones, small wooden stars, or Christmas berries around the candle holders. Keep decorations away from any heat source.
6. Create a lantern frame: If you are making a lantern, construct a wooden base and top with an open frame. You can use clear acrylic panels or leave the sides open, depending on your design.
7. Place the LED candles: Position battery-operated candles securely inside the holder or lantern. Make sure they cannot easily fall over.
8. Finish and inspect: Apply a suitable protective finish, allow it to dry, and check that the entire decoration is stable.
Important Decorating Tips
- Use flameless LED candles for wooden Christmas displays.
- Avoid placing real candles near wood, ribbons, dried plants, or fabric.
- Select a stable wooden base to prevent accidental tipping.
- Combine different candle heights for a more attractive centerpiece.
- Keep battery compartments accessible for easy replacement.
Creative Variations
A long wooden centerpiece with three LED candles, artificial greenery, and pinecones looks especially beautiful on a Christmas dining table. You can also create miniature lanterns with small wooden frames and warm LED lights for shelves and entryway decorations.
For a farmhouse-inspired appearance, use distressed white paint, natural jute twine, and simple greenery. For a more elegant Christmas theme, choose dark-stained wood, gold accents, and warm-white lighting.
These wooden candle holders can also become thoughtful holiday gifts. You can personalize the wooden base with a family name, Christmas greeting, or decorative engraving.
DIY Wooden Christmas Reindeer
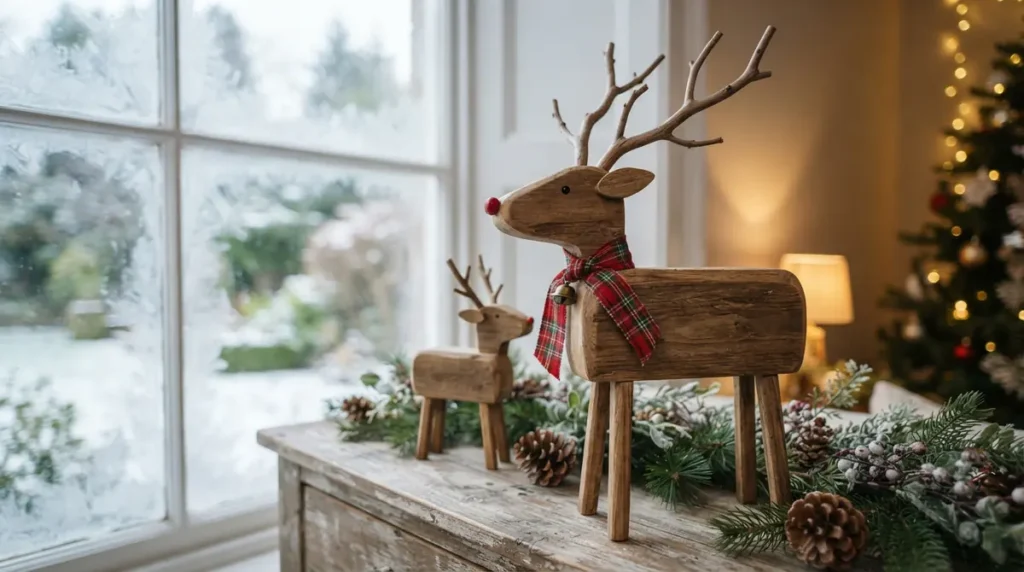
Wooden Christmas reindeer are charming decorations that bring a playful woodland feeling to holiday interiors and outdoor displays. Inspired by Santa’s famous reindeer, these handmade figures can be created using wooden blocks, branches, scrap lumber, or small wooden slices. Their natural appearance works beautifully with rustic Christmas themes, farmhouse decorations, and traditional winter displays.
One reason these projects are so enjoyable is that you can experiment with different shapes and sizes. Small reindeer figures look attractive on bookshelves and mantels, while larger wooden reindeer can become eye-catching porch decorations. You can also create an entire reindeer family with different body shapes, antler styles, and festive accessories.
This craft is especially suitable for people who enjoy using natural materials. Small tree branches can become antlers, wooden blocks can form the body, and smaller wood pieces can be used for the legs and head.
Materials You Will Need
- Wooden blocks or small pieces of scrap timber.
- Small natural branches for antlers.
- Thin wooden dowels or prepared wooden legs.
- Sandpaper.
- Pencil and measuring tape.
- Wood glue or suitable screws.
- Brown, white, or natural wood stain.
- Black paint for the eyes.
- Red paint or a small red decorative nose.
- Small paintbrushes.
- Ribbon, jute twine, or miniature bells.
- Protective wood finish.
Step-by-Step Instructions
1. Plan your reindeer design: Sketch a simple reindeer shape before cutting or assembling the wooden pieces. Decide whether you want a standing, sitting, or minimalist geometric reindeer.
2. Prepare the body: Select a rectangular or oval wooden piece for the main body. Sand it carefully to create smooth edges.
3. Create the head: Use a smaller wooden block or shaped piece of wood for the head. Attach it securely to the front of the body using suitable woodworking adhesive or fasteners.
4. Attach the legs: Use wooden dowels or prepared wooden pieces to create four legs. Check that the figure stands evenly on a flat surface.
5. Make the antlers: Select small natural branches or prepared wooden antler shapes. Attach them securely to the head and allow the adhesive to cure fully.
6. Add facial details: Paint small black eyes and a simple nose. You can create a classic red-nosed reindeer by using a small red wooden bead or a painted wooden circle.
7. Decorate the body: Apply brown wood stain or natural paint. Add a miniature scarf, small bell, or festive ribbon around the neck.
8. Apply a protective finish: Once the paint and adhesive have fully dried, use an appropriate clear finish to protect the completed decoration.
Important Decorating Tips
- Make sure antlers are securely attached and do not have sharp exposed edges.
- Use lightweight branches for small decorative reindeer.
- Keep the legs balanced so the figure can stand without support.
- Use natural wood tones for a realistic woodland appearance.
- Add only a few decorative accessories to avoid making the design look crowded.
Creative Variations
One beautiful idea is to create a standing reindeer family with three different sizes. Use natural brown wood for the bodies and small red scarves to give the figures a coordinated Christmas appearance.
You can also make minimalist reindeer using geometric wooden blocks. These designs look especially attractive in Scandinavian-style homes because they feature simple shapes and natural finishes.
For an outdoor Christmas display, create larger reindeer silhouettes from suitable weather-resistant wood. Place them beside a porch, garden pathway, or Christmas wreath. Make sure the decorations are properly anchored and protected from moisture.
Wooden reindeer also make wonderful handmade gifts and seasonal craft-fair products because they are decorative, customizable, and reusable.
Wooden Christmas Gift Boxes and Storage Crates
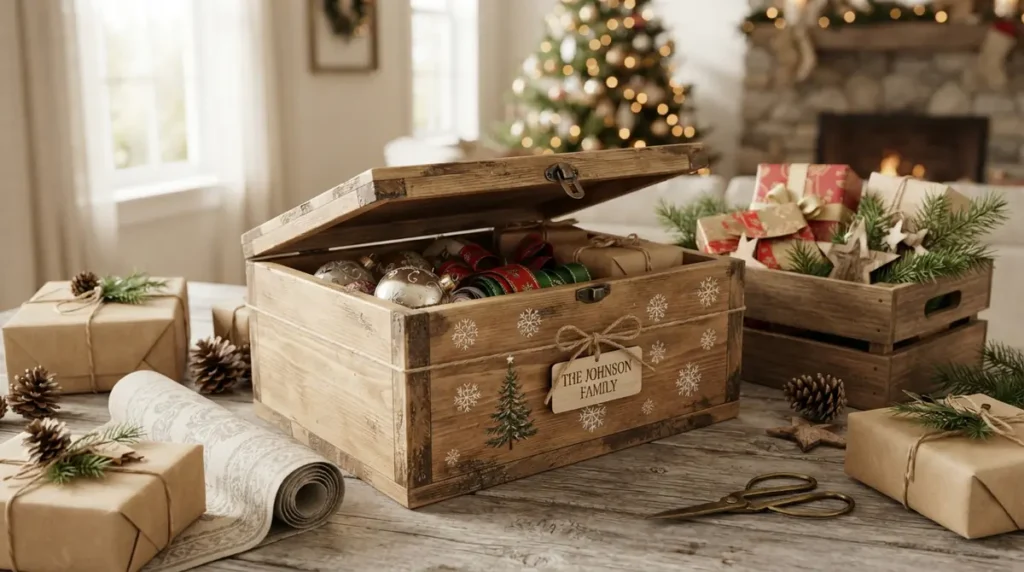
Wooden Christmas gift boxes and decorative storage crates are excellent projects for anyone who wants to combine creativity with practicality. During the holiday season, gift presentation is almost as exciting as the gifts themselves. A handmade wooden box can make even a simple present feel more personal, thoughtful, and special.
Unlike ordinary wrapping paper, wooden gift boxes can be reused for several purposes after Christmas. They can store ornaments, ribbons, greeting cards, small toys, craft supplies, or other seasonal decorations. Decorative wooden crates can also become attractive display pieces for holiday arrangements.
You can make these projects using small wooden boards, leftover plywood, unfinished crates, or recycled timber. Their appearance can be customized according to your preferred Christmas style, whether you enjoy traditional red and green decorations, rustic farmhouse designs, or elegant natural wood finishes.
Materials You Will Need
- Small wooden boards, plywood, or unfinished wooden crates.
- Measuring tape and pencil.
- Wood saw if cutting is required.
- Sandpaper.
- Wood glue and suitable screws or nails.
- Small hinges if making a lidded box.
- Acrylic paint or wood stain.
- Paintbrushes.
- Decorative ribbon, jute twine, and small wooden ornaments.
- Stencils or Christmas lettering templates.
- Suitable protective wood finish.
Step-by-Step Instructions
1. Choose your box size: Decide what you want to store or present inside the box. Small boxes are suitable for jewelry, ornaments, and handmade gifts, while larger crates work well for blankets, toys, and Christmas supplies.
2. Prepare the wooden pieces: Measure and cut the base, sides, and optional lid according to your design. Sand every piece to remove rough edges.
3. Assemble the box: Attach the side pieces to the base using suitable wood glue and fasteners. Check that the corners are straight and the structure is stable.
4. Create a lid if desired: Cut another wooden piece to fit the top. You can leave the lid removable or attach suitable hinges to create a storage box.
5. Apply the background finish: Paint the box in a festive color or use a natural wood stain. Allow the surface to dry before decorating.
6. Add Christmas designs: Paint snowflakes, stars, Christmas trees, reindeer, or festive lettering on the sides. You can also use stencils to create neat decorative patterns.
7. Add finishing accessories: Attach jute handles, decorative ribbon, small wooden stars, or a personalized name tag.
8. Protect the finished box: Apply an appropriate clear protective finish and allow it to dry completely before placing gifts or other items inside.
Important Decorating Tips
- Sand all interior surfaces to prevent splinters from damaging stored items.
- Avoid leaving exposed nails or sharp hardware.
- Use sturdy construction for boxes that will carry heavy objects.
- Choose non-toxic finishes appropriate for the intended use.
- Keep decorative accessories securely attached.
- Make sure the box is completely dry before storing fabric or paper decorations.
Creative Variations
Create a rustic Christmas gift box using natural wood, a red ribbon, and a personalized wooden name tag. Another idea is to turn a small wooden crate into a Christmas gift basket by filling it with chocolates, handmade ornaments, candles, and festive treats.
You can also make a decorative Christmas storage crate featuring the words “Holiday Memories” or “Christmas Decorations.” These crates are especially useful for keeping seasonal items organized after the celebrations end.
For a beautiful holiday display, stack two or three decorated wooden crates near your Christmas tree and fill them with wrapped presents, artificial greenery, or miniature decorative figures. This creates a coordinated festive arrangement while providing additional storage.
Helpful Tips for Making Christmas Wood Crafts Successfully
Before starting your wooden Christmas projects, it is useful to understand a few basic techniques that can improve the appearance, durability, and safety of your finished decorations.
1. Choose the Right Wood
Different woodworking projects require different materials. Plywood is useful for flat shapes, scrap timber works well for rustic decorations, and wooden slices are excellent for natural ornaments. Choose clean, dry wood without serious cracks or damage.
2. Prepare Every Surface Properly
Sanding is one of the most important steps in wooden crafts. Start with medium-grit sandpaper to remove rough areas and finish with finer sandpaper for a smoother surface. Always remove dust before painting or staining.
3. Select Suitable Paint and Finishes
Acrylic paint is convenient for many indoor Christmas decorations. Wood stains help preserve the natural grain, while suitable outdoor-rated products provide additional protection for exterior displays. Follow product instructions and allow each layer to dry fully.
4. Use the Correct Tools
Basic projects may require only sandpaper, a ruler, a pencil, paintbrushes, and wood glue. More complicated designs may require a saw, drill, clamps, and suitable fasteners. Beginners should ask an experienced adult to handle power tools.
5. Focus on Stability
Decorations such as wooden trees, snowmen, reindeer, and lanterns should stand securely. Check the base, joints, and attachment points before displaying the finished piece.
6. Store Decorations Carefully
After Christmas, clean your wooden decorations and allow them to dry before storage. Wrap delicate pieces in soft paper or fabric and place them in a dry storage container away from excessive moisture.
7. Personalize Your Designs
Small details can make ordinary wooden crafts feel special. Add family names, Christmas dates, favorite colors, meaningful messages, or handmade decorative patterns.
Conclusion
Christmas wood crafts are a wonderful way to bring creativity, warmth, and handmade beauty into your holiday celebrations. From rustic wooden Christmas trees and personalized holiday signs to adorable snowmen, reindeer, ornaments, candle holders, and decorative gift boxes, there are countless ways to transform simple pieces of wood into beautiful seasonal decorations.
The best thing about these projects is that they can be adapted to different skill levels, budgets, and decorating styles. Beginners can start with simple wooden ornaments and painted signs, while experienced DIY enthusiasts can experiment with larger decorations, wooden lanterns, and detailed reindeer figures. You can even reuse scrap wood and leftover materials to create attractive decorations without spending too much money.
Remember that successful woodworking begins with careful preparation, suitable materials, smooth sanding, and secure assembly. Take your time with each project, experiment with different colors and finishes, and add personal details that make every decoration unique. Always follow appropriate tool and fire-safety precautions, especially when creating projects for children or using decorations with lighting.
Whether you are decorating your own home, preparing handmade Christmas gifts, or creating products for a holiday craft market, these seven Christmas wood crafts offer plenty of inspiration. Start with a project you love, gather your materials, and enjoy turning ordinary wood into something special that your family can appreciate for many Christmas seasons to come.