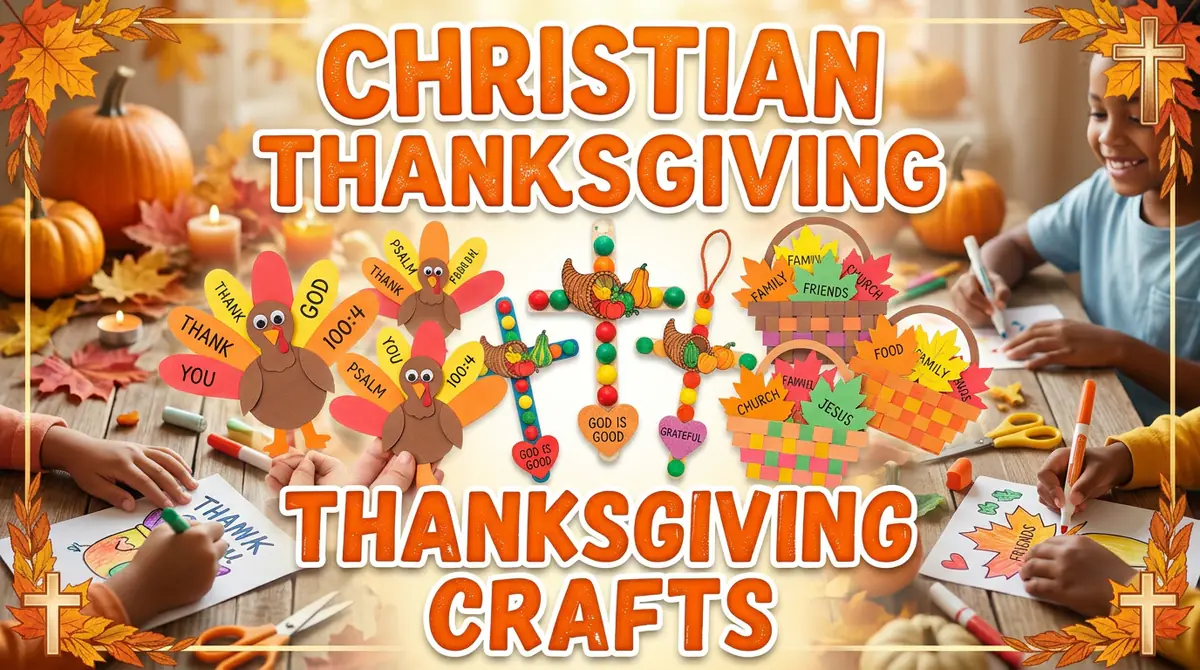
7 Meaningful Christian Thanksgiving Crafts for Kids to Teach Gratitude
Thanksgiving offers a unique and powerful opportunity to anchor children’s hearts in the biblical discipline of gratitude. While popular culture often reduces the holiday to feast preparations and fall decorations, incorporating faith-filled activities helps kids recognize that every good and perfect gift comes directly from God. Crafting provides a tactile, hands-on medium that transforms abstract spiritual concepts—such as continuous praise, stewarding blessings, and intentional prayer—into tangible visual reminders.
Whether you are a parent seeking to build lasting family traditions, a Sunday School teacher planning a November curriculum, or a homeschool educator looking to merge creative arts with Scripture memory, these seven comprehensive Christian craft ideas are designed to engage young minds while teaching timeless biblical truths.
The Scripture Gratitude Tree (Colossians 2:6–7)
Educational & Spiritual Purpose
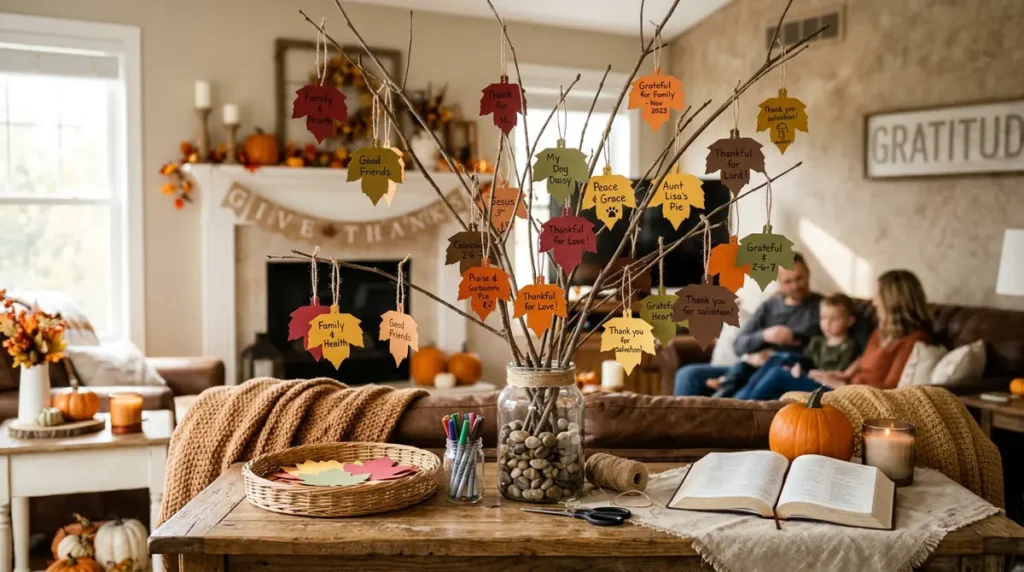
The Scripture Gratitude Tree serves as a dynamic visual lesson in how individual blessings accumulate over time when we intentionally train our minds to notice God’s provision. Rooted in Colossians 2:6–7, which encourages believers to be rooted, built up, and overflowing with thankfulness, this ongoing project bridges the gap between daily observations and spiritual worship. Children learn that gratitude is not just a passing feeling, but an active practice of identifying God’s work in their everyday lives—from family and health to nature and answered prayers.
Complete Supplies Needed
- Real bare tree branches collected from the yard (or brown poster board/construction paper cut into a large trunk and taped to a wall)
- Heavy cardstock in fall shades (deep red, warm orange, golden yellow, olive green, and rich brown)
- Leaf templates or leaf-shaped paper punches
- Single hole punch
- Jute twine, thin ribbon, or painter’s tape
- Fine-tip markers, gel pens, or metallic sharpies
- A sturdy vase, jar, or floral foam block (if building a 3D branch tree)
Detailed Step-by-Step Instructions
- Prepare the Base: If creating a 3D tree, collect a few sturdy bare branches and place them inside a weighted vase or glass jar using floral foam or small rocks to keep them standing upright. If creating a flat wall tree, sketch and cut a large trunk with sprawling branches out of brown poster board and securely fasten it to an accessible wall or bulletin board.
- Cut and Prepare the Leaves: Trace leaf shapes onto the colorful cardstock sheets and carefully cut them out. If working with younger children, prepare a basket of pre-cut leaves ahead of time. Punch a single hole at the stem of each cutout leaf.
- Inscribe the Blessings: Set aside time each day during the weeks leading up to Thanksgiving for children to write down a specific blessing on a leaf. Encourage older kids to write out full Bible verses (such as Psalm 107:1 or Psalm 100:4), while younger kids can write simple one-word gratitude notes or draw pictures of things they appreciate.
- Hang and Display: Thread a piece of ribbon or twine through the hole of each completed leaf, tie a loop, and hang it on the tree branches. If using a wall tree, use glue sticks or double-sided tape to attach the leaves directly onto the paper branches.
- Reflect as a Family or Class: On Thanksgiving Day, sit together around the fully decorated tree and read through the leaves out loud, celebrating how abundant God’s grace has been throughout the season.
The 1 Thessalonians “Thankful Pumpkin” (1 Thessalonians 5:18)
Educational & Spiritual Purpose
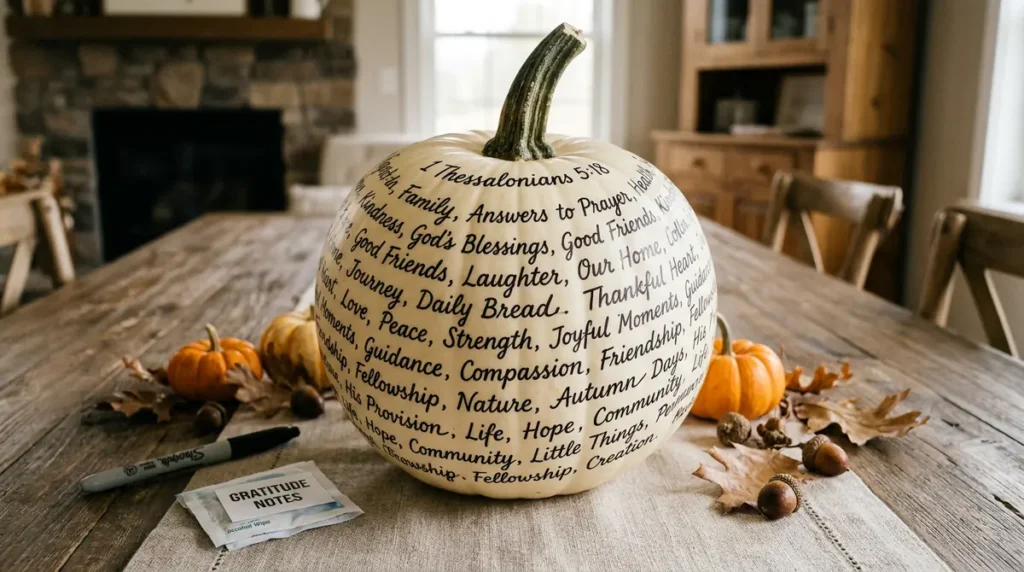
The Thankful Pumpkin craft transforms a quintessential symbol of autumn into an interactive daily devotional tool based on 1 Thessalonians 5:18 (“Give thanks in all circumstances; for this is God’s will for you in Christ Jesus”). This activity helps children break down the habit of taking everyday moments for granted. By recording daily acts of kindness, physical provisions, and spiritual joys directly onto a centerpiece object, kids witness how a simple pumpkin can become an exhaustive record of God’s faithfulness across an entire month.
Complete Supplies Needed
- One medium-to-large real pumpkin with a clean, smooth surface (white “ghost” pumpkins work exceptionally well for contrast, though traditional orange pumpkins are great too) OR a white foam craft pumpkin for a permanent, reusable family keepsake
- Dark black or brown permanent markers (fine point and medium point)
- Acrylic sealant spray (optional, to preserve real pumpkins from smudging or foam pumpkins for future years)
- Alcohol wipes (to clean the pumpkin skin prior to writing)
Detailed Step-by-Step Instructions
- Clean the Surface: Wipe down the exterior of your pumpkin with a damp cloth and a touch of rubbing alcohol to remove natural oils, dust, or dirt. Allow it to dry completely so the marker ink will adhere smoothly without smudging.
- Inscribe the Anchor Scripture: Using your medium-point permanent marker, write the core verse—1 Thessalonians 5:18—in a clear, decorative script around the top stem of the pumpkin. This serves as the spiritual banner for the entire project.
- Establish a Daily Routine: Set the pumpkin in a central location, such as the kitchen table, dining room, or classroom focal area. Dedicate a specific time each day (such as after dinner or during morning devotions) to write down specific entries.
- Write in a Winding Spiral: Beginning just below the top verse, have each child write one thing they are grateful to God for that day. Write in a continuous downward spiral wrapping around the curves of the pumpkin. Use fine-point markers so you can maximize space. Prompt kids to look beyond material possessions—ask them to list character traits of God, specific family members, answered prayers, or challenges where God provided strength.
- Preserve and Showcase: Use the completed Thankful Pumpkin as your main dinner centerpiece on Thanksgiving Day. If you used a craft pumpkin, spray it with a light coat of clear acrylic sealer so you can bring it out in future years to look back on past blessings.
“Walking with Jesus is Sweeter Than Pie” Footprint Keepsake
Educational & Spiritual Purpose
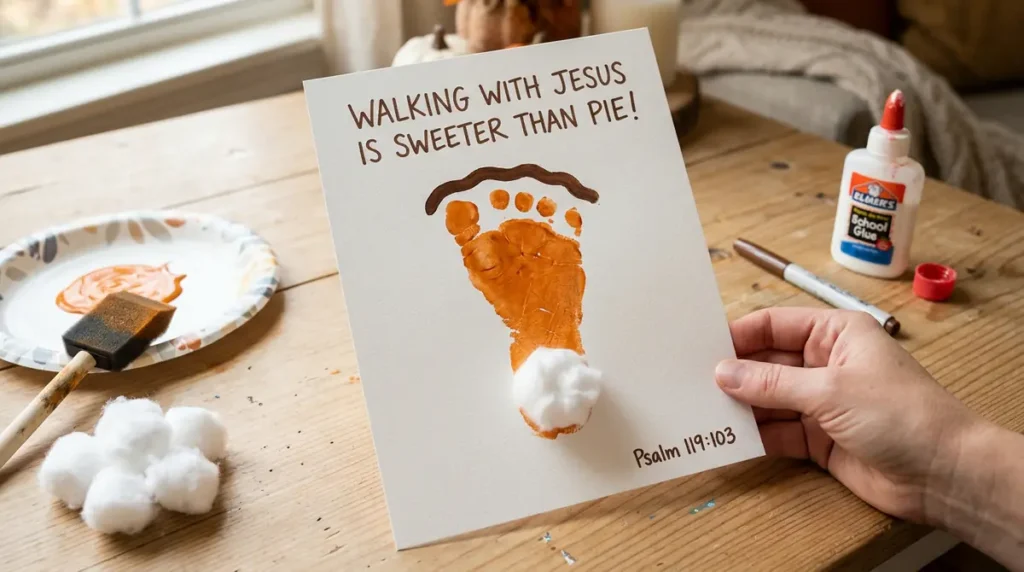
Designed specifically for toddlers, preschoolers, and early elementary students, this tactile sensory craft combines seasonal fun with a meaningful spiritual reminder. Young children learn best when physical actions are linked to conceptual truths. Using their own footprint to represent a slice of pumpkin pie, children absorb the message that their daily steps should be taken alongside Jesus. Furthermore, this craft yields a priceless physical keepsake that parents and grandparents will treasure as a snapshot of the child’s physical and spiritual growth.
Complete Supplies Needed
- Heavyweight white cardstock or canvas boards (8.5×11 inch or 9×12 inch)
- Washable non-toxic acrylic or tempera paint in warm pumpkin orange, brown, and light cream
- White cotton balls or white craft pom-poms
- School glue or craft tacky glue
- Paintbrushes or foam sponge brushes
- Baby wipes or a basin of warm soapy water with paper towels for fast cleanup
- Fine-tip black or brown marker for lettering
Detailed Step-by-Step Instructions
- Set Up the Painting Station: Cover your workspace with newspaper or a plastic tablecloth. Lay out a piece of white cardstock for each child and prepare your orange paint on a paper plate or palette tray.
- Capture the Footprint: Dip a foam brush into the orange paint and apply a thin, even layer directly onto the sole of the child’s foot. Carefully guide their foot down onto the lower center of the cardstock, pressing down gently on each toe to ensure a complete print. Lift the foot straight up to avoid smearing, and immediately clean the foot using baby wipes or a washcloth.
- Detail the Pie Slice: Once the orange footprint dries, turn the paper so the heel points downward and the toes point upward; the triangular shape naturally resembles a slice of pie. Have the child use brown paint or a marker to draw a curved crust line across the top edge (where the toes are).
- Add the Whipped Cream: Put a small dollop of craft glue right at the heel of the footprint (the point of the pie slice). Have the child press a soft white cotton ball or craft pom-pom onto the glue to represent a generous dollop of whipped cream.
- Add the Scripture Header: Across the top half of the cardstock, neatly write or stencil the header text: “Walking with Jesus is Sweeter Than Pie!” Add a supporting scripture reference at the bottom, such as Psalm 119:103 (“How sweet are your words to my taste, sweeter than honey to my mouth!”). Allow the entire artwork to dry completely before framing or gifting.
The 1 Chronicles Pumpkin Strip Sphere (1 Chronicles 16:34)
Educational & Spiritual Purpose
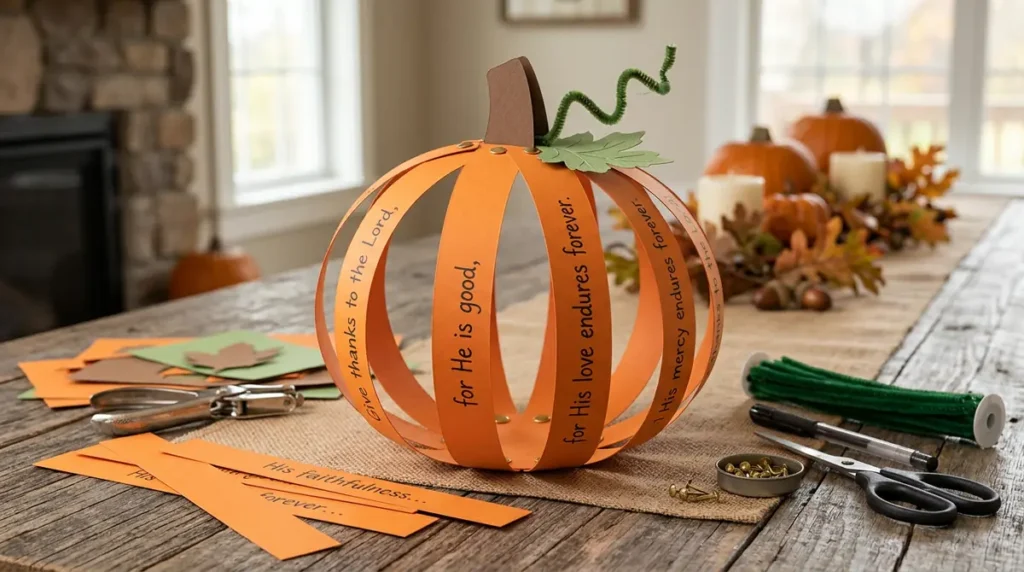
The 1 Chronicles Pumpkin Strip Sphere is an engaging 3D geometric paper craft that serves both as an interactive scripture memory tool and a beautiful holiday table accent. Based on 1 Chronicles 16:34 (“Give thanks to the Lord, for He is good; His love endures forever”), this project challenges kids to break down a passage of Scripture, arrange its phrases in correct sequential order, and construct a tangible three-dimensional object. Manipulating paper strips into a dimensional sphere enhances fine motor skills while reinforcing memory retention through physical repetition.
Complete Supplies Needed
- Sturdy cardstock in shades of orange (2 to 3 sheets per child)
- Green and brown cardstock scraps (for leaves and stems)
- Metal split pins / brass paper fasteners (brads), 1-inch length
- Single hole punch
- Paper trimmer or ruler and safety scissors
- Black gel pens or fine-point markers
- Green pipe cleaners (optional, for coiled vines)
Detailed Step-by-Step Instructions
- Measure and Cut Paper Strips: Cut orange cardstock into 6 to 8 equal strips measuring 1 inch wide by 11 inches long. Cut a small green leaf shape and a brown rectangular stem piece out of your accent cardstock.
- Write the Verse Sequentially: Lay the orange strips out horizontally in front of the child. Have them write the memory verse across the strips, placing a portion of 1 Chronicles 16:34 on each individual strip. For example: Strip 1: “Give thanks”, Strip 2: “to the Lord,”, Strip 3: “for He is good;”, Strip 4: “His love”, Strip 5: “endures forever.”, Strip 6: “1 Chronicles 16:34”.
- Punch Alignment Holes: Using a single hole punch, make a hole exactly in the center of both the top and bottom ends of every orange strip (about 1/2 inch from the edge). Punch a single hole through the base of the green leaf and brown stem cutouts as well.
- Assemble the Base: Stack all the orange strips directly on top of one another in sequential order. Push a brass paper fastener down through the top hole of the entire stack. Insert a second brass fastener through the bottom holes of the stack and flatten the split legs on the back of both fasteners to hold the strips bound together.
- Fan Out into a 3D Sphere: Gently fan out the individual orange paper strips sideways, spacing them evenly in a circular pattern until they expand out into a hollow, round 3D pumpkin shape.
- Attach Stem and Vines: Slide the leaf, stem, and an optional curled green pipe cleaner onto the top brass fastener before securing it. Place the completed 3D pumpkin on the dinner table or window sill as a reminder of God’s eternal love.
Daily Prayer & Praise Jar (Psalm 107:1)
Educational & Spiritual Purpose
The Daily Prayer & Praise Jar is designed to cultivate a daily habit of prayerful reflection that extends beyond a single craft session. Guided by Psalm 107:1 (“Oh give thanks to the Lord, for He is good, for His steadfast love endures forever”), this activity teaches children that gratitude requires active noticing. By writing down specific instances of God’s goodness every day, kids learn to identify subtle answers to prayer, unexpected blessings, and moments of spiritual encouragement, creating an ongoing spiritual record of their journey with God.
Complete Supplies Needed
- Wide-mouth glass mason jars or clear shatterproof plastic containers (16 oz or 32 oz)
- Burlap ribbon, lace trim, or colorful autumn ribbon
- Pre-cut slips of paper or colorful index cards cut into strips
- Mod Podge or craft glue with foam brushes
- Fine markers, pens, and colored pencils
- Small decorative elements: wooden cross charms, leaf stickers, or rustic twine
- Printable labels or blank cardstock labels
Detailed Step-by-Step Instructions
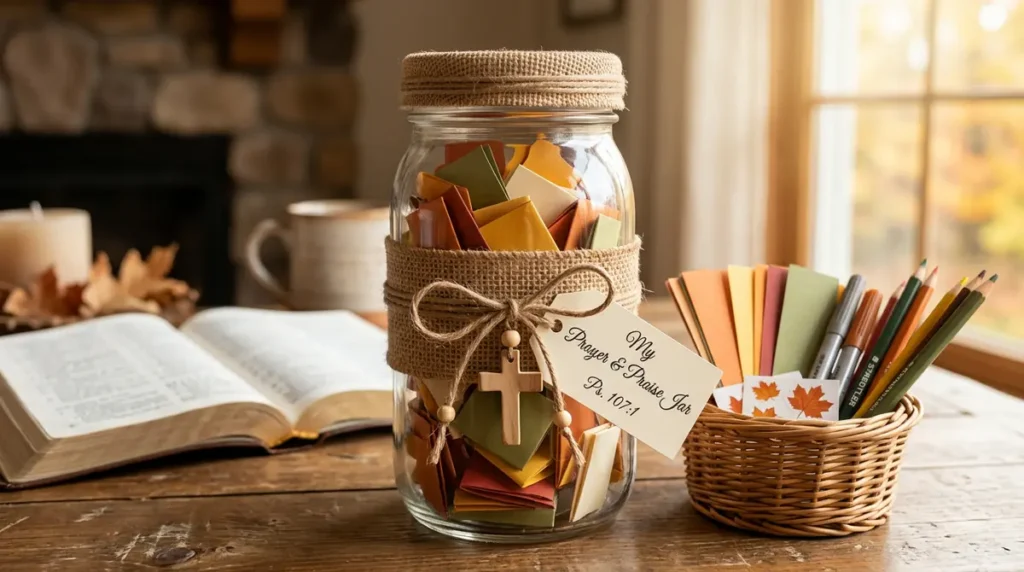
- Decorate the Exterior: Wrap a wide band of burlap or autumn-themed ribbon around the middle of the jar, securing it with hot glue or craft adhesive. Allow children to add embellishments around the neck of the jar, such as tying a length of twine attached to a small wooden cross or faux fall leaf.
- Create the Title Label: Cut a rectangular label out of cardstock. Have children write “My Prayer & Praise Jar” or “Psalm 107:1 Gratitude Jar” on the front. Attach this label to the center of the jar over the burlap wrap using glue or double-sided tape.
- Prepare the Note Strips: Cut colorful papers into uniform strips (approx. 1×5 inches). Place these blank strips in a small decorative box or basket next to the jar along with a pen.
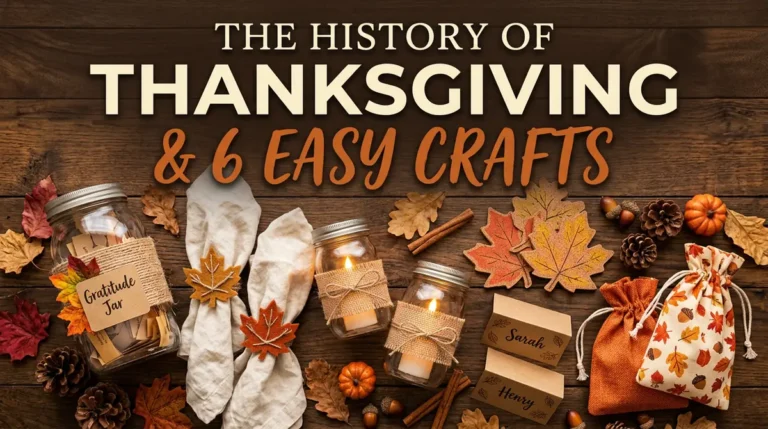
- Establish the Reflection Practice: Teach children to write down at least one specific praise or answered prayer on a paper strip each evening. Encourage them to note the date, what happened, and why they are thanking God for it. Fold the strip in half and drop it into the jar.
- Share on Thanksgiving Day: Make it a highlight of your Thanksgiving family gathering or Sunday School lesson to unscrew the jar lid, draw out the paper slips one by one, and read all the accumulated prayers and praises out loud together in celebration of God’s faithfulness.
Handprint “Praying Hands” Placemats
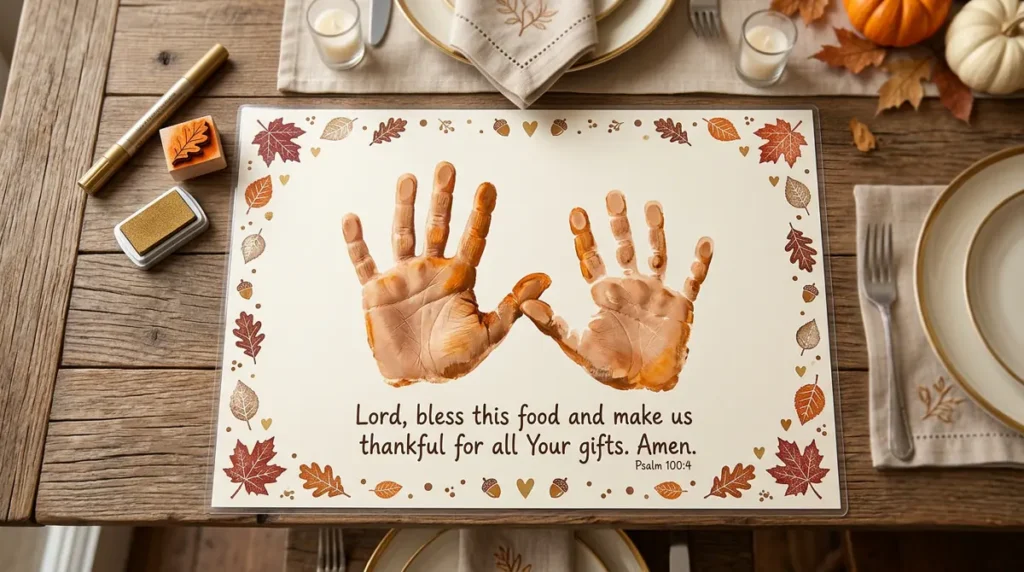
Educational & Spiritual Purpose
Handprint “Praying Hands” Placemats provide a practical connection between creative artwork and the family dinner table. Placing handprints together to form folded praying hands reminds children of the importance of pausing to pray before meals. Incorporating scripture verses onto an object used during Thanksgiving dinner gives children an active role in table preparation, boosting their sense of contributing to the family celebration while anchoring mealtime in reverence and praise.
Complete Supplies Needed
- Large heavy cardstock or construction paper (11×17 inch tabloid size)
- Washable tempera or acrylic paint (skin tones, warm autumn colors, or brown/gold)
- Self-adhesive clear contact paper or thermal laminating pouches (11×17 size)
- Paintbrushes, fine-point permanent markers, and metallic paint pens
- Stickers, leaf stamps, or autumn-themed border templates
Detailed Step-by-Step Instructions
- Prepare the Base Page: Place a large 11×17 sheet of cardstock horizontally on the table. Use markers to rule a neat border around the outer edges of the page, leaving a large clear workspace in the middle.
- Paint and Press Handprints: Paint the child’s left hand with washable paint and press it firmly onto the center of the paper, angled slightly to the left. Immediately paint their right hand and press it down right next to the first print, angling it to the right so the wrists meet and the thumbs overlap. This creates the visual silhouette of folded praying hands. (Alternatively, arrange handprints in a fan shape to form the feathers of a Thanksgiving turkey).
- Inscribe Table Blessings: Once the paint dries, write a prayer of thanksgiving or a scripture verse in the center of the paper beneath or around the handprints. Classic options include Psalm 100:4 or a simple mealtime grace: “Lord, bless this food and make us thankful for all Your gifts. Amen.”
- Decorate the Border: Allow the child to decorate the outer borders with autumn leaves, drawn hearts, crosses, or stamped designs to frame their central artwork.
- Laminate for Durability: Encase the completed paper placemat between two sheets of clear self-adhesive contact paper (or run it through a thermal laminator). Smooth out any air bubbles and trim the edges. The resulting placemat is waterproof, easy to wipe clean, and ready to use during your Thanksgiving feast.
The “Jesus at the Core” Apple Craft
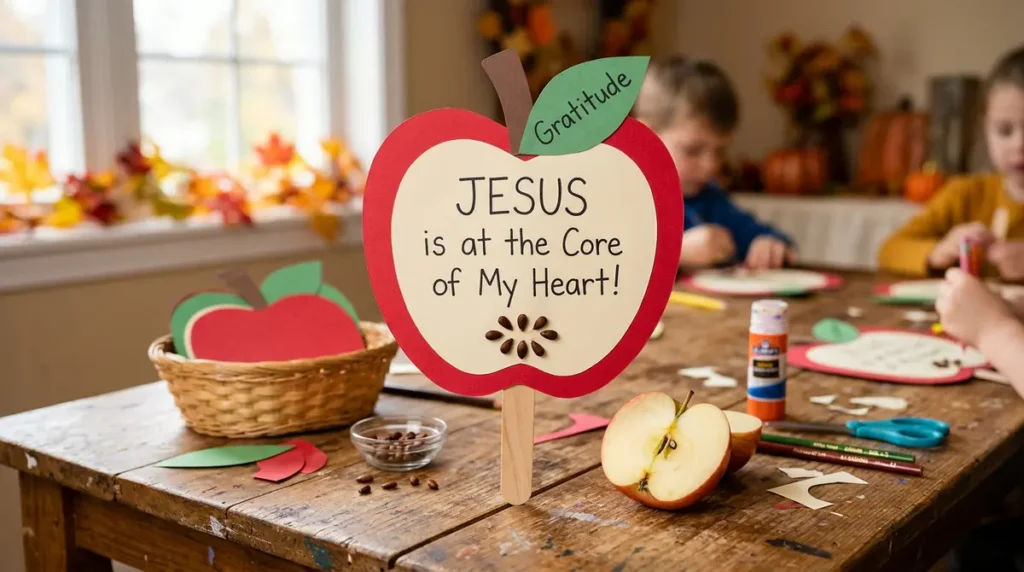
Educational & Spiritual Purpose
Using a familiar harvest motif, the “Jesus at the Core” craft provides a memorable object lesson on priority, spiritual posture, and inner heart transformation. Just as the core of an apple carries the seeds that give life to future fruit, putting Jesus at the center of our lives produces real spiritual fruits of joy, peace, and thankfulness. This craft helps children visually understand that true gratitude is not an external surface action, but something that flows out from an inner heart surrendered to Christ.
Complete Supplies Needed
- Red, green, and cream/off-white heavy cardstock
- Wooden jumbo craft sticks (popsicle sticks)
- Scissors and paper glue sticks
- Real apple seeds, dark brown sequins, or brown markers (for the seeds)
- Red and green glitter pens or colored pencils
- Printable apple template featuring an outer skin frame and an inner core insert
Detailed Step-by-Step Instructions
- Cut out Apple Shapes: Cut a large whole apple silhouette out of red cardstock. Next, cut a slightly smaller inner oval core shape out of cream cardstock and glue it directly onto the center of the red apple so the red paper forms an outer skin border around the light core.
- Inscribe the Central Message: Across the light-colored inner core of the apple, have children write the key phrase: “Jesus is at the Core of My Heart!” or “Thankful to the Core (Psalm 9:1)”.
- Attach Real Seeds: Apply small dots of glue in the center of the inner core and have children press real apple seeds (or dark brown sequins) onto the paper to form the seed pod. This reinforces the object lesson that God plants His Word inside our hearts to produce good fruit.
- Add Stem and Leaves: Cut a small brown stem and a green leaf out of cardstock scraps. Have the child write one thing they are thankful for on the leaf, then glue both the stem and leaf to the top of the apple.
- Mount on Craft Stick: Apply glue to the top half of a jumbo wooden craft stick and press it firmly against the back of the cardstock apple. Children can use this handle to hold up their apple during a Sunday School presentation, or place it in a pencil holder as a reminder to keep Jesus at the center of their thoughts every day.
Conclusion
Engaging children in faith-centered Thanksgiving crafts bridges the gap between creative fun and intentional spiritual formation. These seven projects offer more than simple afternoon entertainment; they provide practical ways for children to memorize Scripture, practice daily prayer, and recognize God as the source of every blessing. By surrounding kids with physical reminders of God’s goodness, parents and teachers help cultivate a lifelong habit of biblical thankfulness that continues long after the holiday season has passed.