Pressed Leaf & Mod Podge Mason Jar Lanterns
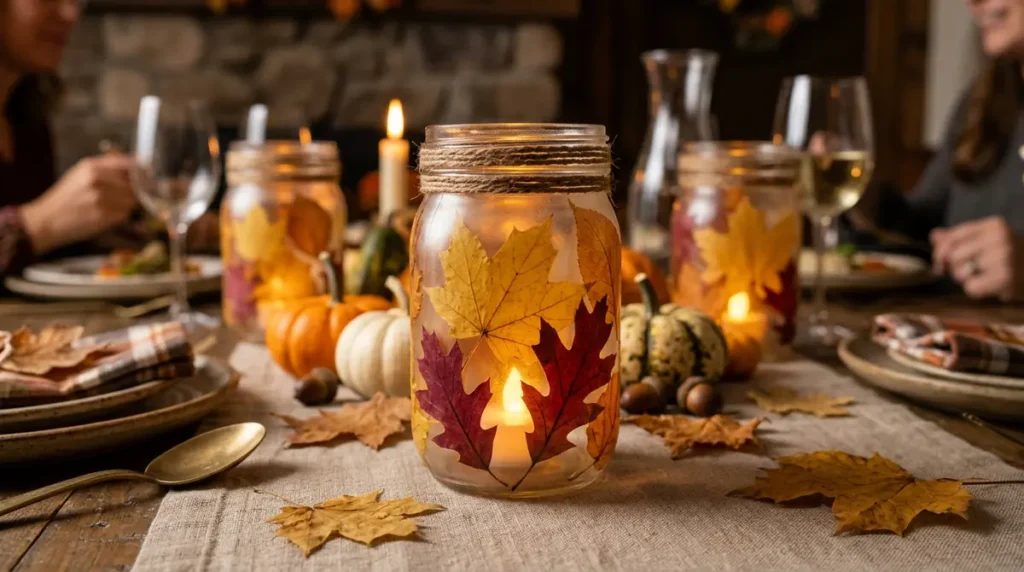
Preserve the rich golden and crimson foliage of late autumn while creating functional ambient lighting for dark November evenings.
Why It’s Useful for November
As sunset arrives earlier, indoor lighting becomes central to creating a welcoming home environment. These lanterns serve as zero-cost mood lighting for quiet evenings, porch steps, or Thanksgiving dinner tables.
Materials Required
- Clean glass mason jars (16 oz or 32 oz)
- Mod Podge (Matte finish yields a softer, more natural look; glossy gives a stained-glass effect)
- Foam sponge paintbrushes
- Real autumn leaves (flattened under heavy books for 24–48 hours)
- LED flameless tea lights or small votive candles
- Natural jute twine for embellishment
1.Prep and Press the Leaves:
Collect vibrant, pliable leaves. Avoid brittle or dry leaves as they crack when bent around glass curved surfaces. Press them flat between parchment paper inside heavy books for at least 24 hours.
2.Apply the Base Adhesive:
Wipe the exterior of your glass jar clean with rubbing alcohol. Using your foam brush, apply a generous layer of Mod Podge directly onto a 2-inch wide section of the jar.
3.Position and Smooth the Foliage:
Press a flattened leaf firmly onto the glued surface. Start smoothing from the leaf’s central stem out to the edges to eliminate air bubbles and prevent curling.
4.Seal and Cure the Jar:
Apply a thorough layer of Mod Podge over the entire leaf surface and exposed glass. Allow it to dry completely for 2 hours until the glue turns from milky white to crystal clear.
5.Finish and Illuminate:
Tie several turns of jute twine around the threaded lip of the jar. Drop an LED tealight inside to cast a warm, mottled golden glow across your space.
Aromatic Cinnamon Stick Candle Wraps
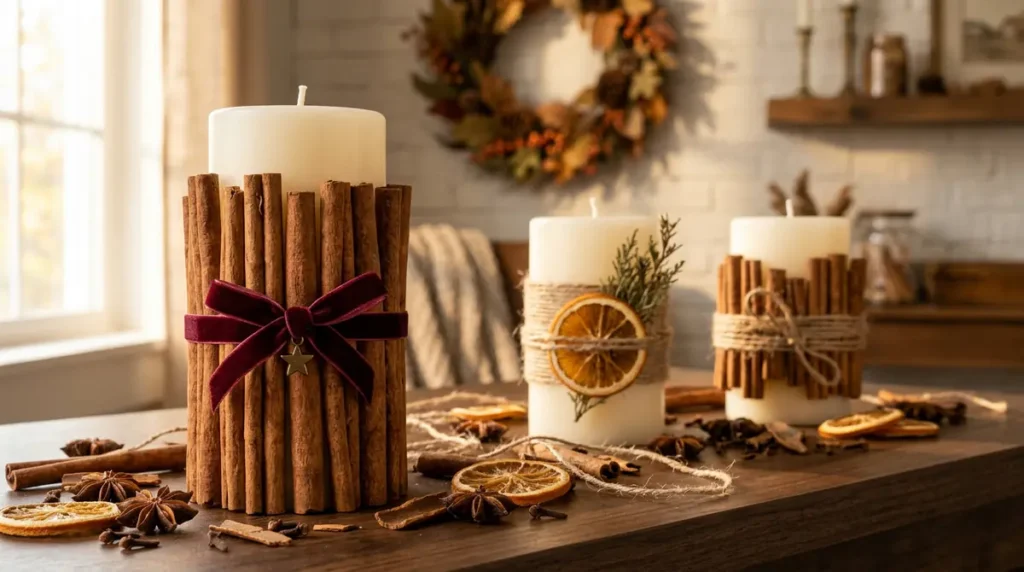
Elevate plain, inexpensive pillar candles into sophisticated, scent-releasing decor accents using whole spices.
Why It’s Useful for November
Unlike artificial room sprays, this project provides continuous natural aromatherapy. As the candle burns, the gentle heat warms the cinnamon bark, diffusing a subtle, authentic spice scent throughout your living space.
Materials Required
- Plain white or cream pillar candles (3-inch diameter works best)
- Whole cinnamon sticks (approx. 20–25 sticks per candle, cut to matching length)
- High-temp hot glue gun and glue sticks
- Natural jute string, velvet ribbon, or burlap strips
- Star anise pods or dried orange slices (optional accent)
1.Sort and Measure Cinnamon Sticks:
Select cinnamon sticks of uniform length and straightness. Trim any unusually long sticks using sharp garden shears so they align neatly with the height of your candle base.
2.Affix Sticks to Candle Exterior:
Apply a thin vertical stripe of hot glue down one side of a cinnamon stick. Press it immediately onto the side of the pillar candle, ensuring the bottom of the stick sits flush with the table.
3.Encircle the Candle Base:
Repeat the glue-and-press process around the entire perimeter. Place the sticks as close to one another as possible to eliminate visible gaps.
4.Secure with Decorative Binding:
Wrap jute twine or a piece of velvet ribbon around the middle of the cinnamon wrap multiple times. Tie tightly in a double knot, finishing with a classic bow.
Upcycled Thrifted Sweater Mug Cozies
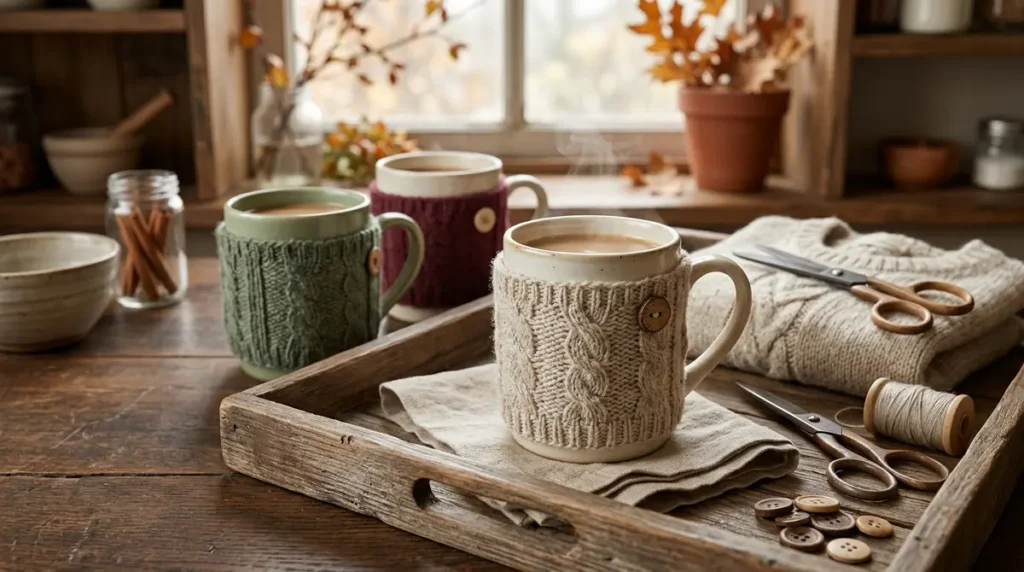
Give old, worn-out wool or cable-knit sweaters a practical second life as thermal sleeves for hot November drinks.
Why It’s Useful for November
Hot cider, chai, and cocoa cool down fast in chilly November air. These cozies insulate ceramic mugs, keeping beverages hot longer while protecting your fingers from scalding temperatures.
Materials Required
- Sleeves from thrifted cable-knit or wool sweaters
- Fabric scissors
- Fabric glue (or needle and matching thread)
- Small wooden or coconut-shell buttons
- Tailor’s chalk or fabric marker
1.Measure and Cut Sleeve Segment:
Slide your target ceramic mug inside the sweater sleeve starting from the finished cuff. Mark a line 3 to 4 inches up from the cuff using fabric chalk and cut straight across.
2.Hem the Cut Edge:
Turn the cut sweater ring inside out. Apply a thin bead of fabric glue along the raw edge (or sew a quick running stitch) and fold over 1/4 inch to seal the knit fibers and prevent fraying.
3.Create the Handle Opening:
If the sleeve is snug, cut a vertical notch on one side so the cozy fits cleanly over your mug’s handle without stretching unevenly.
4.Attach Decorative Details:
Sew a wooden button onto the front center of the cozy for a rustic, handmade touch.
Baked Pinecone & Fairy Light Rustic Table Centerpieces
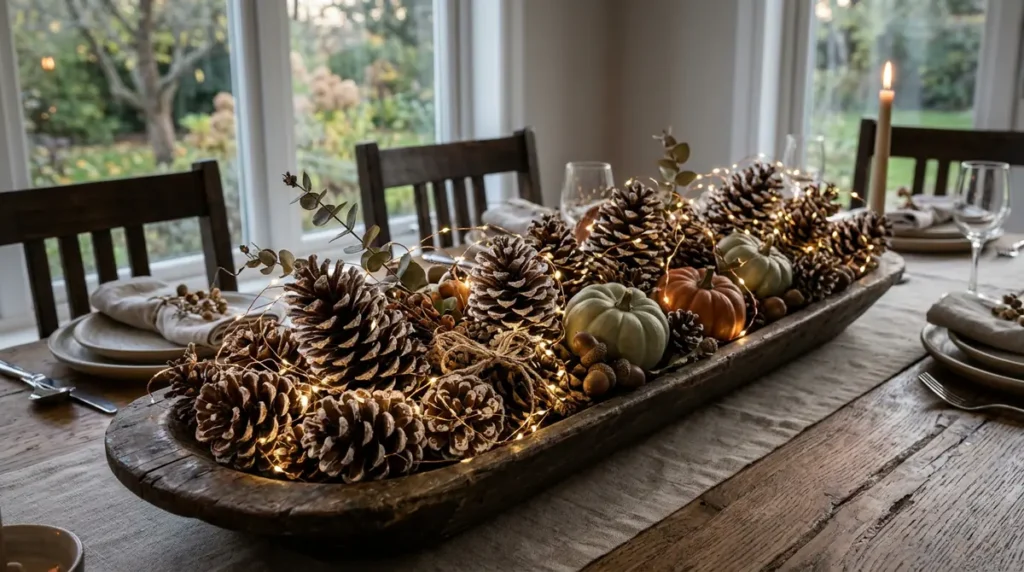
Combine harvested outdoor elements with warm lighting to build a low-cost centerpiece that lasts straight through to December.
Why It’s Useful for November
Purchasing fresh flowers weekly during holiday hosting month is costly. A pinecone display does not wilt, costs virtually nothing, and smoothly bridges the aesthetic gap between Thanksgiving and early winter.
Materials Required
- Natural pinecones (various sizes)
- Baking sheet and aluminum foil
- Shallow wooden tray, dough bowl, or ceramic basin
- Battery-operated micro fairy lights (warm white, on copper wire)
- Faux mini pumpkins, dried eucalyptus, or real acorns
- White or matte gold acrylic paint (optional)
| Step | Action | Focus Detail |
| 1. Thermal Sanitization | Bake pinecones at 200°F (93°C) for 30–45 min. | Melts sticky sap into a glossy coat and removes small insects. |
| 2. Dry-Brush Accents | Lightly brush white paint across outer tips. | Creates a subtle frosted edge without hiding natural wood grain. |
| 3. Base Layout | Weave fairy light wiring across tray bottom. | Hides battery pack underneath larger pinecones. |
| 4. Layering Content | Cluster large pinecones first, filling gaps with mini pumpkins. | Builds depth and visual height variation across the table line. |
Rosemary Wreath & Twine Thanksgiving Place Card Holders
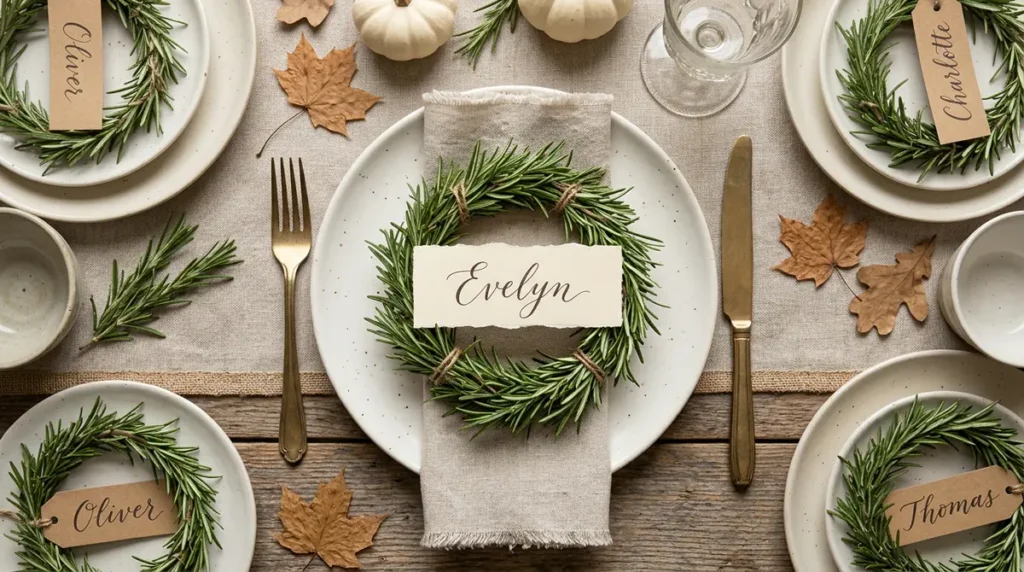
Integrate aromatic herbs into formal holiday table settings with miniature place card rings.
Why It’s Useful for November
Hosting Thanksgiving or family dinners requires seating organization. These place markers provide clear structure while filling the dining room with a fresh herbal scent that pairs naturally with roasted holiday meals.
Materials Required
- Fresh rosemary sprigs (long, flexible sprigs work best)
- Heavyweight craft cardstock (cream, kraft brown, or off-white)
- Fine-tip calligraphy pen or gel pen
- Thin baker’s twine or natural jute string
- Small hole punch (optional)
1.Form the Rosemary Ring:
Gently flex a single fresh rosemary sprig between your fingers to loosen its fibers. Bend it into a circle (approx. 3 inches in diameter), overlapping the stem ends by about 1 inch.
2.Bind the Ends:
Wrap a 6-inch piece of baker’s twine tightly around the overlapping ends of the rosemary stem. Tie a firm double knot to hold the wreath shape intact.
3.Prepare Name Tags:
Cut cardstock paper into 1.5 x 3-inch rectangular strips. Write each guest’s name using elegant script or clean block lettering.
4.Assemble Place Marker:
Rest the written cardstock tag across the center of the rosemary wreath, or tuck the paper edges underneath the herb needles so it sits securely on the dinner plate.
Wool Felt Acorn & Twine Door Garland
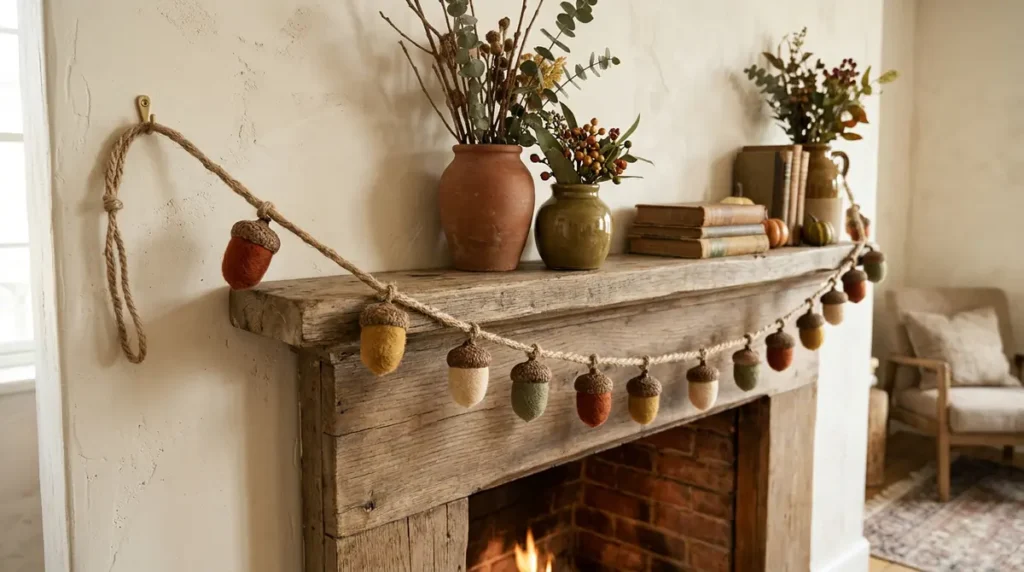
Add physical warmth, color, and soft texture to interior doorways, fireplace mantels, or stair banisters.
Why It’s Useful for November
Unlike paper decorations that wear down quickly, felt and natural wood elements withstand low temperatures and humidity, allowing them to be stored and reused year after year.
Materials Required
- Natural acorn caps (collected outdoors)
- Wool felt balls (15mm to 20mm in autumn shades: terracotta, mustard, cream, olive)
- High-temp hot glue gun
- Sturdy jute twine or hemp cord (6 to 8 feet in length)
- Large tapestry needle
1.Clean Natural Acorn Caps:
Wipe gathered acorn caps clean with a damp cloth to remove residual dirt, allowing them to air-dry completely.
2.Glue Felt Balls into Caps:
Place a small dot of hot glue inside the cavity of a natural acorn cap. Press a colored wool felt ball firmly inside for 5 seconds until secured.
3.Thread the Main Cord:
Thread your tapestry needle with sturdy jute twine. Pierce straight through the upper portion of each wool felt ball right below the wooden cap line.
4.Space and Secure:
Slide each finished felt acorn along the cord, maintaining a consistent 3 to 4-inch gap between items. Tie a small loop at both ends of the twine for easy hanging.
Stovetop Simmer Pot Hostess Gift Bags
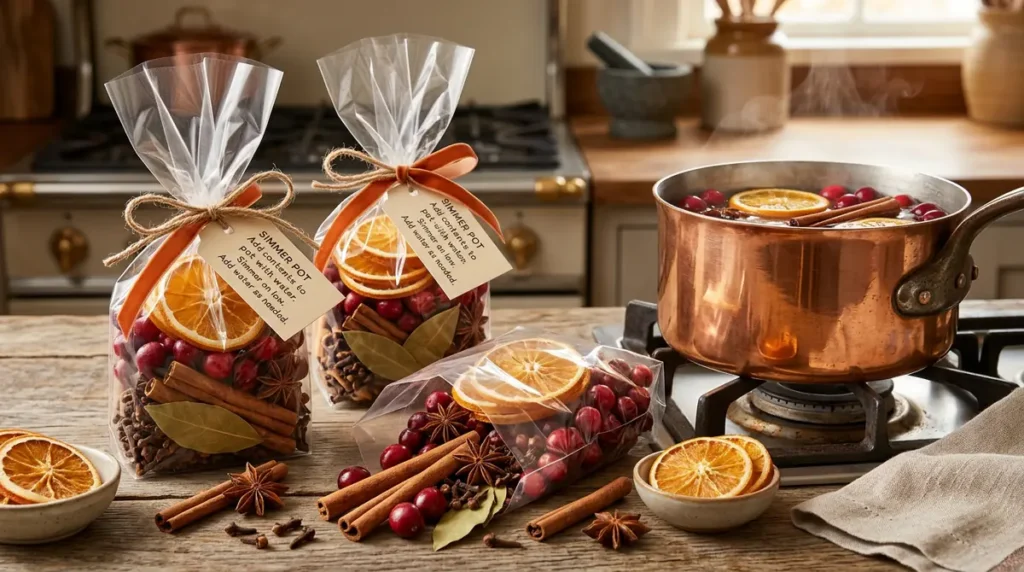
Combine dried fruits, whole spices, and fragrant herbs into custom scent sachets for home simmering.
Why It’s Useful for November
As homes remain closed up against cold weather, natural stovetop potpourri neutralizes lingering cooking smells and elevates indoor air quality without harsh chemicals. It also functions as a thoughtful, budget gift for Thanksgiving hosts.
Materials Required
- Dehydrated orange or lemon slices
- Whole fresh cranberries
- Cinnamon sticks and whole star anise pods
- Whole cloves and dried bay leaves
- Clear cellophane bags or breathable drawstring burlap pouches
- Printable gift tags with simmer instructions
1.Dehydrate Citrus Wheels:
Slice oranges thin (1/8 inch thick). Lay them out on a parchment-lined baking sheet and bake at 200°F (93°C) for 2.5 to 3 hours, flipping halfway, until completely dry.
2.Assemble Fragrant Ingredients:
Layer ingredients into your bag: place 3 dried orange slices at the bottom, followed by 2 cinnamon sticks, 3 star anise pods, 1 tablespoon of cloves, and a small handful of fresh cranberries.
3.Attach Instructions Tag:
Thread a ribbon through your printable tag. Write clear instructions: “Add contents to a saucepan filled with 4 cups of water. Simmer on low heat, adding water as needed, for an instant warm fall aroma.”
4.Seal and Gift:
Crimp the bag top closed and tie securely with decorative ribbon or twine.